Page 1
SIM2 BV International Srl
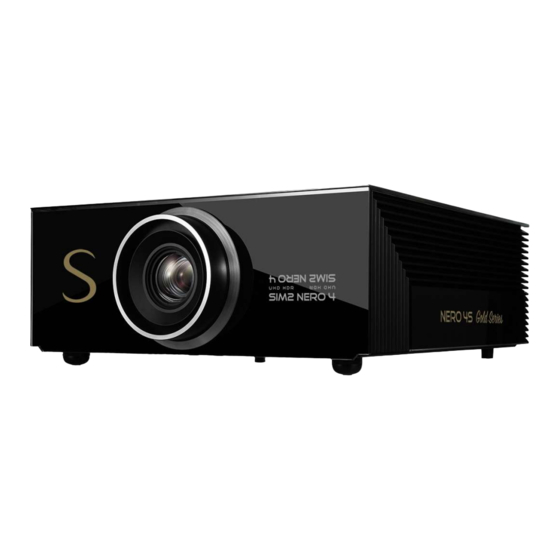
 NERO Gold Series User Guide NERO4...
Page 2
Series) ensures a wider colorimetry and improved HDR features. There are few projectors can match the targets SIM2 define for its top of the class products in 4K UHD HDR, only few pieces – all numbered - our of the whole production.
Page 3
Display – Aspect Ratio Display – Edge Mask, Digital Zoom, Image Shift Setup Network Info Perfect-fit Image Size and Projection Distances Compatibility Modes Replacing the lamp How to install the brkt bracket Specifications Dimensions Holding rings NERO 4S Gold Series User Guide...
Page 5
Inside the housing there are electrical parts carrying dangerously high voltages and parts operating at high temperature. Never open the housing. Entrust all servicing and repair work to a SIM2 Authorized Service Center. Opening the housing voids the warranty. Disconnect the projector from the power supply The device that disconnects the projector from the electrical outlet, is the power plug.
Page 6
Do not place objects in the slots on the side of the lens and also ensure that vertical lens movements are not impeded by external objects. Do not hold the projector by its lens. NERO 4S Gold Series User Guide...
Page 7
It may contain materials that constitute a health and environmental hazard. To prevent harmful materials from being released into the environment and to promote the use of natural materials, SIM2 provides the following information regarding the disposal and recycling of the product.
Page 8
You may return your old equipment to your SIM2 Authorized Dealer free of charge when you buy a new product that is equivalent or has the same functions as the old one. Contact SIM2 to find your local dealer.
Page 9
In order to obtain the best projected image accuracy, a delicate balance is required between the light engine, the DLP® chipset and the video processing electronics. Building on its heritage of high-end light engine design, SIM2 has invested heavily in the development of a high precision telecentric optical system.
Allen Screw (of 2.5mm or 0.0984 inch) for manual adjustments of optical shift H,V If any items are missing or damaged, contact your SIM2 Authorized Dealer as soon as possible. Keep the original packaging in case anything has to be shipped.
3 Overview Remote Control Power Off Power On Brightness Gamma Contrast Lens Color Settings Iris Aspect Pure Engine Display Mode Arrows for Menu 14,16,17,18,20 Menu Info Light Re-Sync HDMI 1 HDMI 2 HDMI 3 VGA/YPbPr NERO 4S Gold Series User Guide...
Page 12
HDMI 2 Choose source from HDMI 2 (UHD, HDR and HLG) connector HDMI 3 Choose source from HDMI 3 connector Choose source from Display Port connector VGA/YPbPr Choose source from VGA connector (RGB or YPbPr) NERO 4S Gold Series User Guide...
Page 13
If you are using a programmable remote control, the setup software probably allows importing Hex codes. See “SIM2 NERO 4S GS IR Control” document, for a list of all the projector codes.
Page 14
If you will not use the remote control for a long time, remove the batteries to avoid battery leakage. When you dispose of the battery, you must obey the law in the relative area or country. NERO 4S Gold Series User Guide...
Product overview IR Receiver Ventilation Outlet LED Status Indicators Power Socket Tilt-Adjustment Feet Keypad Lens Input / Output Optical Lens Shift Glass safety screw Ventilation Inlet NERO 4S Gold Series User Guide...
Page 16
12 V 150 mA ±10% max output, for motorized screen. Activates 12V TRIG B when the projector is switched on. Activates also from the function buttons F1,F2 or F3. HDMI Out HDMI3 loop through NERO 4S Gold Series User Guide...
Connecting sources to the projector DisplayPort Cable 12 V DC Jack VGA Cable HDMI Cable Inputs RCA (YpbPr) Component Cable HDMI Cable Output RJ-45 Cable Wired Remote Control Cable RS232 Cable NERO 4S Gold Series User Guide...
Page 18
Keypad Power For Directional Select Keys Re-Sync Information Source Focus Zoom Not Used Menu NERO 4S Gold Series User Guide...
Check planned cable lengths for video and control cables and make sure these lengths do not exceed specifications. Ambient Light Avoid or minimize light sources directed at the screen to preserve the quality of the projected image. NERO 4S Gold Series User Guide...
Page 20
Nevertheless, even if the best materials and adhesives available in the market, in order to guarantee a safe application on the long long run, exclusively for the ceiling mounting applications, SIM2 has equipped the projector with glass safety screw that are aesthetic part of its cabinet (see K at page 15).
Page 21
If you do so: the top and bottom borders of the image will be unequal in length the sides of the image will be inclined NERO 4S Gold Series User Guide...
Page 22
When the horizontal and vertical shifts are centered to the lens, the leds signal this status with a flashing. Item Description Vertical Lens Shift Horizontal Lens Shift If you want to use the Perfect-Fit function, your setup should not have any horizontal optical shift. NERO 4S Gold Series User Guide...
Page 23
Graphics RGB Input for Personal Computer and other sources that outputs RGB or YPrPb signals. These sources must be able to provide separate H/V sync or composite H+V sync. NERO 4S Gold Series User Guide...
Page 24
Plug the female end of the power cord to the AC receptacle located on the left hand side of the projector (100-240 V AC, 50-60 Hz) and the other end into a grounded AC outlet. An high-quality surge protector is recommended while a UPS is optional. NERO 4S Gold Series User Guide...
“ | “ on the remote control to restart the projector. III. Disconnect the power cord from the electrical outlet and the projector. Warning: Do not turn on the projector immediately following a power off procedure. NERO 4S Gold Series User Guide...
Steady Light Lighting Power Off Flashing (Cooling) Error Flashing (Lamp fail) Error Flashing Flashing (Fan fail) Error Flashing Steady Light (Over Temperature) * ON/STANDBY LED be ON when OSD appears, be OFF when OSD disappears. NERO 4S Gold Series User Guide...
Use or to select an item on a list either in the main menu and the submenu. To return to the previous menu when in a submenu press on the remote control. NERO 4S Gold Series User Guide...
Page 28
This PC-based software gives calibration experts unprecedented control over the projector image quality. SIM2 recommends the use of LCC software to calibration experts only, by using spectrophotometers or color probes to correctly analyze and adjust the colorimetry.
Display This menu section provides access to common image quality adjustments. Display – Image Settings Page 1 Page 2 NERO 4S Gold Series User Guide...
Page 30
HDMI and VGA. If you change any of the image settings, the display mode presets will be changed and saved automatically. If you want to return to the factory default display mode, select RESET from the menu SETUP. NERO 4S Gold Series User Guide...
Page 31
Adjust the brightness of the image. Use this control to adjust the darker areas of the picture (black level), without affecting bright areas. Increasing the value will give more detail in darker parts of the NERO 4S Gold Series User Guide...
Page 32
Press to increase the amount of green in the image Press to increase the amount of red in the image Range [-50 .. 50] Note: Tint is only supported for composite and component sources. NERO 4S Gold Series User Guide...
Page 33
Graphics: for PC/Photo source Standard (2.2): for standardized setting 1.8/2.0/2.4: for specific PC/Photo source Color Settings Press the to enter the menu and then use or to select item. NERO 4S Gold Series User Guide...
Page 34
Color Gamut “User” or “Cinema”. Press the to enter the menu and then use or to select item. Select one of the colors (Red/Green/Blue/Cyan/Magenta/Yellow/White) to adjust its x & y offset and brightness. NERO 4S Gold Series User Guide...
Page 35
16-235 or 0-255 RGB (0-255) sets black at R, G, B = 0 and white at R, G, B = 255 NERO 4S Gold Series User Guide...
Page 36
Live Color Calibration – PC sw application SIM2 has developed with the experience gained over many years of projection as a premium brand, a PC SW that facilitates the tricolor calibration of its high-end machines: the Live Color Calibration, now arrived at Release 5.x. It's continuously updated to introduce new features and support new SIM2 projectors.
Page 37
Range [Off, 1, 2, 3, 4, 5] PureMotion Pure Action uses sophisticated algorithms to ensure that the natural in the image is preserved. Range [Off, 1, 2, 3] NERO 4S Gold Series User Guide...
Auto: automatically selects the appropriate display format. Note: some LBX aspect format DVDs are not enhanced for 16x9 TVs. In this situation, the image will not look right when displaying image in 16:9 mode. In this situation, NERO 4S Gold Series User Guide...
H: press the to shift the projected image position horizontally V: press the to shift the projected image position vertically This Image Shift is a digital image shift, inside the DMD active pixels area. NERO 4S Gold Series User Guide...
Page 41
Lamp Reminder: choose this function to show or to hide the warning message when the changing lamp message is displayed. The message will appear 30 hours before suggested replacement of lamp. Lamp Reset: resets the lamp hour counter after replacing the lamp. NERO 4S Gold Series User Guide...
Page 42
“On” to use security verification when the turning on the projector. In this status appear a quick menu to select the 4 digit password. Choose “Off” to be able to switch on the projector without password verification. The default Security password is “1234”. NERO 4S Gold Series User Guide...
Page 43
Menu Settings: Set the menu location on the screen and configure menu timer settings. Menu Location : select the menu location on the display screen. There are 5 • possible positions, the 4 corners and the center. NERO 4S Gold Series User Guide...
Page 44
Logo: use this function to set the desired startup screen. If changes are made, they will take effect the next time the projector is powered on. Select “Default” for the SIM2 startup screen or “Neutral” to do not have the logo displayed on startup screen.
Page 45
This projector can be controlled by using a PC (laptop) or other external device via LAN / RJ45 port and compatible with Crestron, Extron, AMX (Device -Discovery) or PJLink. This sub-menu allows to setup Ethernet connection parameters. NERO 4S Gold Series User Guide...
Page 46
Applied for trademark and logo registration in Japan, the United States of America, and other countries by JBMIA. This projector supports all commands of PJLink Class1 (Version 1.00), see http://pjlink.jbmia.or.jp/english/. Port number is 4352. NERO 4S Gold Series User Guide...
Page 47
View the projector information as listed below: Product Name Serial Number Source Resolution Refresh Rate Display Mode Power Mode (Standby) Lamp Hours Bright Total Network Status IP Address Brightness Mode FW versions System NERO 4S Gold Series User Guide...
6) Store this new configuration, by the Lens Memory Save menu, in a different position compared to previous. 7) Recall the two lens memories by the Lens Memory Load menu, or by one of Remote Control buttons function (if programmed), or by an RS232 command. NERO 4S Gold Series User Guide...
Page 49
Do not touch, or place anything near, the lens, otherwise it may cause injury or a malfunction. With some setting positions, the range of lens shift may be restricted, even though the unit is installed within the specified parameters. NERO 4S Gold Series User Guide...
24/ 30 3840 x 2160 50/ 60 4096 x 2160 4096 x 2160 30/ 50/ 60 : 1920 X 1200 @ 60 Hz only support RB (reduced blanking). NERO 4S Gold Series User Guide...
Page 52
1920 x 1080 1920 x 1200 3840 x 2160 : 1920 X 1200 @ 60 Hz only support RB (reduced blanking). NERO 4S Gold Series User Guide...
10. Turn on the projector and reset the lamp timer. 11. Reset the lamp timer. Open the OSD "Menu" and select "Setup" main menu and then “Lamp Settings" sub-menu. Here there is the "Lamp Reset" function, select "Yes" to reset lamp timer. NERO 4S Gold Series User Guide...
Page 54
Note: do not touch the glass area of the lamp. Hand oil can cause the lamp shatter. Use a dry cloth to clean the lamp module if it was accidentally touched. NERO 4S Gold Series User Guide...
Page 55
Attach bracket by using 4 x M8 screws (provided with the bracket kit) not exceeding 15 mm in thread length For ceiling mounting use only SIM2-approved ceiling brackets and adhere to the installation instructions and safety guidelines provided with the bracket.
1x RJ45 for control communications and internal web pages 1x RS232 (D-sub 9 pin) for control communications 2x IR receivers 2x 12V, 150mA ±10%, Triggers output 1x Wired IR receiver NERO 4S Gold Series User Guide...
Page 58
Email notifications in case of malfunctions. LCC 5 Projector's features, that allows professional calibration of all (PC softawre application - Live Colors projection parameters such as complete adjustment of the Calibration) primary, secondary and white point color coordinates. NERO 4S Gold Series User Guide...
Page 59
12 Dimensions NERO 4S GS dimensions in millimeters and inches. NERO 4S Gold Series User Guide...
In case of ceiling installation, to help you on holding the product or to add a fixing security, you can install the two security rings included on accessory box. You can use these security rings during ceiling installation or leave them after the installation to prevent any accidental dislodge. NERO 4S Gold Series User Guide...
Need help?
Do you have a question about the Gold Series and is the answer not in the manual?
Questions and answers