Advertisement
Quick Links
Part No. 113804 Rev A
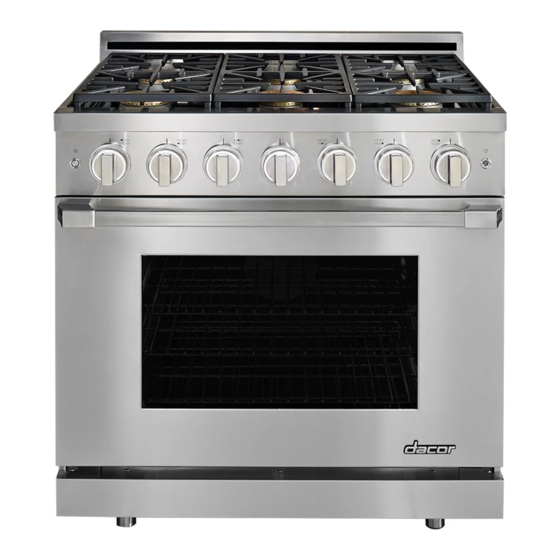
Heritage Gas Range
HGPR36S
T a b l e o f C o n t e n t s
Important Safety Instructions ....................................................................1
Getting to Know the Range ....................................................................... 4
Setting Up the Range ................................................................................. 6
Operating the Range .................................................................................. 8
Care and Cleaning ......................................................................................16
Troubleshooting .........................................................................................21
Parts and Accessories .............................................................................. 23
Warranty and Service ............................................................................... 23
Warranty Card .............................................................................Back Cover
User Manual
Advertisement

Subscribe to Our Youtube Channel
Related Manuals for Dacor Heritage HGPR36S


Summary of Contents for Dacor Heritage HGPR36S
-
Page 1: Table Of Contents
User Manual Heritage Gas Range HGPR36S T a b l e o f C o n t e n t s Important Safety Instructions ..............1 Getting to Know the Range ............... 4 Setting Up the Range ................. 6 Operating the Range .................. 8 Care and Cleaning ..................16 Troubleshooting ..................21 Parts and Accessories ................ - Page 2 Website: www.dacor.com/customer-care/contact-us Thanks for choosing Dacor for your home. We are a company built by families for families, and we are dedicated to serving yours. We are confident that your new Dacor range will deliver a top-level performance and enjoyment for decades to come.
-
Page 3: Important Safety Instructions
Visit agency or the gas supplier. www.dacor.com to download the latest version of this manual. WARNING Important Information About... - Page 4 Important Safety Instructions General Safety Precautions To reduce the risk of fire, electric shock, serious injury or death when using your range, follow basic safety precautions, including the following: WARNING WARNING • If you receive a damaged product, immediately contact •...
- Page 5 Important Safety Instructions WARNING WARNING • This appliance is equipped with a three-prong grounding • For your safety, do not use the oven to cook without the plug for your protection against possible electric shock convection filter installed. When the filter is not installed, the hazards.
-
Page 6: Getting To Know The Range
Smart-Flame extends grate life and protects the finish. SimmerSear™: The SimmerSear burners are equipped with Dacor’s exclusive precision burner control system. This feature allows you to cook with a wide range of heat settings, from simmer to sear. - Page 7 Getting to Know the Range Parts of the Oven Model and serial number label (view through grill) Oven Door Switch: Monitors the self clean Convection fan/filter: The convection fan cir- process. culates heated air through the oven chamber during the convection cooking process.
-
Page 8: Setting Up The Range
Setting Up the Range Cooktop Assembly The burner rings spread the flame evenly around the burner cap. All burner parts must be properly seated for proper burner lighting and operation. To assemble the burners: 1. Remove the burner rings, burner caps and grates from their shipping packages. - Page 9 Setting Up the Range GlideRack™ Oven Racks Installing the Oven Racks Your oven comes with Dacor GlideRack oven racks. When you use them, you can effortlessly slide heavy WARNING pots, pans or other items out to check, stir or add ingredients quickly and safely.
-
Page 10: Operating The Range
Operating the Range 2. Open windows and turn on the range hood to Burning-in the Oven allow the odors and smoke to escape. 3. Turn the oven to the BROIL setting for 10 min- When the oven comes from the factory, residue for utes. - Page 11 1/3 of the utensil diameter. Doing so will ensure even heating and reduce the likeli- hood of burning or scorching the food. • Dacor’s SimmerSear feature allows you precision control of the flame on the SimmerSear burner, from low to high heat. Lighting a Burner...
- Page 12 Operating the Range Using the Griddle 3. Turn the center front burner knob to the light (HIGH) position. Once lit, turn the knob to the For best results, allow the griddle to preheat for MAX GRIDDLE position, or lower if desired. DO about 10 minutes before you start to cook.
- Page 13 Operating the Range Oven Operation IMPORTANT: WARNING • Before starting the oven, position the oven rack(s) at the proper height(s). If the oven is Do not touch any of the surfaces inside the oven during warm, use potholders for safety. or immediately after use.
- Page 14 1. Adjust the rack position based on the food thick- 1. Turn the oven knob (center) to BROIL. ness. Dacor recommends rack levels 4 or 5. The oven ON indicator illuminates, indicating 2. Turn the oven control (center) knob on the the oven is on.
- Page 15 Operating the Range Baking Tips Tips for All Baking Modes • Wait until the shortest recommended baking time before checking food. For cakes, a wooden • Do not open the oven door frequently during pick placed in the center should come clean baking.
- Page 16 About Convection Baking... to right, parallel to the door. • Dacor’s optional GlideRack oven rack is espe- The Dacor convection cooking system distributes the cially good for heavy food items like heavy pots heated air evenly to ensure uniform results. It also...
- Page 17 After reading the meat • Dacor recommends that you set a timer to time thermometer once, insert it 1/2 inch further into the broiling process. the meat, then take a second reading. If the •...
-
Page 18: Care And Cleaning
Care and Cleaning Important Things to Know About the Self WARNING Clean Cycle • Clean only the parts of the range listed in this manual. • During self clean, the oven is heated to a very Clean them only in the manner specified. high temperature which burns off any deposits •... - Page 19 Care and Cleaning • If you want to stop the self clean cycle before it Cooktop Disassembly and Cleaning is complete, turn the oven control knob to the 1. Disconnect the power cord. OFF position. If the oven temperature is 600°F (315°C) or below, the door latch will release 2.
- Page 20 If the unit still exhibits problems oven control knob to the BROIL position for about after drying, call your local Dacor authorized ser- ten minutes. After ten minutes turn the oven off. vice agent.
- Page 21 WARNING 4. Wash the knobs regularly with a solution of warm • Do not operate the cooktop without the knobs and spill soapy water. Dacor recommends hand dishwash- protector rings in place. ing liquid. • Do not soak the knobs and spill protector rings in 5.
- Page 22 Solution Guide on page 21. • Remove the filter regularly for cleaning. A 1. Replace the light bulb only with Dacor part clogged filter will reduce the effectiveness of number 108774. See page 23 for ordering convection cooking. Soak it in hot soapy water.
-
Page 23: Troubleshooting
Troubleshooting Problem May Be Caused By What to Do Nothing works. Power cord not connected. Check to make sure range power plug is connected to electrical outlet. Power is off. Turn on power at circuit breaker panel or fuse box for electrical outlet range is con- nected to. - Page 24 Troubleshooting Problem May Be Caused By What to Do Oven will not heat when No power to range. See Nothing Works on previous page. turned on. Gas is turned off. Make sure the gas supply valve is in the “ON” position. Gas supply interrupted.
-
Page 25: Parts And Accessories
Cookie sheets (3 per carton) ACSRO303 Cooktop grate (3 used per unit) 702035 To order parts and accessories, contact your Dacor dealer or visit www.everythingdacor.com. Warranty and Service Getting Help Before you request service: 1. Review Before You Call For Service section of this manual (see page 21). - Page 26 Dacor. dential consumer use. If your Dacor product fails to function within one year of • Failure of the product caused by improper product the original date of purchase, due to a defect in material installation.
- Page 27 NO POSTAGE NECESSARY IF MAILED IN THE UNITED STATES BUSINESS REPLY MAIL FIRST-CLASS MAIL PERMIT NO 1600 CITY OF INDUSTRY CA POSTAGE WILL BE PAID BY ADDRESSEE DACOR ATTN WARRANTY PROCESSING DEPT PO BOX 90070 CITY OF INDUSTRY CA 91715-9907...
- Page 28 Dacor product, please return all forms in one envelope, or activate the warranty online for each product. Please be assured that Dacor will never sell your name or any information on this form for mailing-list purposes, as we do not...
Need help?
Do you have a question about the Heritage HGPR36S and is the answer not in the manual?
Questions and answers
instuction on replacing hinges.
To replace the hinges on a Dacor Heritage HGPR36S oven door:
1. Grasp the oven door on the sides below the handle and hold it at a 15° angle to the oven front.
2. Slide the hinges into their openings, resting the bottom of the hinge arms on the hinge receptacles.
3. Keeping the door at the 15° angle, push until the notch on the bottom of each hinge slips over the lower lip of the hinge receptacles.
4. Flip the hinge locks toward the range immediately after installing the door.
This answer is automatically generated