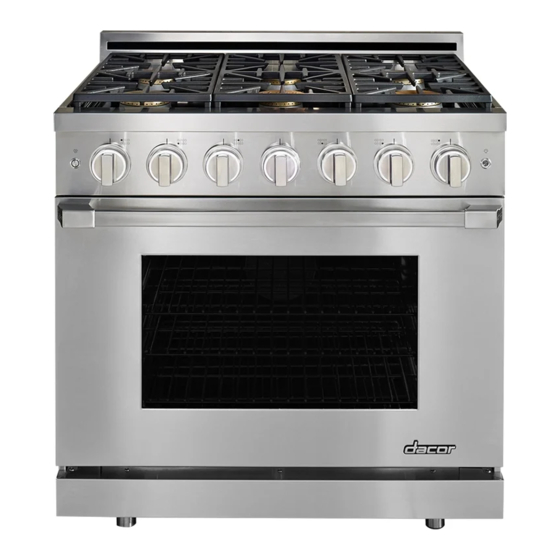
Summary of Contents for Dacor HGPR36S
- Page 1 Installation Instructions Heritage Gas Range HGPR36S, HGPR48S Part No. 108531 Rev A...
-
Page 2: Table Of Contents
No Character = Equipped for low altitude operation Front panel, below control knobs Model/Serial Number Location READ AND SAVE THESE INSTRUCTIONS ® All specifications subject to change without notice. No liability is assumed by Dacor for changes to specifications. © 2018 Dacor, all rights reserved. -
Page 3: Important Safety Instructions
Use common sense and caution in installing and testing blocks air flow through the oven, may cause carbon monoxide buildup, and this range. Contact Dacor Customer Assurance about issues you may trap heat, causing a fire hazard. cannot resolve. -
Page 4: Planning The Installation
Model Circuit Required Total Connected Load* 120 Vac 60 Hz, 120 Vac, 60 Hz, 15 Amp. HGPR36S 5.0 Amp. 120 Vac 60 Hz, 120 Vac, 60 Hz, 15 Amp. HGPR48S 8.0 Amp. -
Page 5: Product Dimensions
Cabinet face chassis to clear stiffener Downdraft Part Numbers Downdraft Part Nos. ERV3015 (for 30G) ERV36-ER for HGPR36S ERV36-ER (for 36G) ERV48-ER for HGPR48S ERV48-ER (for 48G) Installed Range Installed Range With Downdraft... -
Page 6: Cabinet Layout
- the range to be pulled out for service without disconnecting • Seal openings in the wall behind the range or in the floor below. the gas and electrical supply. DIMENSIONS Model HGPR36S 42” (106.2 cm)*; 36” (91.4 cm)** 36” (91.4 cm)** 33 1/2” (84.8 cm) 30 7/8” (78.4 cm) 3 1/2”... -
Page 7: Installation Instructions
Approved kits for this range: TOP VIEW Model Description APB36D9 9” high backguard for range model HGPR36S Range center line APB48D9 9” high backguard for range model HGPR48S Installing the Anti-Tip Bracket Install the anti-tip bracket in one of two ways: •... - Page 8 3. Align the anti-tip bracket holes with the holes in the floor. 4. Insert and tighten the four screws. Bracket center ANTI-TIP BRACKET PLACEMENT line Dimension HGPR36S HGPR48S 10-7/8” (27.6 cm) 1-1/2” (3.8 cm) 22-1/2” (57.2 cm) 22-1/2” (57.2 cm) *Excludes bull nose (see Pg. 3)
-
Page 9: Removing The Oven Door
Installation Instructions Removing the Oven Door Connecting the Gas Make the range easier to move by detaching the door. WARNING WARNING • Close the gas-supply valve, and unplug the range before connecting the gas line. • Do not try to disengage the hinge catches with the door •... -
Page 10: Finalizing The Anti-Tip Installation
Installation Instructions Finalizing Anti-Tip Installation Re-installing the Oven Door(s) 1. Peel the protective plastic from the range (including the door). WARNING 2. Measure from floor to countertop, and adjust the leveling legs as needed so the cooktop trim is even with or above the countertop. To avoid personal injury or property damage: 3. -
Page 11: Installing The Burner Knobs
D-shaped valve stem to ensure proper installation and function The range has three types of burner-control knobs: WARM 200° 300° 400° 500° BROIL CLEAN HGPR36S Oven / Broil Knob Knob Placement Max Griddle Burner Knob Icons Left Burner Knob Icons HGPR48S Knob Placement... -
Page 12: Assembling The Cooktop
Installation Instructions Assembling the Cooktop WARNING Spill tray Do not use the cooktop unless all burner components and grates are properly in place. SimmerSear burner Standard • The range uses standard and SimmerSear burners. burner • Use porcelain or brass burner caps as you prefer. •... -
Page 13: Verifying Proper Function
2. Retest cooktop and oven function. 3. If the rangee still does not work, contact Dacor Customer Assurance (833) 353-5483. Do not try to repair the range yourself. - Page 14 Notes Notes...
- Page 15 Notes...
- Page 16 Dacor ● 14425 Clark Avenue, City of Industry, CA 91745 ● Phone: (800) 793-0093 ● Fax: (626) 403-3130 ● www.dacor.com...


Need help?
Do you have a question about the HGPR36S and is the answer not in the manual?
Questions and answers