Table of Contents
Advertisement
Quick Links
Advertisement
Table of Contents

Related Manuals for Hangar 9 HAN5190


Summary of Contents for Hangar 9 HAN5190
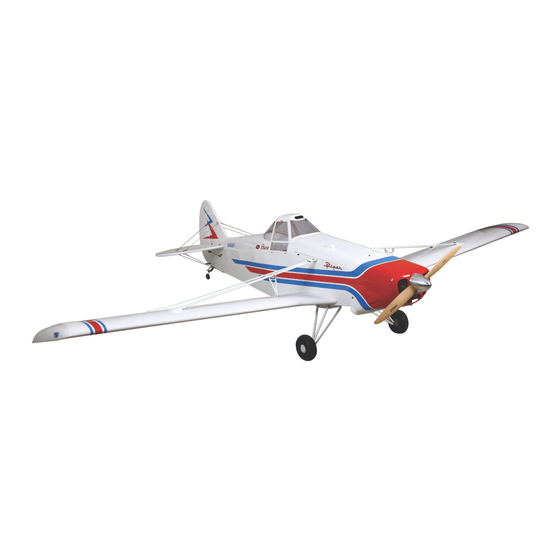
- Page 1 33% Pawnee 80cc ARF Assembly Manual...
-
Page 2: Table Of Contents
Table of Contents Introduction Notice Notice ................2 Congratulations on the purchase of your new Hangar 9 33% All instructions, warranties and other collateral Meaning of Special Language ...........2 Pawnee 80cc. As of right now, all that stands between you documents are subject to change at the sole discretion Introduction ..............2... -
Page 3: Contents Of Kit And Parts Listing
Age Recommendation: Not for children under 14 HAN519008 Left Stabilizer with Elevator years. This is not a toy. HAN51909 Right Stabilizer with Elevator HAN519010 Landing Gear and Shocks HAN519012 Wheel Set HAN519013 Wing Spar Hangar 9 33% Pawnee 80cc ARF... -
Page 4: Important Information Regarding Warranty
6.0V Receiver Battery, 2700mAh JRPB5008 Remember to take your time and follow the directions. Aluminum Servo Arm, 3-inch (152mm) JRPA237 Aluminum Servo Arm, 1 -inch (38mm) (7) HAN9154 A6020 Digital Aircraft Servo, High-Torque (8) SPMSA6020 Hangar 9 33% Pawnee 80cc ARF... -
Page 5: Optional Field Equipment
0% in both the up and down positions. This will center the flap servo, allowing you to properly install the servo arm and linkage. Hangar 9 33% Pawnee 80cc ARF... - Page 6 6. Place the servo on the cover, centering the servo arm in the opening. Use a pencil to mark the location of the servo mounting tabs. Hangar 9 33% Pawnee 80cc ARF...
- Page 7 12. Apply 2–3 drops of thin CA in each hole four holes for the servo mounting screws. to harden the surrounding wood. Allow the CA to cure before proceeding. Note: Use a 3-inch (152mm) servo extension when preparing the flap servos for installation. Hangar 9 33% Pawnee 80cc ARF...
- Page 8 17. Apply 2–3 drops of thin CA in each hole using four 2mm x 10mm sheet metal screws and a #1 to harden the surrounding wood. Allow the CA to cure Phillips screwdriver. before proceeding. -inch (31mm) Hangar 9 33% Pawnee 80cc ARF...
- Page 9 8-32 flanged nut against the wing to secure the position of the screw. -inch (28.5mm) *Drawing not to scale 23. Repeat Steps 2 through 22 to install the remaining aileron servos, as well as the flap servos. Hangar 9 33% Pawnee 80cc ARF...
-
Page 10: Wing Strut Installation
1. Locate the items necessary to install the struts. You cover the opening, or to finish off the lighting system. will also need the left and right wing panels for this section of the manual. Hangar 9 33% Pawnee 80cc ARF... - Page 11 1/4-inch nut driver and 3/32-inch hex wrench to tighten when installed so it aligns with the strut support. hardware. Make sure the airfoil on strut matches wing, and jury strut fitting faces to wing. Hangar 9 33% Pawnee 80cc ARF...
-
Page 12: Rudder And Elevator Servo Installation
You will also need to have the fuselage for this section of the manual. 3. Locate the rudder cable and pass one end of the cable through the brass crimp. Hangar 9 33% Pawnee 80cc ARF... - Page 13 5. Loop the cable back through the crimp. This will make the cable secure when it is crimped in the next step. 8. Repeat steps 3 through 7 to prepare a second ball end and cable. Hangar 9 33% Pawnee 80cc ARF...
- Page 14 Guide the cables for the rudder through the openings in the sides of the fuselage. Note that the cables cross inside the fuselage. Note: Always use threadlock on metal-to-metal fasteners to prevent them from vibrating loose. Hangar 9 33% Pawnee 80cc ARF...
-
Page 15: Landing Gear Installation
Flat blade screwdriver Hex wrench: 1.5mm, 5/64-inch, 1/8-inch Open-end wrench: 11/32-inch 1. Locate the items necessary to install the landing gear. You will also need the fuselage for this section of the manual. Hangar 9 33% Pawnee 80cc ARF... - Page 16 The screw then threads into a blind nut that has freely in the brackets. been installed in the fuselage. Tighten the screw using a 1/8-inch hex wrench. Hangar 9 33% Pawnee 80cc ARF...
-
Page 17: Stabilizer Installation
2. Use a 3/32-inch hex wrench and 1/4-inch open-end wrench to attach the ball end to the top side of the servo horn. Install both ball ends at this time. Hangar 9 33% Pawnee 80cc ARF... - Page 18 #8 washers to keep the stabilizer half in position. Do not tighten the screws at this time. 4. Slide the aluminum tubes for the stabilizer into the stabilizer. Note the longer tube is closer to the elevator as shown in the photo below. Hangar 9 33% Pawnee 80cc ARF...
-
Page 19: Elevator Linkage Installation
*Drawing not to scale Thread an 8-32 flanged nut on the screw. While using a flat blade screwdriver to hold the screw, thread the control horn on the screw. Hangar 9 33% Pawnee 80cc ARF... -
Page 20: Tail Wheel Installation
3/32-inch hex wrench to secure the tail gear assembly and 2. Use pliers to make a slight bend in each of the brass strut fitting to the fuselage as shown. strut fittings. Hangar 9 33% Pawnee 80cc ARF... -
Page 21: Rudder Preparation
2. Insert the 8-32 x 4-inch threaded rod into the hole in the rudder. Thread an 8-32 flanged nut on either side of the rudder to secure the threaded rod. Hangar 9 33% Pawnee 80cc ARF... - Page 22 8. Secure the rudder tiller arm using two #4 x 5/8-inch sheet metal screws and a #1 Phillips screwdriver. -inch (28mm) *Drawing not to scale Hangar 9 33% Pawnee 80cc ARF...
-
Page 23: Rudder Installation
5. Thread a cable fitting into each of the ball ends. To entering the hinge, which could restrict their movement. make sure the fitting is secure, turn the fitting 12 rotations in the ball end. Hangar 9 33% Pawnee 80cc ARF... -
Page 24: Engine And Cowling Installation
Phillips screwdriver: #1 30-minute epoxy Isopropyl alcohol Epoxy brush Mixing cup Mixing stick Pencil Paper towel Side cutter Open-end wrench: 1/4-inch Hex wrench: 5/64-inch, 3/16-inch Drill bit: 1/16-inch (1.5mm), 5/16-inch (8mm) Linkage wrench (optional) Hangar 9 33% Pawnee 80cc ARF... - Page 25 4. Use four 1/4-inch blind nuts, four 1/4-inch washers, four 1/4-inch lock washers and four 1/4-20 x 1 -inch socket head screws to secure the engine to the engine box. Tighten the hardware using a 3/16-inch hex wrench. Hangar 9 33% Pawnee 80cc ARF...
- Page 26 Note: The previous step only works when using a spinner with a flat backplate. If the backplate of your particular spinner will be recessed on the driver washer, use the backplate to set the gap between the cowl and spinner backplate. Hangar 9 33% Pawnee 80cc ARF...
-
Page 27: Receiver And Switch Harness Installation
Once the cowl is secured to the fuselage, install the propeller and spinner. hint: Place a drop of canopy glue on the cowl mounting screws to help keep them from vibrating loose in flight. Hangar 9 33% Pawnee 80cc ARF... -
Page 28: Wing Installation
Note: Multiple locations have been provided for the switch harness installation. Use a location that best suits your radio installation, battery and receiver positioning in the fuselage. Hangar 9 33% Pawnee 80cc ARF... - Page 29 7mm open-end wrench to tighten the 4mm nuts against the ends to secure the ends in position. 7. Repeat steps 2 through 6 to attach the remaining wing panel to the fuselage. Hangar 9 33% Pawnee 80cc ARF...
-
Page 30: Center Of Gravity
The linkage geometry should always be maximized so the servo isn’t working any harder than it has to. After the first flights, the CG position can be further adjusted for your personal preference. Hangar 9 33% Pawnee 80cc ARF... -
Page 31: Preflight
If any of these components in flight could mean the loss of you are using a Spektrum transmitter, please refer to your your aircraft. transmitter’s manual for detailed instructions on the range check process. Hangar 9 33% Pawnee 80cc ARF... -
Page 32: Safety Do's And Don'ts For Pilots
The Pawnee also has a full scale working • Perform a ground range check before each day’s flying developing this great aircraft for Hangar 9. undercarriage, so even the roughest field will be ok. In session. testing, many takeoffs were done on extremely rough grass •... -
Page 33: Limited Warranty
WARRANTY IS THE PURCHASER’S SOLE AND EXCLUSIVE Notice: Do not ship Li-Po batteries REMEDY. to horizon. If you have any issue with a Li-Po battery, please contact the appropriate horizon Product Support office. Hangar 9 33% Pawnee 80cc ARF... -
Page 34: Compliance Information For The European Union
For more information about where you can drop off your Champaign, Illinois waste equipment for recycling, please contact your local city 61822 USA office, your household waste disposal service or where you productsupport@horizonhobby.com purchased the product. 877-504-0233 Hangar 9 33% Pawnee 80cc ARF... -
Page 35: Academy Of Model Aeronautics National Model Aircraft Safety Code
5. RC model aircraft will not operate within three (3) miles of any pre-existing flying site without a frequency-management • F ree Flight fuses or devices that burn producing smoke and are agreement (AMA Documents #922- Testing for RF Interference; securely attached to the model aircraft during flight. #923- Frequency Management Agreement) Hangar 9 33% Pawnee 80cc ARF... - Page 36 The Spektrum trademark is used with permission of Bachmann Industries, Inc. © 2011 Horizon Hobby, Inc. Hangar 9, UltraCote, Evolution, and JR are trademarks or registered horizonhobby.com trademarks of Horizon Hobby, Inc. All other trademarks, service marks and logos are the property of their respective owners.
Need help?
Do you have a question about the HAN5190 and is the answer not in the manual?
Questions and answers