Table of Contents
Advertisement
Quick Links
All rights reserved. Product description and product specifications are subject to change without notice.
For l a stest product information, please v i s it Acnodes' website at www.acnodes.com
14628 Central Ave. Chino, CA 91710
Tel: 909. 597. 7588
Fax: 909. 597. 1939
© C opyright 2015 Acnodes C orp.
Advertisement
Table of Contents

Related Manuals for Acnodes KDM82712


Summary of Contents for Acnodes KDM82712
- Page 1 All rights reserved. Product description and product specifications are subject to change without notice. For l a stest product information, please v i s it Acnodes’ website at www.acnodes.com 14628 Central Ave. Chino, CA 91710 Tel: 909. 597. 7588 Fax: 909. 597. 1939...
- Page 2 Legal Information First English printing, October 2002 Information in this document has been carefully checked for accuracy; however, no guarantee is given to the correctness of the contents. The information in this document is subject to change without notice. We are not liable for any injury or loss that results from the use of this equipment.
-
Page 3: Table Of Contents
Contents < Part. 1 > KDM82712 Package Content Structure Diagram & Dimension P.1 - 2 Installation P.3 - 5 < Part. 2 > Specifications / OSD Product Specifications P. 6 Keyboard / Mouse Specifications 8 - 10 On-screen Display Operation ( OSD ) 11 -12 <... - Page 4 Before Installation ■ It is very important to mount the equipment in a suitable cabinet or on a stable surface. ■ Make sure the place has a good ventilation, is out of direct sunlight, away from sources of excessive dust, dirt, heat, water, moisture and vibration. Unpacking The equipment comes with the standard parts shown in package content.
-
Page 5: Package Content
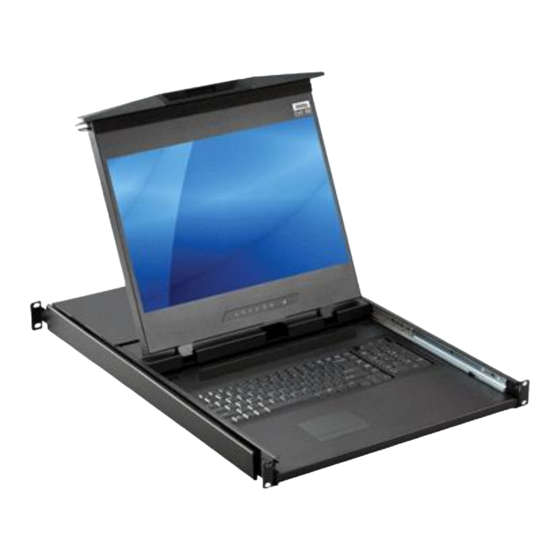
< Part 1 > < 1.1 > Package Content KD M8 2712 unit X1 - 6ft DVI-D co nsole cable X 1 - Pow er c ord X 1 - M6 screw, c age nut & cu p washer X 8 <... - Page 6 < 1.2 > Dimension Front View UNIT : mm Sid e View 1mm = 0.03937 inch Top View Product Dimension Packing Dimension Gross Model (W x D x H) (W x D x H) Weight Weight 441.6 x 650 x 44 mm 595 x 860 x 140 mm 14 kg 20 kg...
-
Page 7: Installation
< 1.3 > Installation - How to install Installation Slides Step ¦ Insert the left and right rear mounting brackets into the LCD c onsole drawer. Step ¦ Measure the depth of the front and rear mounting rails. ¦ Align each rear mounting bracket to a suitable length. Step Complete the installation ¦... - Page 8 < 1.3 > Installation - How to Use the Dual Slides ¦ Press the handle button and gently slide out the drawer. ¦ Flip up the LCD to a suitable angle. ¦ Operate the LCD console drawer.
- Page 9 < 1.3 > Installation - How to Use the Dual Slides ¦ Flip down the front panel. ¦ Press the handle button and gently push back the drawer into the rack . ¦ Retur n the LCD console drawer to park position.
-
Page 10: Product Specifications
< Part 2 > < 2.1 > Product Specifications Panel Size ( diagonal ) 17.3-inch W idescreen TFT color LCD Panel Display pix el ( dots x lines ) 1920 x 1080 Brightness ( typ. ) Contras t Ratio ( typ. ) 600:1 Color 1.07 Billion, 10-bit... - Page 11 Environmental Operating Tem peratur e 0 to 50°C degree Conditions Humidity 20~90%, non-condensing Storage Tem peratur e -5 to 60°C degree Humidity 5~90%, non-condensing Shock 10G acceleration (11ms duration) Vibration 5~500Hz 1G RMS random Physical Product ( W x D x H ) 441.6 x 650 x 44 mm Specification 17.4 x 25.6 x 1.73 inch...
-
Page 12: Keyboard / Mouse Specifications
< 2.2 > Keyboard / Mouse Specifications G keyboard integrated with touchpad Key force 55 ± 5g Travelling distance 3 ± 0.3mm Switch life > 10 million life cycle tim e Software support MS W indows 7 / 2008 / 2003 / 2000 / XP / ME / 98 / DOC Linux / Mac Supporting layouts America... - Page 13 < 2.2 > MAC Keyboard / Mouse Options MAC k eyboard integrated with touchpad Supporting layouts America United States How to Use "MAC" Keyboard K eyboard Fea tures Decrease d isplay brightness Fast-forward Increase display brightness Mu te sound Mission control * Only works with OS X Lion Decrease volume default Keyboard Sho rtcuts.
- Page 14 < 2.2 > SUN Keyboard / Mouse Options S keyboard integrated with touchpad N u m C a ps S cr ol l C om po se S keyboard integrated with touchpad / trackball ¦ Incorporates SUN k eys, including Stop, Cut, Paste, Compose, Copy and Help ¦...
-
Page 15: On-Screen Display Operation ( Osd )
< 2.3 > On-screen Display Operation ( OSD ) M embrane Switch Funct ion Turn the monitor on or off Display the OSD menu Act as an Enter key to select screen setting options Scroll through menu options and adjust the displayed co ntrol Exit t he OSD screen Go back to the previous on-screen sub-men u o r... - Page 16 < 2.3 > On-screen Display Operation ( OSD ) Auto adjust : Auto mat ically ad just sizes, centers and fine tunes the video signal to eliminate waviness and distortion. Clock : Adjust the clock value Phase : Adjust the phase value H.
-
Page 17: Part. 3 > Options
<Part 3> < 3.1 > Options : DC Power Model Input rating Input voltage: 12-Volt 24-Volt 48-Volt Input range: 9 ~ 18V 18 ~ 36V 36 ~ 75V Input current - No load 50 mA 50 mA 50 mA - Full load 4950 mA 245 0 m A 1220 mA... -
Page 18: Part 4> Kvm Integration
<Part 4> KVM Integration < 4.1 > KVM port connection USB Servers DVI-D KVM port Power Audi o USB Servers D VI KVM C ab le 6 feet DVI KVM c able 15 feet DVI KVM cable ( Server end : DVI-D + USB + Audio ) ( KVM port : DVI-D + USB3.0 ) IP console, remote c onsole, daisy- chain and OSD m enu are NOT available for this model. -
Page 19: Specifications
< 4.2 > Specifications KVD1201 KVM Port ¯ Number of ports: Connector: DVI-D connector USB 3.0 connector ( combined for keyboard, mouse & audio ) Connectivity: Com bo 4-in-1, KV M cable, 6 or 15 feet Audio Out 1 x 3.5mm stereo audio ¯... -
Page 20: Kvm Button
4.3 KVM Button Power ON ¦ Turn off all servers and KVM s witches ¦ Make sure all cables / c onnectors are properly connec ted ¦ Recommend Power ON sequence is m onitor, K VM switch finally computer Front Panel - Port LED Indications DVI-D K VM 12 ports PC port LEDs Channel... -
Page 21: Kvm Hotkey
4.4 KVM Hotkey Hotkey Function Scroll Lock + Scroll Lock + Switch to previous port Scroll Lock + Scroll Lock + Switch to nex t port Scroll Lock + Scroll Lock + Port no. Switch to specific port Scroll Lock + Scroll Lock + Auto scan for powered on PC Scroll Lock + Scroll Lock + Enable / Disable beeper sound... -
Page 22: Dc Power 12V, 24V, 48V Input
4.5 DC Power 12V, 24V, 48V Input Model Input rating Input voltage: 12-Volt 24-Volt 48-Volt Input range: 9 ~ 18V 18 ~ 36V 36 ~ 75V Input current - No load 50 mA 50 mA 50 mA - Full load 4950 mA 2450 mA 1220 mA...
Need help?
Do you have a question about the KDM82712 and is the answer not in the manual?
Questions and answers