Advertisement
Quick Links
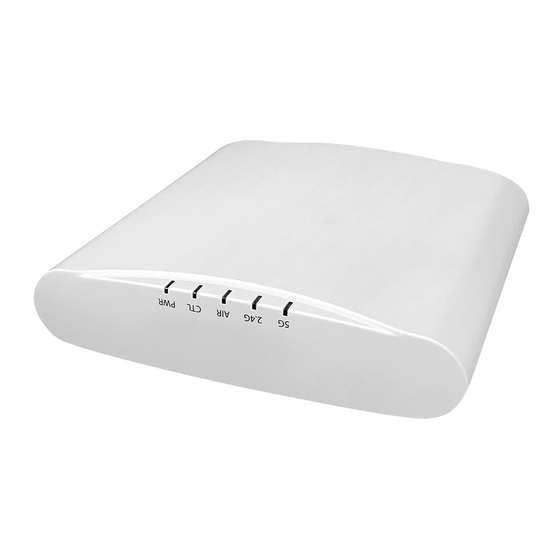
Ruckus Q410 LTE
Access Point
Quick Setup Guide
Introduction
This Quick Setup Guide provides step-by-step instructions
on how to set up your Ruckus Q410 LTE Access Point
(Q410). After completing the steps described in this
guide, you will be able to place Q410 at your site and
provide LTE wireless network access to users.
Before You Begin
Before deploying Ruckus Wireless products, please check
for the latest information and release documentation at
http://support.ruckuswireless.com/documents
Software License and Limited Warranty are available at
http://support.ruckuswireless.com/warranty
Package Contents
A complete Q410 field installation package includes all of
the items listed below (see Figure 1 for illustrations):
• Q410 (A)
• M3 Shoulder Screw (B)
• Q410 Bracket (C)
• Locking Tab (D)
• R510 Band (E)
• R610 Band (F)
• R720 Band (G)
• M3 Flat Head Screw (H)
• Unit Removal Pin (J)
• Drywall Anchors (K)
• No 8. screws (L)
• Ethernet CAT 5 RJ-45 cable
• Service Level Agreement/Limited Warranty Statement
• Regulatory Statement
• This Quick Setup Guide
Copyright
©
2018 ARRIS Enterprises LLC. All rights reserved.
Published November 2018, Part Number 800-71629-001 Rev C
FIGURE 1 Q410 and associated hardware
Mounting Instructions
Q410 can be mounted to a ceiling tile T-bar, to a flat
surface, to a pole using cable ties, or to a Junction box.
Mounting Q410 AP to a T-bar
Perform the following steps to mount Q410 to a ceiling
tile T-bar.
1. Attach the two shoulder screws (B in Figure 1)
provided using a 2 mm hex wrench or bit to Q410 (A
in Figure 1). It is recommended to tighten the screws
to 7 in-lbs (see Figure 2).
FIGURE 2 Attaching the shoulder screws (B)
2. Insert two locking tabs (D in Figure 1) into the two
channels on Q410 Bracket (C in Figure 1) as shown in
Figure 3. The two tabs should line up with position 2.
FIGURE 3 Align the arrow on the tab with the position
printed depending on the AP being linked
3. Position the larger hole of the keyhole on Q410
bracket through shoulder screws on Q410, then slide
the bracket away from the Ethernet ports until the
screws are in narrow parts of the keyholes (see Figure
4). Q410 locks in place on the bracket.
Page 1 of 4
Advertisement

Related Manuals for Arris Ruckus Q410


Summary of Contents for Arris Ruckus Q410
- Page 1 This Quick Setup Guide provides step-by-step instructions 2. Insert two locking tabs (D in Figure 1) into the two on how to set up your Ruckus Q410 LTE Access Point channels on Q410 Bracket (C in Figure 1) as shown in (Q410).
- Page 2 3. Attach the corresponding band (E, F, or G in Figure 1) to Q410 using two M3 flat head screws (H in Figure 1) Copyright © 2018 ARRIS Enterprises LLC. All rights reserved. Page 2 of 4 Published November 2018, Part Number 800-71629-001 Rev C...
-
Page 3: Making The Connections
2. AC/DC adapter: P/N 902-1170-US00 (It includes KIT, SPARE, Modular AC/DC Power adapter, 48V - 36W, w/US Power Cord, 1 Unit) Copyright © 2018 ARRIS Enterprises LLC. All rights reserved. Page 3 of 4 Published November 2018, Part Number 800-71629-001 Rev C... - Page 4 © 2018 ARRIS Enterprises LLC. All rights reserved. ARRIS, the ARRIS logo, Ruckus, Ruckus Wireless, the Ruckus logo, and FIGURE 14 Port Locations the Big Dog design are trademarks of ARRIS International plc and/or its affiliates. All other trademarks are the property of their respective owners.
-
Page 5: Federal Communications Commission Notices
Page 1 Q410 – LTE Access Point Ruckus Wireless Inc., an ARRIS Company Federal Communications Commission Notices This product complies with Part 15 of the FCC Rules. Operation is subject to the following two conditions: (1) this device may not cause harmful interference, and (2) this device must accept any interference received, including interference that may cause undesired operation.
Need help?
Do you have a question about the Ruckus Q410 and is the answer not in the manual?
Questions and answers