Table of Contents
Advertisement
Quick Links
Unleashed R320
Access Point
Quick Setup Guide
This Quick Setup Guide provides step-by-step instructions on how
to set up your Ruckus Unleashed R320 access point. After
completing the steps in this guide, you will be able to place the
access point (AP) at your site and provide wireless network
access to users.
For detailed information on configuration and administration of
your Ruckus Unleashed R320 AP, refer to the Unleashed Online
Help, available from https://docs.ruckuswireless.com/unleashed/
200.7/index.html.
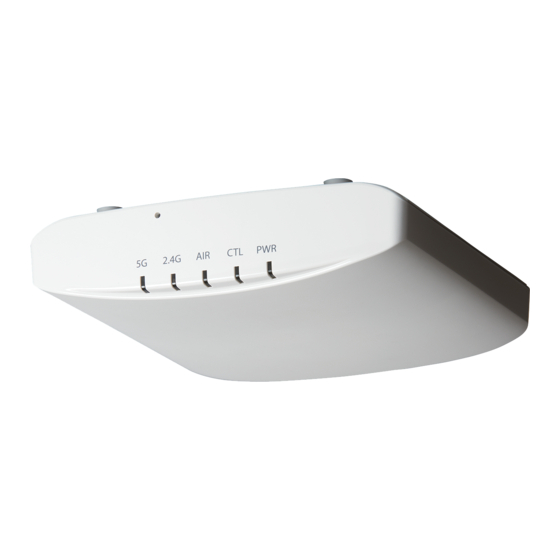
FIGURE 1 Unleashed R320 Top
Before You Begin
Before deploying Ruckus products, please check for the latest
software and the release documentation.
• Release Notes and other user documentation are available at
http://support.ruckuswireless.com/documents.
• Software upgrades are available at
http://
support.ruckuswireless.com/software.
• Open source information is available at
http://
opensource.ruckuswireless.com/open_source.
This Guide in Other Languages
• 请从以下网站获得该指南的简体中文版
https://
support.ruckuswireless.com.
• Vous trouverez la version française de ce guide à l'adresse
suivante https://support.ruckuswireless.com.
• このガイドの日本語版は
https://support.ruckuswireless.com
ご覧ください。
• 이 가이드의 한국어 버전은 웹 사이트
(https://
support.ruckuswireless.com) 에서 확인하시기 바랍니다.
Copyright
©
2018 ARRIS Enterprises LLC. All rights reserved.
Published December 2018, Part Number 800-71990-001 Rev A
• Veja a versão em português (Brasil) deste guia em
support.ruckuswireless.com.
• Puede ver la versión en español (América Latina) de esta guía
en
https://support.ruckuswireless.com.
Package Contents
A complete Unleashed R320 installation package includes all of
the items listed below:
• Unleashed R320 Access Point
• One wall-mount anchor kit, including two 1" No. 8 steel pan
head Phillips sheet metal screws and wall-mount anchors.
• One external T-bar bracket (two unassembled parts)
• One unit removal pin
• Service Level Agreement/Limited Warranty Statement
• Declaration of Conformity
• Regulatory Statement
• This Quick Setup Guide
Unleashed Network Configuration
Setup Using the Unleashed Mobile App
To perform setup using the Unleashed Mobile App, download the
iOS or Android app from the app store.
1. As soon as the Unleashed AP is powered on and connected
to the local network, it boots up and begins broadcasting a
temporary unencrypted WLAN named "Configure.Me-
[xxxxxx]" from both radios.
2. Using your client's Wi-Fi connection settings, select and
associate to the "Configure.Me-[xxxxxx]" WLAN.
3. Launch the app, and follow the on-screen instructions to
configure your Unleashed network(s).
FIGURE 2 Unleashed Mobile App for iOS and Android
で
https://
FIGURE 3 Configuring Unleashed from the Mobile App
Setup Using a Web Browser
1. As soon as the Unleashed AP is powered on and connected
to the local network, it boots up and begins broadcasting a
temporary unencrypted WLAN named "Configure.Me-
[xxxxxx]" from both radios.
2. Using your client's Wi-Fi connection settings, select and
associate to the "Configure.Me-[xxxxxx]" WLAN.
3. Launch a web browser and enter the following into the
browser's URL bar: unleashed.ruckuswireless.com, and press
Enter.
4. You will be redirected to the Setup Wizard. Complete the
steps in the Setup Wizard and click Finish.
FIGURE 4 Complete the Setup Wizard to set up your
Unleashed network
5. Once the Setup Wizard is finished, a "Configuring system
settings and rebooting" progress screen appears. Wait until
the process is complete.
Page 1 of 4
Advertisement
Table of Contents

Related Manuals for Arris Ruckus Unleashed R320


Summary of Contents for Arris Ruckus Unleashed R320
- Page 1 • Service Level Agreement/Limited Warranty Statement This Quick Setup Guide provides step-by-step instructions on how • Declaration of Conformity to set up your Ruckus Unleashed R320 access point. After • Regulatory Statement completing the steps in this guide, you will be able to place the •...
- Page 2 (B) into the mounting surface, leaving approximately 6 mm (1/4”) of the screw heads protruding from the surface. Copyright © 2018 ARRIS Enterprises LLC. All rights reserved. Page 2 of 4 Published December 2018, Part Number 800-71990-001 Rev A...
- Page 3 2018 ARRIS Enterprises LLC. All rights reserved. this task. ARRIS, the ARRIS logo, Ruckus, Ruckus Wireless, the Ruckus logo, and 2. If you are mounting the AP on a pipe or pole, then feed the the Big Dog design are trademarks of ARRIS International plc and/or two customer-supplied stainless steel clamps through the its affiliates.
- Page 4 Copyright © 2018 ARRIS Enterprises LLC. All rights reserved. Page 4 of 4 Published December 2018, Part Number 800-71990-001 Rev A...
Need help?
Do you have a question about the Ruckus Unleashed R320 and is the answer not in the manual?
Questions and answers