Advertisement
Quick Links
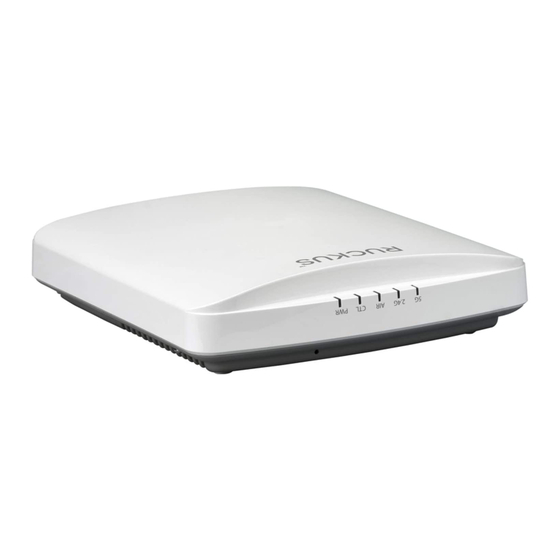
R650 Access Point
Quick Setup Guide
This Quick Setup Guide provides step-by-step instructions on
how to install and begin using your Ruckus R650 dual-band
802.11ax indoor Wi-Fi access point (AP).
FIGURE 1 R650 Access Point: Top View
This Guide in Other Languages
• 请从以下网站获得该指南的简体中文版
https://
support.ruckuswireless.com.
• Vous trouverez la version française de ce guide à l'adresse
suivante https://support.ruckuswireless.com.
• このガイドの日本語版は
https://support.ruckuswireless.com
ご覧ください。
• 이 가이드의 한국어 버전은 웹 사이트
(https://
support.ruckuswireless.com) 에서 확인하시기 바랍니다.
• Veja a versão em português (Brasil) deste guia em
support.ruckuswireless.com.
• Puede ver la versión en español (América Latina) de esta guía
en
https://support.ruckuswireless.com.
Before You Begin
Before deploying Ruckus products, please check for the latest
software and the release documentation.
• Release Notes and other user documentation are available at
http://support.ruckuswireless.com/documents.
• Software upgrades are available at
http://
support.ruckuswireless.com/software.
Copyright
©
2019 CommScope, Inc. All rights reserved.
Published November 2019, Part Number 800-72206-001 Rev E
• Software license and limited warranty information are
available at http://support.ruckuswireless.com/warranty.
NOTE: The minimum software revision for the R650 is
SmartZone (SZ) 5.2 New AP Model.
Package Contents
A complete R650 installation package includes all of the following
items:
• R650 Access Point
• One wall-mount anchor kit, including two 1-inch No. 8 steel
pan-head Phillips sheet metal screws and wall-mount anchors
• One external T-bar bracket (two unassembled parts)
• T-bar wall mount screws, two 1-inch No. 8 steel pan-head
Phillips sheet metal screws
• Service Level Agreement/Limited Warranty Statement
• Declaration of Conformity
• Regulatory Statement
• Ruckus Access Point Getting Started Guide
• AP Cloud Management Insert
• This Quick Setup Guide
For further assistance, please contact RUCKUS WIRELESS INC.
Required Hardware Tools
• Admin PC (computer with an Ethernet port and Wi-Fi adapter)
• Cat 5e (or better) Ethernet cable
• Ruckus Wireless 48 VAC power adapter (sold separately) or
802.3at-compliant Power over Ethernet (PoE) switch or PoE
injector
Optional hardware and tools:
Customer-ordered Ruckus Wireless 902-0120-0000 secure
mounting bracket kit:
• If you are mounting the AP on a flat surface using the secure
mounting bracket kit, then you need an electric drill with 4.75-
mm (3/16-in) drill bits.
• If you are mounting the AP on a pipe or pole using the secure
mounting bracket kit, then you will also need a 38.1-mm to
63.5-mm (1.5-in to 2.5-in) pipe or pole, customer-supplied two
pole clamps, and hand tools to tighten the clamps.
で
Step 1: Connecting Your Computer to the
AP
1. Using an Ethernet cable, connect your computer network
https://
port to the 2.5G ETH PoE port on the AP. Refer to
2. Connect the AC cable of the AC power adapter to a
convenient and protected power source. Connect the DC
output cable of the AC power adapter to the 48 VDC port on
the AP.
NOTE: Alternatively, connect the 2.5G ETH PoE port to a
PoE injector or switch for both power and network
connectivity.
Alternatively, connect the computer and the AP with a basic
PoE switch in the following ways:
a) Connect the AP to a switch port.
b) Connect the computer to another switch port and
manually assign an IP address to configure the AP.
FIGURE 2 R650 AP Ports on Bottom Panel
TABLE 1 R650 AP Ports
No.
Label
1
1G ETH
2
2.5G
ETH PoE
3
48V
0.75A
4
USB
5
Reset
switch
3. Verify that the PWR LED on the AP is lit a steady green.
Step 2: Preparing Your Computer for AP
Setup
Figure
2.
NOTE: The following procedures assume Windows is the
operating system. Procedures for other operating systems are
similar.
1. On your Windows PC, navigate to Start > Control Panel >
Network and Sharing Center > Change Adapter Settings
to configure your network adapter from the Local Area
Connection settings.
2. Navigate to Local Area Connection > Properties > Internet
Protocol Version 4 (TCP/IPv4) > Properties to edit the TCP/
IPv4 address settings.
The Internet Protocol Version 4 (TCP/IPv4) Properties
dialog box displays.
Description
10/100/1000 Mbps port: RJ-45
Ethernet port (non-PoE)
100/1000/2500 Mbps PoE In Port:
RJ-45 Ethernet port (supports
802.3af/at PoE)
48 VDC input
USB Port
• Maximum Dimensions: 6 cm x 2
cm x 1.1 cm
• Interface: USB 2.0
• Connector: USB – Type-A plug
Resets the AP
Page 1 of 4
Advertisement

Related Manuals for Arris Ruckus R650


Summary of Contents for Arris Ruckus R650
- Page 1 • One external T-bar bracket (two unassembled parts) This Quick Setup Guide provides step-by-step instructions on how to install and begin using your Ruckus R650 dual-band • T-bar wall mount screws, two 1-inch No. 8 steel pan-head 802.11ax indoor Wi-Fi access point (AP).
- Page 2 2. Verify that the following options are active: 1. Position the studs on the bottom of the T-bar bracket (1 in IMPORTANT-QSG: Write down all of the currently active Figure 3) in the keyholes on the AP enclosure. Channel: SmartSelect settings so you can restore your computer to its current 2.
- Page 3 © 2019 CommScope, Inc. All rights reserved. ARRIS, the ARRIS logo, CommScope, Ruckus, Ruckus Wireless, the Ruckus logo, and the Big Dog design are trademarks of CommScope, Mounting on a Flat Surface Inc. and/or its affiliates. Wi-Fi Alliance, Wi-Fi, the Wi-Fi logo, Wi-Fi...
- Page 4 Copyright © 2019 CommScope, Inc. All rights reserved. Page 4 of 4 Published November 2019, Part Number 800-72206-001 Rev E...
Need help?
Do you have a question about the Ruckus R650 and is the answer not in the manual?
Questions and answers