
Related Manuals for Unique UGP-370L1


Summary of Contents for Unique UGP-370L1
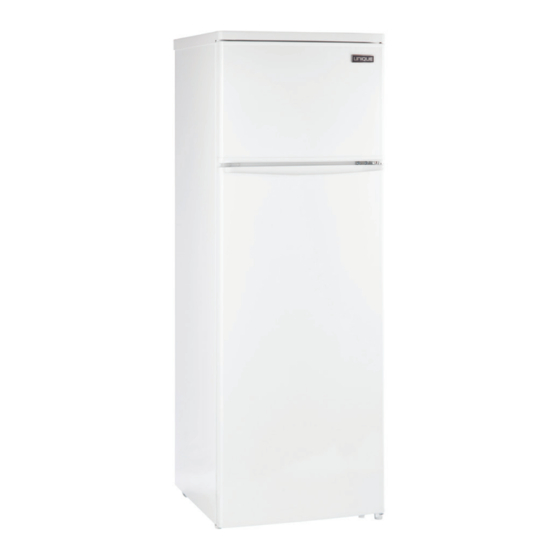
- Page 1 370L / 13.0 cu. ft. SOLAR POWERED DC FRIDGE UGP-370L1 OWNER’S GUIDE serial number: JUN18V1...
-
Page 2: Table Of Contents
TABLE OF CONTENTS Important safety notes Installation Parts list Door removal and reversal instructions DC power connection Operation Cleaning Energy saving tips Troubleshooting Appliance information Parts diagram and list Notes Contact us Limited warranty Back Technical specifications... -
Page 3: Important Safety Notes
Congratulations! You have purchased one of the most efficient refrig- eration products available on the market today. The Unique 370L1 solar powered DC fridge is designed to provide years of efficient trouble-free operation. The design is optimized for energy savings with an efficient DC compressor and thick insulation. - Page 4 IMPORTANT SAFETY NOTES continued • To allow the interior to cool down properly, run the fridge for at least 4 hours empty before adding food. • This fridge is designed to operate on 12 or 24 volts DC ONLY. DO NOT CONNECT THIS FRIDGE TO AN AC (alternating current) POWER SOURCE.
- Page 5 It is not advised to connect an ap- pliance that has been damaged, especially damage to the electrical supply cable or refrigerant circuit. In the event of damage please contact your local product dealer or Unique Off-Grid Appliances for assistance. GENERAL SAFETY •...
- Page 6 IMPORTANT SAFETY NOTES continued supply cable. Also, be sure the electrical cable is not squeezed or bent when the appliance is being installed or moved. • Installation work and adjustments on the appliance must be carried out by qualified personnel only. Work performed by persons with inadequate technical knowledge may adversely effect the perfor- mance of the appliance, causing damage to the equipment, and void the warranty.
-
Page 7: Installation
INSTALLATION UNPACKING AND CLEANING Remove all packaging and securing tapes from the appliance. To avoid injury and causing damage to the appliance, be extremely cautious when using sharp or pointed tools to complete this task. Keep children away from the packaging material - DANGER OF SUF- FOCATION! Wash the inside and outside of the appliance with luke warm water and a mild soap or detergent. -
Page 8: Parts List
PARTS LIST PARTS LIST 1: Shelf 2: Freezer compartment 3: Bulb with cover 4: Thermostat 0 - 7 5: Door 6: Upper hinge 7: Lower hinge 8: Adjustable feet 9: Crispers 10: Detachable door rack 11: Middle hinge 12: Egg Tray 13: Power Cable 14: AC/DC Plug (optional for on-grid use) - Page 9 DOOR REMOVAL AND REVERSAL continued 5. Remove two screws from the top hinge cover located on the top of the fridge & slide the cover out. 6. Unscrew the adjustable feet (8) on the bottom. 7. Unscrew the lower hinge (7). 8.
-
Page 10: Dc Power Connection
DC POWER CONNECTION THIS FRIDGE MUST NEVER BE CONNECTED DIRECTLY TO ANY AC (alternating current) POWER SOURCE! THE FRIDGE MUST ONLY BE CONNECTED TO A 12V OR 24V DC POWER SOURCE, SUCH AS A SOLAR BATTERY SYSTEM OR CHARGE CONTROLLER. THE FRIDGE WILL AUTOMATICALLY OPERATE ON EITHER 12V OR 24V DC. - Page 11 DC POWER CONNECTION continued IN-LINE FUSE A 15A in-line fuse is provided with this fridge in order to protect the wiring. For 12V operation, use a 15A fuse. A standard automobile fuse is recommended and the fuse should be wired to the positive (“+”) side of the system close to the positive battery terminal.
-
Page 12: Operation
OPERATION Your Unique fridge, like any battery-powered refrigerating appli- ance, requires different care than appliances plugged into an elec- tric utility. Prudent operation is the key to extended service. STARTING THE FRIDGE After the fridge has been properly connected to the 12 or 24 VDC power source, the compressor will automatically turn on and the cabinet will begin cooling. - Page 13 OPERATION continued ADJUSTMENTS As the ambient temperature changes with the season, it may be nec- essary to adjust the thermostat to achieve the proper internal tem- perature. If the room/ambient temperature approaches the appliance’s internal operating temperature, the appliance will not function as it should.
- Page 14 OPERATION continued DEFROSTING Before cleaning or repositioning the fridge, you must DISCONNECT the appliance from the electrical power supply. DEFROSTING THE UNIT The fridge compartment will become progressively covered with frost. When 5mm of frost forms in the freezer, this should be removed with the supplied plastic scraper. This should be removed periodically with a plastic scraper.
- Page 15 OPERATION continued WATER CATCH BASIN There is a water catch basin located at the back of the fridge for excess water or as a result of defrosting. The hot condenser coil runs into the water catch basin and evaporates the water slowly: NOTE: Take notice when doing a complete defrost as the water catch basin could overfill with large volumes of water going in the water catch basin all at once.
-
Page 16: Cleaning
CLEANING Internal Cleaning Wash the inside of the appliance with luke warm water and a mild soap. Never use abrasive or corrosive cleaning agents, steel wool, scouring sponges, chemical cleaning agents, or highly perfumed cleaning products to clean the interior as these will damage the sur- face and leave behind a strong odor. -
Page 17: Troubleshooting
TROUBLESHOOTING Before contacting a service technician, your local product dealer or Unique Off-Grid Appliances, please check the following points. If you contact a technician to repair a fault listed below, or to repair a fault caused by misuse, abuse, or faulty installation, a charge will be made even if the appliance is under warranty. - Page 18 TROUBLESHOOTING continued Excessive frost • Is the weather hot and humid? If so, this will and ice has increase the rate of frost build-up in the built up cabinet. • Ensure that stored food is properly packaged. • Check that the door is closed and has a good seal, and that nothing is preventing the door from closing properly.
- Page 19 UGP-370L1 PARTS DIAGRAM AND LIST...
- Page 20 PARTS DIAGRAM AND LIST continued ITEM # PART # DESCRIPTION UGP-370LW-1 / UGP-370LB-1 Freezer Door UGP-370LW-2 / UGP-370LB-2 Freezer Door Gasket UGP-370LW-3 / UGP-370LB-3 Upper-door Bumper UGP-370LW-4 / UGP-370LB-4 Door Hinge Plug UGP-370LW-5 / UGP-370LB-5 Fridge Door UGP-370LW-6 / UGP-370LB-6 Fridge Door Gasket UGP-370LW-7 / UGP-370LB-7...
- Page 21 UGP-370LW-38 / UGP-370LB-38 Screw Cover UGP-370LW-39 / UGP-370LB-39 Trouble light and cable PARTS DIAGRAM AND LIST continued UGP-370LW-40 / UGP-370LB-40 Plug UGP-370LW-41 / UGP-370LB-41 The speed resistance cable UGP-370LW-42 / UGP-370LB-42 Compressor connect cable ITEM # PART # DESCRIPTION UGP-370LW-43 / UGP-370LB-43 Back cover UGP-370LW-44 /...
-
Page 22: Appliance Information
APPLIANCE INFORMATION (manual copy - keep with your records) To make care and servicing of your solar powered DC fridge easy and efficient, please record the following information for future reference: Model: Serial Number: Purchased From: Date Purchased: NOTES... -
Page 23: Contact Us
This Warranty is made only to the first purchaser (”original purchaser”) who acquires this fridge for his/her own use and will be honored by Unique Gas Products Ltd. and by the Seller. Purchaser must retain their receipt as proof of purchase date. - Page 24 62 W 12V/24V AV. RUN CURRENT 5.2A on 12V - 2.6A on 24V FRIDGE TEMP. RANGE -3˚C to +10˚C FREEZER TEMP. RANGE -15˚C to +6˚C © 2018 Unique Gas Products Ltd., 2245 Wyecroft Road, Oakville, Ontario, Canada, L6L 5L7 www.uniqueoffgrid.com...
Need help?
Do you have a question about the UGP-370L1 and is the answer not in the manual?
Questions and answers