Advertisement

Quick Links

THANK YOU!
We are grateful for your purchase of HYT product. We believe this easy-to-use radio will
provide you with dependable and reliable communications. This HYT portable two-way
radio is a precision device. Treat it with care, and you will enjoy years of reliable
operation.
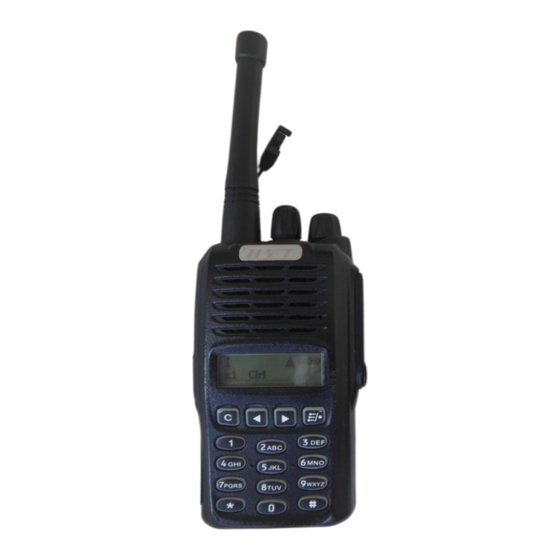
MODELS COVERED IN THIS MANUAL
TC3600 VHF Two-way Radio
TC3600 UHF Two-way Radio
1

Advertisement

Table of Contents
loading

Summary of Contents for HYT TC3600 VHF

  • Page 1 THANK YOU! We are grateful for your purchase of HYT product. We believe this easy-to-use radio will provide you with dependable and reliable communications. This HYT portable two-way radio is a precision device. Treat it with care, and you will enjoy years of reliable operation.
  • Page 2: Table Of Contents

    Content User Safety, Training, and General Information Compliance with RF Energy Exposure Standards FCC Compliance Precautions Product Inspection Battery Information Accessory Installation Getting Started Features and Operation Chinese/English Menu Troubleshooting Guide Care and Cleaning Optional Accessories Specification Frequency Chart...
  • Page 3: User Safety, Training, And General Information

    BEFORE USING YOUR HYT PORTABLE TWO-WAY RADIO. Compliance with RF Energy Exposure Standards Your HYT two-way radio is designed and tested to comply with a number of national and international standards and guidelines (listed below) regarding human exposure to radio frequency electromagnetic energy.
  • Page 4: Fcc Compliance

    Use only HYT approved, supplied batteries or HYT approved replacement batteries. Use of non- HYT -approved batteries may exceed FCC RF exposure guidelines. Approved Accessories For a list of HYT approved accessories, see the accessories page of this user manual or visit the following website which lists approved accessories: http://www.HYT.com.cn...
  • Page 5: Battery Information

    Product Inspection Thank you for your use of HYT portable two-way radio TC3600. Before use, you are recommended to inspect the product as follows. First check the shipping carton for any signs of damage. If any damage has occurred, please contact your dealer immediately.
  • Page 6: Accessory Installation

    Charging the Battery You are recommended to use HYT authorized charger. Charger LED will indicate the charging status. Meaning Red LED flashes Power voltage too low Red LED glows Charging Green LED glows Done Accessory Installation Battery Attach the battery Insert the two tabs on bottom of the battery into the slots at the bottom of the radio.
  • Page 7 Fig. 2 Antenna Insert the threaded end of the antenna into the connector on top of the radio. Rotate the antenna clockwise to fasten it. Rotate the antenna counterclockwise to remove it. (See figure 3) Attach Remove Fig. 3 Belt Clip Attach Belt Clip Align the slot of the belt clip with the T-slot at the battery cover and press the belt clip downwards until it is locked.
  • Page 8 Fig.5 Earplug Cover Rotate the screw at the bottom of the cover counter clockwise by a screwdriver until it is out of the nut to remove the Earphone/Microphone jack cover. (See figure 6) Fig. 6 External Earphone/Microphone (Optional) Insert the tab at the bottom of the earphone/microphone into the slot on the radio. (See figure 7).
  • Page 9: Getting Started

    Getting Started (1) Antenna Used to transmit/receive signals. (2) LED Following table indicates LED indication and corresponding radio status. Status No display Standby Green Receive Transmit Flashing green Scan Flashing red Low battery voltage Flashing orange Call waiting (3) Channel Selector Used to select wanted channel.
  • Page 10 (11) Battery Pack (12) PTT key Press and hold PTT, radio operates in transmit mode. Release PTT, radio returns to receive mode. (13) Programmable Key [B] (14) Programmable Key [C] The following table shows the key function when Briefly press Press and hold Key Function Briefly Press...
  • Page 11: Features And Operation

    Fig. 9 (17) LCD Display Used to indicate operation status of the radio. Features and Operation Turn On/Off the Radio Rotate “Power/Volume” knob clockwise. An alert tone indicates that the self-test of the radio has been completed satisfactorily. LED glows green at the same time. If self-test fails and/or the selected channel is not programmed, you will hear another alert tone.
  • Page 12 1. Then you can receive a valid call. LED glows green during receiving. 2. 1) If CTCSS/CDCSS and squelch tail elimination feature are enabled by your dealer, noise will be removed by the end of a conversation. 2) Beep tone sounds by the end of a conversation if roger tone is enabled by your dealer;...
  • Page 13 Disable/Enable Scan Feature 1. Press scan key, scanning begins. 2. Press scan key again, scanning ends. LED flashes green in scan mode. Callback Pressing PTT during scanning can callback on the callback channel. Please contact your dealer for more details. Nuisance Delete Nuisance delete feature allows you to temporarily delete an unwanted channel from the scan list.
  • Page 14 that is the same as your preset one, it will send a confirmation tone to the caller. 2. After transmitting the confirmation tone, the radio enters call waiting mode. 3. Then pressing PTT can talk. 4. When the call waiting reset time elapses, MONI key is pressed or channel selector knob is rotated, the radio will exit the call waiting mode.
  • Page 15: Chinese/English Menu

    Chinese/English Menu Menu Call List 1. Press key in standby mode to enter the main menu and go to the “call list”item.
  • Page 16 Press [C] key to exit the menu mode. Call List 2. Press key to enter call list and then press key to select upwards/downwards. Press key to save the change and exit the menu. Press [C] key to return to the upper menu without saving the change. Simon Edit Call Alias 1.
  • Page 17 2. Press key to enter the zone list (1-8) and press key to select a zone. Press key to save the selected zone and return to the main menu. Press [C] key to return to the main menu without saving the change. Zone 6 Utilities Squelch Level...
  • Page 18 3. Press key to change the VOX level (off, level 1-3). VOX feature is disabled when OFF. Press key to save the change and return to the utilities menu. Press [C] key to quit without saving the change. Power Level Enter the “Utilities”...
  • Page 19 return to the utilities menu. Press [C] key to quit without saving the change. Tone Level 1. Press key to go to “tone level” item. Tone Level 2. Press key to enter “tone level” (level 1-8) item. LCD displays current tone level. Press key to change the tone level.
  • Page 20 Language Press key to save the change and return to the utilities menu. Press [C] to return without saving the change. Chinese English Channel Display 1. Press key to go to “channel display” item. Channel Display 2. Press key to enter channel display item. LCD displays the current channel display mode.
  • Page 21 Appendix 1 LCD Display Description Signal Strength Indicator Keypad Lock Battery Power Indicator Carrier Indicator Speaker on High/Low Power Transmitting Monitoring Scanning Call Waiting Appendix 2 Character Input Number of times key is pressed < > Space ’ ” & Appendix 3 Alert Tone High pitched tone Low pitched tone...
  • Page 22: Troubleshooting Guide

    Low Battery Alert Tone Idle Channel Tone PLL Unlock Tone Troubleshooting Guide Trouble Solution Battery may be used up. Please recharge or replace the battery. No power Battery may not be attached properly. Remove the battery and attach again. Power doesn’t last long even if fully Battery life cycle is over.
  • Page 23: Specification

    Specification Item Specification VHF: 145-175MHz Frequency Range UHF: 440-470MHz Channel Number 16*8 Channel Spacing 25KHz/12.5KHz Frequency Stability ±2.5ppm IF Frequency 44.85MHz/455KHz Antenna Impedance 50Ω Speaker Impedance 24Ω Operation Voltage 7.2V Operating Temperature -30~+50ºC Receiver Sensitivity 0.25uV (Wide)/0.35uV (Narrow) 45 (Wide) /40dB (Narrow) Modulation Acceptance 2*7.5KHz/2*3.5KHz Adjacent Channel Selectivity...
  • Page 24: Frequency Chart

    Frequency Chart Model: Serial Number: Channel Transmit Transmit Transmit Transmit Transmit Transmit Receive Receive Receive Receive 2-Tone Receive Frequency CTCSS CDCSS 2-Tone 5-Tone ANI DTMF Frequency CTCSS CDCSS 5-Tone...
  • Page 25 HYT endeavor to achieve the accuracy and completeness of this manual, but cannot guarantee its accuracy at all times. All the above specifications and design are subject to change without notice. All the reproduction and translation of this manual without authorization of HYT is not allowed.

This manual is also suitable for:

Tc3600 uhf

Table of Contents