Table of Contents
Advertisement
Advertisement
Table of Contents

Subscribe to Our Youtube Channel
Related Manuals for HYT TC-310 OBR


Summary of Contents for HYT TC-310 OBR
- Page 1 TC-310 OBR www.hytera.us...
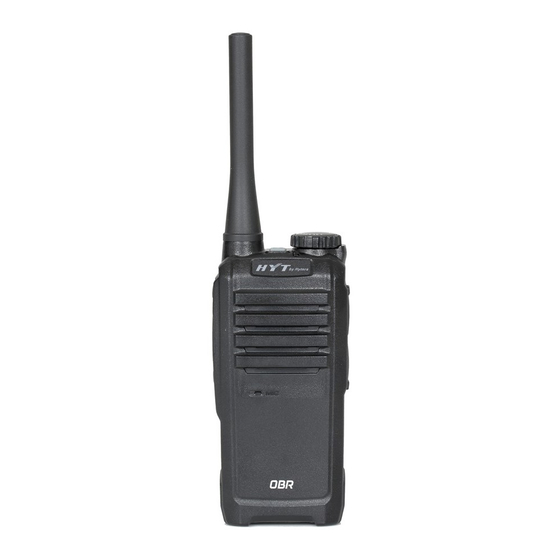
- Page 2 Thank you for purchasing Hytera’s HYT TC-310 On-Site Business Radio. With its unique compact design and crystal clear sound quality the HYT TC-310 OBR is the ideal radio solution for schools, retail locations, hotel management, restaurants, manufacturing and other small to mid-sized organizations looking for quick, easy and dependable communications at a great value.
-
Page 3: Copyright Information
Note: indicates important information which helps you make better use of your radio. Copyright Information HYT is registered trademarks of Hytera Communications Corporation Limited (the Company) in P.R.C and other countries and/or areas. Hytera retains the ownership of its trademarks and product names. All other company and/ or product names used in this manual are trademarks and/or registered trademarks of their respective owners. - Page 4 FCC License Information This device complies with Part 15 and Part 90 of the FCC Rules. Operation is subject to the condition that this device does not cause harmful interference. On-Site business two-way radios operate on radio frequencies that are regulated by the FCC.
-
Page 5: Table Of Contents
Contents Safety Information --------------------------------------------------------------------------------- 2 Product Inspection -------------------------------------------------------------------------------- 3 Radio Overview ------------------------------------------------------------------------------------- 4 Battery Information -------------------------------------------------------------------------------- 6 Antenna Information ------------------------------------------------------------------------------ 10 Assembly and Disassembly ------------------------------------------------------------------- 10 Attaching/Removing the Battery ---------------------------------------------------------- 10 Attaching/Removing the Antenna --------------------------------------------------------- 11 Attaching/Removing the Belt Clip --------------------------------------------------------- 11 Attaching/Removing the External Earpiece/Mini USB Device -------------------- 12 Basic Operations ----------------------------------------------------------------------------------- 13 Turning the Radio On/Off ------------------------------------------------------------------- 14... -
Page 6: Safety Information
Safety Information The following safety precautions shall always be observed during operation, service and repair of this equipment. ● This equipment shall be serviced by qualified technicians only. ● Do not modify the radio for any reason. ● Use only Hytera supplied or approved batteries and chargers. ●... -
Page 7: Product Inspection
Product Inspection Please unpack the package box carefully and check that all shipped items are received; report any missing or damaged items to your reseller. Accessories supplied with the radio Item Qty. (PCS) Antenna Strap Belt Clip Li-Ion Battery Switching Power Owner’s Manual Antenna Li-Ion Battery... -
Page 8: Radio Overview
(6) Volume Control Key [-] (18) MINI USB Port (7) Programmable Function Key (19) Screw for Belt Clip (8) Microphone (20) Battery (9) Channel Selector Knob (21) Belt Clip (10) Channel Mark (22) Charging Piece (11) Status Indicator (23) Battery Latch (12) HYT Logo... -
Page 9: Led Indicator
Radio Overview ﹡PTT (Push-to-Talk) Key Press and hold down the PTT key to transmit, and release it to receive. ﹡LED Indicator Status indications and alert tones are shown in the table below: When the radio is turned on, an alert tone sounds and Power On (to enter the Status Indicator flashes orange once. -
Page 10: Battery Information
Radio Overview ﹡Mini USB Port Used to connect accessories such as programming cable, cloning cable and switching power. Battery Information Initial Use New batteries from the factory are not fully charged, so be sure to charge a new battery for at least 5 hours before initial use. Three full charge-discharge cycles would optimize the capacity and performance of your battery. -
Page 11: Charging The Battery
Battery Information 7. Do not charge fully charged batteries for an “extra boost”. This action will significantly reduce battery life. 8. Do not insert the radio or battery into the charger when it doesn’t need to be charged, because continuous charging will shorten the battery life. - Page 12 Battery Information Please follow steps below to charge the radio with switching power: 1. Plug the AC connector of the switching power into an AC outlet socket. 2. Plug the Mini USB connector of the switching power into the Mini USB port at one side of the radio unit.
- Page 13 Battery Information 1. Plug the AC connector of the switching power into an AC outlet socket. 2. Plug the Mini USB connector of the switching power into the Mini USB port on back of the desktop charger. 3. Place the radio with the battery attached, or the battery alone, into the charger.
-
Page 14: Antenna Information
Battery Information Latch of Desktop Charger Figure 2 Diagram of Multi-Unit Charger Assembly Antenna Information ● Stubby antenna is durable and ideal for communication at low transmit power. ● Communication range may vary with terrain and your operating conditions. Rainy days or forest locations may narrow your communication range, so please make full preparations in advance to avoid potential inconvenience. -
Page 15: Attaching/Removing The Antenna
Assembly and Disassembly Figure 1 Figure 2 Removing the Battery 1. Make sure the radio is powered off first. Press the belt clip down (in direction of ① ) to make its bottom up. Then lift the battery latch (in direction of ②... -
Page 16: Attaching/Removing The External Earpiece/Mini Usb Device
Assembly and Disassembly Figure 5 Figure 6 Attaching/Removing the Belt Clip Attaching the Belt Clip Unfasten the two screws for belt clip by a screwdriver, then place the belt clip on the radio and align its two holes with two threaded holes of the radio, and secure the two screws again. - Page 17 Assembly and Disassembly Figure 7 Removing the External Earpiece Take converse steps to remove the external earpiece. Note: When the earpiece is not in use, make sure the accessory jack is properly covered to prevent intrusion of dust. Attaching the External Mini USB Device Uncover (not remove) the Accessory Cover (in direction of ①...
-
Page 18: Basic Operations
Basic Operations Turning the Radio On/Off Long press the Power On/Off Key until an alert tone is heard to turn the radio on/off. Adjusting the Volume Press [+] to increase or [-] to decrease the volume level. During volume adjustment, the radio will sound alert tones at your selected volume level. Selecting a Channel Rotate the Channel Selector Knob to align your desired channel number with the Channel Mark. -
Page 19: Advanced Operations
Programmable Auxiliary Functions ● Squelch Off Momentary ● Battery Strength ● Channel Lock (When this function is enabled, your current operating channel will remain unchanged even if you rotate the Channel Selector Knob. And this feature always remains valid after PC programming.) Advanced Operations The following functions can be programmed via programming cable and CPS software. -
Page 20: Battery Strength Indicator
Advanced Operations Battery Strength Indicator When you intend to know the battery strength, press the programmed Battery Strength Indication key to illuminate the Status Indicator and learn the battery strength by different colors. To exit this function, release the key. Status Indicator of different colors represents different battery strength levels. -
Page 21: Scan
Advanced Operations ● Monitor Purpose: In this mode, the receiving party can receive incoming calls regardless of CTCSS/CDCSS condition. If the carrier condition is not satisfied, the receiving party will fail to receive any incoming calls. Operation: Press the Monitor key to enter this mode, and press it again to exit. - Page 22 Advanced Operations Figure 1 Normal Scan Sequence Figure 2 Priority Scan Sequence ● Scan On/Off You can enter Scan mode through any of the following two methods: Key-operated Entry Press the programmed Scan key to enter Scan mode, provided that there are no less than 2 channels in the scan list.
-
Page 23: Busy Channel Lockout (Bcl)
Advanced Operations Note: Even though the radio stays on a non-priority channel, activities on the priority channel are still under detection. The radio will switch to the priority channel once any activity is detected. ● Available Keys in Scan Mode PTT key, Volume Control Key [+]/[-], Squelch Off key, Squelch Off Momentary key, Monitor and Monitor Momentary keys. -
Page 24: Compandor
Advanced Operations 4. The VOX function will work with a dedicated earpiece. 5. You dealer may set VOX sensitivity or disable the VOX feature through the programming software. The VOX key will be null once the VOX feature is disabled. Compandor With this feature, you can communicate with clear voice in despite of various noises. -
Page 25: Troubleshooting
Troubleshooting Symptom Solution ● The battery may have run out. Please recharge the battery or replace it with a new one. Cannot power on the radio. ● The battery may have been improperly installed. Please remove the battery and insert it again. ●... -
Page 26: Care And Cleaning
Care and Cleaning ● Do not hold the radio by its antenna or external earpiece directly. ● Do not place the radio in a dusty or dirty environment. ● Clean the radio with a lint-free cloth to remove dirt or grease, to avoid poor contact due to excessive dust. -
Page 27: Default Frequency List
Default Frequency List Channel Table No. Frequency (MHz) Code (Hz) 464.5500 67.0 467.9250 67.0 461.0375 67.0 461.0625 67.0 461.0875 67.0 461.1125 67.0 461.1375 67.0 461.1625 67.0 464.5000 67.0 467.7625 67.0 467.8125 67.0 467.8500 67.0 467.8750 67.0 467.9000 67.0 461.1875 67.0 461.2125 67.0 Frequency and Codes Chart... - Page 28 Frequency and Codes Chart Table No. Frequency (MHz) Table No. Frequency (MHz) 461.0875 469.5625 461.1125 462.1875 461.1375 462.4625 461.1625 462.4875 461.1875 462.5125 461.2125 467.1875 461.2375 467.4625 461.2625 467.4875 461.2875 467.5125 461.3125 451.1875 461.3375 451.2375 461.3625 451.2875 462.7625 451.3375 462.7875 451.4375 462.8125 451.5375 462.8375...
-
Page 29: Ctcss And Cdcss Codes
CTCSS AND CDCSS CODES CTCSS Codes CTCSS CTCSS 67.0 131.8 69.3 136.5 71.9 141.3 74.4 146.2 77.0 151.4 79.7 156.7 82.5 162.2 85.4 167.9 88.5 173.8 91.5 179.9 94.8 186.2 97.4 192.8 100.0 203.5 103.5 210.7 107.2 218.1 110.9 225.7 114.8 233.6 118.8... - Page 30 CTCSS AND CDCSS CODES CDCSS CDCSS CDCSS Hytera offers free download CPS software to modify/configure OBR radios per user specific requirements. The software is available on www.hytera.us.
-
Page 31: Default Factory Feature List
HYTERA AMERICA, INC. warrants its manufactured Communication Products against defects in material and workman-ship under normal use and service for a period of time from the date of purchase by end-user as scheduled below: HYT Brand: TC-310 - OBR One (1) year Warranty Exclusions: Defects or damage resulting from use of the Product other than its normal and customary manner. - Page 32 Unapproved upgrades or modifications. Who’s Covered This warranty is not transferable and it only extends to the first consumer purchaser. For Warranty Service or any additional information please contact your Hytera / HYT point of purchase.
- Page 33 Hytera Communications Corporation Limited. 2015 Hytera Communications Corporation Limited. C10524 L06774 8110031000200...
Need help?
Do you have a question about the TC-310 OBR and is the answer not in the manual?
Questions and answers