Table of Contents
Advertisement
Quick Links
Advertisement
Table of Contents

Related Manuals for Selden Furlex 404TD


Summary of Contents for Selden Furlex 404TD
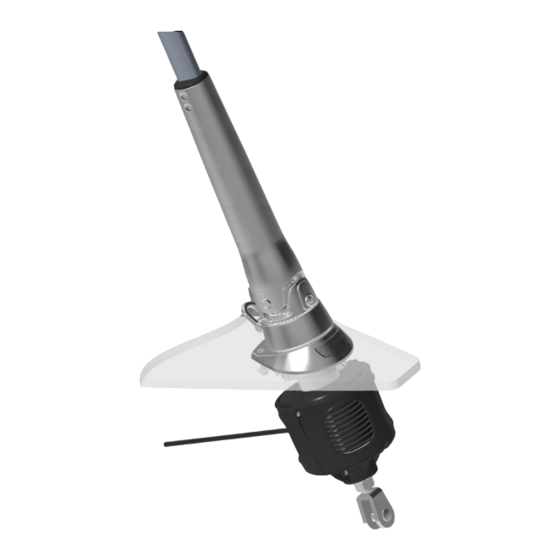
- Page 1 597-465-E 2021-05-05 404TD Manual and Spare parts list Furlex 404TD...
-
Page 2: Table Of Contents
Contents Page Page 1 Introduction 5 Rigging 5.1 Fitting the Furlex to a stepped mast 1.1 Key features 5.2 Fitting the Furlex to an un-stepped mast 1.2 What’s included? 5.3 Routing the furling line 1.3 Main dimensions 5.4 Fitting the stanchion blocks 1.4 Safety precautions 1.5 Sail measurements 6 The Sail... - Page 3 Three options for wire termination Furlex 404TD can be delivered with three wire terminals. The standard version is a Sta-lok wire eye terminal. An alternative is a Sta-lok wire terminal fitted to a rigging screw for adjustability of the forestay length. The stroke is 100 mm.
-
Page 4: What's Included
1.2 What’s included? Basic pack / Extended pack The Furlex TD-system includes a basic pack with drum unit, torque tube, deck fitting, halyard swivel, sail feeder, bearing halves, top guard and furling line. In addition, the extended pack also includes halyard leads, stanchion blocks and pre-feeder pack. -
Page 5: Safety Precautions
1.4 Safety precautions The information in this manual must be followed carefully to Fig. 1.3.a avoid damage to the system and to aviod the risk of personal injury. The warranty is only valid if the system is assembled and operated according to this manual. 10-15°... -
Page 6: Sail Measurements
1.5 Sail measurements Your sailmaker has all the necessary information through the Seldén Sailmakers Guide. The Sailmakers Guide can be downloaded from www.seldenmast.com Note that if you want to use an existing sail, it will need some modifications. • The luff length needs to be adjusted. •... -
Page 7: Assembly Preparations
Assembly preparations 2.1. Tools Before starting with the assembly, make sure you have the following tools available: • Hack saw • Torx bits and bit holder: T25; T30, T45 • Measuring tape • Knife • Hammer • Pencil If Sta-lok is to be fitted you will also need: •... -
Page 8: Hull Attachment
2.3 Hull attachment The lower bearing assembly of the Furlex TD system is to be considered as an extension of the forestay fitting inside the hull. As it is locked horizontally at deck level, there is a toggle fitted between the lower bearing assembly and the forestay/luff section. -
Page 9: Location Of The Through-Deck Hole
2.4 Location of the through-deck hole The bearing of the through-deck fitting has a spherical surface which compensates for smaller Fig. 2.4.a angle discrepancies between forestay and through-deck fitting. However, it is important to minimize the discrepancies to achieve maximum furling performance. - Page 10 2.4.1 Mast is not stepped 2.4.2 Mast is stepped using a forestay attached to the final forestay chainplate Establish the forestay angle. Use an accurate 1. Make a jig which represents the forestay angle (FA) drawing, which shows details of the area of the above deck (See fig.
-
Page 11: Calculating The Length Of The Forestay Wire
2.5 Calculating the length of the forestay wire. (The following is valid for a yacht with the mast stepped.) If a Sta-lok terminal (with or without rigging screw) is included, the wire is supplied over-length. The wire has a swaged eye terminal on one end while the other end is open (= without terminal). If your Furlex is supplied with a fixed-length forestay, with a swaged eye on one end and a swaged stud in the other end, skip this part and go directly to 2.6. -
Page 12: Calculating The Length Of The Luff Extrusion
2.6 Calculating the length of the luff extrusion The Furlex luff extrusion consists of a number of shorter sections. Starting from the bottom there is a 560 mm luff extrusion connected to the drum unit and extending up to the sail feeder. Then, from the sail feeder and up there are a number of full length luff extrusions (L=2400 mm) and finally there is a 1700 mm top extrusion that has to be cut to length to suite the actual forestay length. - Page 13 If, as in our example, D becomes less than 700 mm it is necessary to recalculate as below and cut one of the full length luff extrusions according to Dnew and one of the full length distance tubes according to Enew. Note that the original top luff extrusion and the original top distance tube will now be used as intermediate extrusions.
-
Page 14: Fitting The Lower Bearing Assembly
Assembly of the Furlex system 3.1 Making deck hole and fitting of through-deck fitting The best way to decide the location of the through-deck fitting is to step the mast with a forestay, which passes through a smaller hole in the deck. If using this procedure follow the instruction starting at item 1. -
Page 15: Fitting The Lower Bearing Assembly
8. Fit the through deck fitting. The markings (A), fore and aft of the fitting, will help to center the fitting in the longitudinal direction. The deck fitting has a compartment for sealing compound which can be used if required. Check that the through deck fitting rests against the aft edge of the hole when the the screws are tightened. -
Page 16: Fitting The Furling Line
3.3 Fitting the furling line Feed the furling line through the line guide cover half with the screws. Feed the rope through the two ”channels” in the drum. Fit the first screw through the rope approximately 25 mm from the rope end. Then tighten up the rope and push it into the jaw-slot before fitting the second screw. -
Page 17: Assembly Of The Luff Extrusion
4 Assembly Prior to the assembly of the luff extrusion, the top extrusion and the top distance tube shall be cut according to table 3. 4.1 Assembly of the luff section Luff assembly should be carried out on a clean, flat surface. Make sure there is enough space for the entire forestay length to be stretched out. - Page 18 9. Repeat for the remaining 2400 mm luff extrusions. Use short joining sleeves only. 10. Fit the long joining sleeve (785mm) onto the wire with four-hole end oriented downwards. Then fit the short (560mm) luff extrusion, four-hole end oriented as shown. Fit the long connecting plate in the 560mm extrusion and push the long joining sleeve upwards to hold it in position.
-
Page 19: Fitting The Wire
15. Loosen the screws of the torque tube somewhat and feed the torque tube on to the luff section. Protect the luff section and the torque tube with paper or plastic. Secure the torque tube with tape before rigging. Mark the luff section 67 mm from the edge of the luff section to help aligning the screws with the holes in the luff section at a later stage. - Page 20 Space the outer strands of the wire evenly around the wedge and bring down the socket so that the strands are held in place. Hold an adjustable spanner between the 700 mm extrusion and the socket. Tapping the core of the wire, locate it firmly in the socket. Check that the core of the wire protrudes approx.
-
Page 21: Fitting Eye Terminal To The Swaged Terminal
4.3 Fitting eye terminal to swaged stud (Stud/Eye) 1. Screw the eye terminal part onto the stud terminal until the holes in stud and eye align. 2. Fit the spirol spring pin using a hammer to permanently lock the terminal. 3. -
Page 22: Rigging
5 Rigging The Furlex system is best transported and rigged together with the mast. 5.1 Fitting the Furlex on a stepped mast 1. Slacken the backstay as much as possible, but make sure that any rigging screw is not unscrewed so far that the threads are no longer visible ”on the inside”. -
Page 23: Fitting The Furlex To An Un-Stepped Mast
7. Slide the torque tube down and fit it to the lower bearing assembly. Align the marking on the torque tube with corresponding mark on the bearing assembly, fig 5.1.d. Apply locking adhesive to the screws and fit the bushings attaching the torque tube to the bearing assembly. -
Page 24: Routing The Furling Line
5.3 3 Routing the furling line The illustration below shows of principal arrangement of furling line routing inside a anchor well to achieve maximum furling performance. The turning block inside the anchor well and the sheave box required to lead the line through the deck are not included in the Furlex package as these parts must be individually adopted for each boat. -
Page 25: Fitting The Stanchion Blocks
5.4 Fitting the stanchion blocks The Furlex kit contains 6 fixed stanchion blocks for fitting on a Ø25 mm (63/64”) stanchion. The fixed blocks can also be fitted on Ø30 mm (1 3/16”) stanchions, but the standard screws must be replaced by M6x25 mm screws. -
Page 26: The Sail
6 The sail 6.1 Adapting the sail to the Furlex system To fit the Furlex system, an existing sail may need a number of modifications. The maximum luff length is calculated as shown in Table 1 page 6 FLD-(F+E). Existing forestay length FLD as per Table 2, page 11. It is most important that the halyard swivel is located so that the halyard satisfies the 5–10°... -
Page 27: Adjusting The Forestay Length
6.2 Adjusting the forestay length The Furlex system may be supplied with or without an integrated rigging screw. With an integral rigging screw, the forestay length can be easily adjusted. Tensioning the forestay however, is done by tensioning the cap shrouds and/or the backstay, and not by tensioning the forestay rigging screw. The sail must be removed or unfurled and halyard slackened before the forestay length can be adjusted. -
Page 28: Checklist
6.3 Checklist Go through the checklist below and make sure that all the important steps have been carried out. This will ensure that the Furlex system functions safely and reliably for many years and in all conditions. • Check that the angle between the halyard and forestay is 10–15° when the sail is hoisted. •... -
Page 29: Unfurling The Sail
14. When the sail is hoisted, check that the halyard swivel is at least 50 mm below the top guard and that the halyard angle satisfies the 10–15° requirement. 15. Finally, mark the halyard as shown to prevent overtensioning. This is very important! Also mark the maximum tension position of any backstay adjuster. -
Page 30: Reefing The Sail
6.7 Reefing Furlex is provided with a tack attachment which rotates in relation to the luff extrusion. When furling and simultaneously applying a limited countertension in the sheet, the luff extrusion makes approximately one revolution before the tack fitting starts rotating as well. The part of the sail with the biggest draft will in this way be flattened. -
Page 31: Maintenance
7 Maintenance 7.1 Inspection • To ensure that the system rotates easily and functions satisfactorily year after year, regular inspection and maintenance should be carried out once a year. Maintenance is simple, even with the Furlex rigged on the boat. •... -
Page 32: Dismantling
7.4 Dismantling Never take the halyard swivel or the drum unit apart as you will find it difficult to re-assemble them correctly. (The ball-bearings are loose and difficult to refit!). Contact your Furlex dealer if service is required. 7.4.1 Sail feeder Fig. - Page 33 7.4.4 Brims Loosen the two screws little by little and pull the brims apart gradually. This way the screws and plastic locking washers will remain on the brims. Fig. 7.4.4.a 7.4.5 Disconnecting the forestay 1. Loosen the upper screws. (1). Support the luff section before the lower screws are loosened to prevent the luff section from dropping onto the terminal or rigging screw.
- Page 34 7.4.6 Sta-lok-terminal 1. To remove the Sta-lok eye, heat up the threads to release the locking adhesive. 2. Remove the terminal part (or rigging screw) from the socket. 3. Remove the former from the bottom of the terminal part. Fig. 7.4.6.a 4.
- Page 35 7.4.9 Halyard swivel The halyard swivel is removed from the system by sliding it downwards in conjunction with dismantling the sail feeder and removing the drum unit. Alternatively, the halyard swivel can be slid up after the top guard has been removed.
-
Page 36: Trouble Shooting
7.5 Trouble shooting Problem Probable cause Action 7.5.1 ”The sail will not unfurl or will only • The jib halyard is wrapped around the • Ease the halyard slightly and try to partly unfurl.” luff extrusion. reverse the system. • Another halyard is wrapped around the •... - Page 37 7.5.5 ”The sail is hard to hoist” • The luff tape is too thick. • Return the sail to the sailmaker and refer to this manual. • The sail is caught on something or is • Arrange the sail better on the foredeck. not sufficiently loose on the foredeck.
-
Page 38: Spare Parts And Accessories
8 Spare parts and accessories... -
Page 39: Spare Parts
8.1 Spare parts and accessories Forestay wire size Item Description Dimension Ø12/Rod-30 Ø14/Rod-40 Torque tube Ø110x507 549-472-02R Lower bearing L=70 549-438-02R Sail feeder L=75 549-423-01R Line drum replacement kit Ø122 549-403-10R Brim Ø182 549-478-01R Line cover Ø203 549-477-01R Deck fitting Ø182 549-459-01R Bushings... - Page 40 Serie 404TD Forestay wire size Description Dimension Ø12 mm Ø14 mm Furlex grease ~100g 312-501 312-501 Furling line Ø12 L=40000 612-036-01 612-036-01 Stanchion block For Ø25/30 538-210-02R 538-210-02R Pre-feeder pack 505-538-01R 505-538-01R Locking adhesive 312-305 312-305 Soft shackle 8 (5 mm) 614-523R 614-523R Connecting plate...
- Page 41 Luff extrusion pack 404TD Including luff extrusions, joining sleeves, distance tubes and connecting plates for forestay lengths according to table. Description Dimension (FLD max) Art. No. Luff extrusion pack 14980 549-432-32 Single luff extrusion pack 404TD Including 1 pcs luff extrusion, 1 pcs joining sleeve, 1 pcs distance tube and 1 pcs connecting plate. Description Art.
-
Page 42: Toggles
8.2 Toggles (Forestay mast attachment only) Forestay Dimensions Toggle type Ø 12 Ø 14 Eye/fork toggle Article No. 174-134-01 174-135-01 Length (H) Ø Eye (D1) Ø Clevis pin (D2) Fork width (W2) Fork/Fork toggle Article No. 517-052-02 517-053-02 Length (H) Ø... - Page 43 7 Warranty Seldén Mast AB guarantees the Furlex-system for 2 years. The guarantee covers faults arising from defective design, materials or workmanship. The guarantee is only valid if the Furlex-system is assembled, operated and maintained in accordance with this manual and is not subjected to loads in excess of those indicated in the brochure and instructions. Complete shipment and warranty conditions are to be found on Seldéns website www.seldenmast.com.
- Page 44 DINGHIESKEELBOATSYACHTS The Seldén Group is the world’s leading manufacturer Seldén Mast AB, Sweden Tel +46 (0)31 69 69 00 of mast and rigging systems in carbon and aluminium e-mail info@seldenmast.com for dinghies, keelboats and yachts. Seldén Mast Limited, UK Tel +44 (0) 1329 504000 e-mail info@seldenmast.co.uk Our well known brands are Seldén and Furlex.
Need help?
Do you have a question about the Furlex 404TD and is the answer not in the manual?
Questions and answers