Table of Contents
Advertisement
Quick Links
Advertisement
Table of Contents

Subscribe to Our Youtube Channel
Related Manuals for Schweigen BRW622


Summary of Contents for Schweigen BRW622
- Page 1 INSTALLATION GUIDE BRW600 BRW622 www.schweigen.com.au Revision V4 06/12/21...
-
Page 2: Welcome
This will ensure your personal safety and the lasting value of your motor system. We trust that you will enjoy your new Schweigen BRW600 system. Please always retain your proof of purchase to aid in any warranty queries. -
Page 3: Table Of Contents
Table of Contents 1. Welcome _____________________________________________________________________________________ 2 2. Your Safety Warning _______________________________________________________________________________________ 4 Before Installation ______________________________________________________________________________ 4 Electrical Cord __________________________________________________________________________________ 4 3. General Motor Features ________________________________________________________________________________ 5 General Notes on Installation and Use ____________________________________________________________ 5 Recommended Installation Distance _____________________________________________________________ 5 Minimum Mounting Height ______________________________________________________________________ 6 Avoidance of Back Flow _________________________________________________________________________ 6 Safety of Children ______________________________________________________________________________ 6... -
Page 4: Your Safety
2. Air exhaust must be installed in accordance with local laws. Before Installation We recommend this appliance to be installed or repaired by a qualified Schweigen Home Appliances technician. Please see our website www.schweigen.com.au for recommended installers. It is dangerous to modify any part of this appliance. Modification of any kind, will immediately void the warranty. -
Page 5: General
3. General This manual is for the installation of the motor systems use for bathroom and general extraction. Motor Features • Universal mounting all position with IPX4 degree of weather protection • Patented anti water intrusion system. • Acoustic dome with super quiet, long vane, backward curved centrifugal fan. •... -
Page 6: Minimum Mounting Height
Any installation problems must be reported to Schweigen. Call outs relating to incorrect installation will result in a service fee direct to the customer. Schweigen takes no responsibility for problems caused by faulty installation. Faulty installation may void warranty. A preferred installer list can be obtained from the Schweigen website www.schweigen.com.au or call 1300 881 693. -
Page 7: Roof Installation
The pipe should be mounted either vertically or perpendicular to the roof cladding with the roof penetration being sealed using a Dektite or other sealing device. Please note Schweigen do not provide any sealing kits. Ensure that the pipe protrudes at least 80mm past the top of the Dektite, checking that the mounting flange clears the roof cladding at upper edge as shown in figure 1. - Page 8 4. Installation Locking Screw Fan Module Please refer to page 12 (Figure 6) for back draft shutter fitment Roof Clading Mounting Flange Dektite Slot option Roof Frame Optional 110mm PVC Pipe bend Secure pipe to structure Slot pipe for power cord exit.
-
Page 9: Eaves Installation
4. Installation 2. Eaves Installation After ensuring sufficient clearance exists for the mounting flange and ducting (figure 1), cut a circular hole 165mm Ø, maintaining adequate clearances. The eave sheeting must be reinforced. Pre-drill mounting flange recess (figure 4). If access to the eave space is restricted, before fixing the mounting flange to the eave, preassemble the mounting flange, PVC pipe, bell-mouth adaptor and flexi-duct, then feed up into roof space. -
Page 10: Wall Installation
4. Installation 3. Wall Installation The installation should be similar to eaves mounting if access to the inside is limited, but if unrestricted. Refer to EAVES INSTALLATION and figure 5. Please refer to page 12 (Figure 6) for back draft shutter fitment Min 90mm long PVC pipe Min 20mm Bell-mouth Adaptor... -
Page 11: Optional Dvw600 Installation
4. Installation BRW622 Duel Vent System or optional DVK600 Installation For dual installation, bathroom, toilet or laundry Bell-mouth Adaptor 2m of ducting Back Draft Stopper Y-branch To main power/switch 2m of ducting Additional dual vent kit, Y-branch, 3 metre length flexi ducting and... -
Page 12: Back Draft Shutter System
5. Back Draft Shutter System Back Draft Shutter System Fitment to Bell-mouth Adaptor This back draft shutter system cannot be installed in eave type installation. Vertical Installation Figure 7 shows an example of vertical installation. Tape over flanges Air flow Back draft shutter system Figure 7 Back draft shutter system... -
Page 13: Flexible Ducting
Incorrect installation may reduce airflow and increase noise levels. Call outs relating to incorrect installation will result in a service fee directed to the customer. Schweigen will take no responsibility for problems caused by faulty installation. Installation must be carried out by a qualified technician. -
Page 14: Shallow Roof Space
6. Flexible Ducting Shallow Roof Space In shallow roof spaces, 90 degree elbow PVC joint can be used as a substitute for the bend. Page 14... - Page 15 6. Flexible Ducting Securing Flexible Duct Flexible duct must be installed with supports at maximum intervals of 1.5 metres. Flexible ductwork can be supported by using gaffer or electrical tape, provided that it does not restrict the internal diameter of the ducting.
-
Page 16: Maintenance
7. Maintenance Roof Restoration or Cleaning Before roof restoration or cleaning, please completely cover the outside motor system and avoid all chemical contact. IMPORANT Any damages caused by the use of chemical products are not covered by warranty. Figure 10 Avoid chemical contacted to motor system Page 16... -
Page 17: Measurements
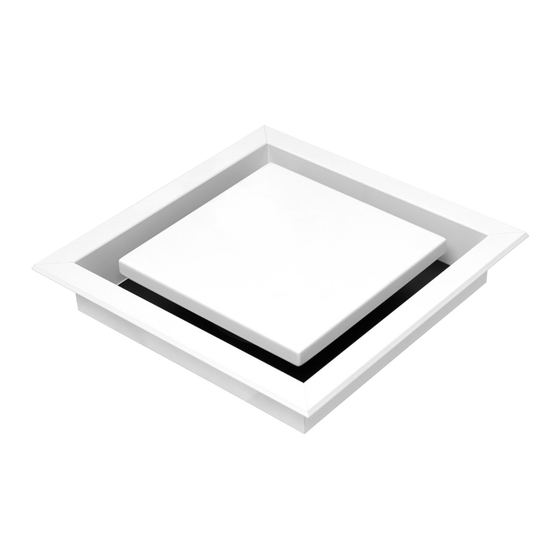
8. Measurements Vent 194.35 Two timber support batons by installer 150mm reducer 194.25mm outlet Ceilling 240 x 240 255 x 255 Page 17... -
Page 18: Brw600 Motor
8. Measurements BRW600 Motor 35 minimum 370mm Please refer to page 12 (Figure 6) for back draft shutter fitment Page 18... -
Page 19: Warranty / Disclaimer
It is not the responsibility of Schweigen Home Appliances to rectify any incorrect installations. A service call out fee will be charged for any Schweigen technician that attends a call, whereby it is established that the fault is due to an incorrect installation or non-manufacturing fault. Should the appliance be installed in such a way that the service agent is unable to gain access to the appliance, the person/s who own the premises where the appliance resides —... - Page 20 Australia 4/1-5 Lake Drive, Dingley Village, Victoria 3172. Phone 1300 881 693 Email sales@schweigen.com.au Web www.schweigen.com.au New Zealand 5 Tolich Place, Henderson, Auckland 0610. Phone 0800 200 510 Email info.parex@emerson.com Web www.parex.co.nz SCH00015...
Need help?
Do you have a question about the BRW622 and is the answer not in the manual?
Questions and answers