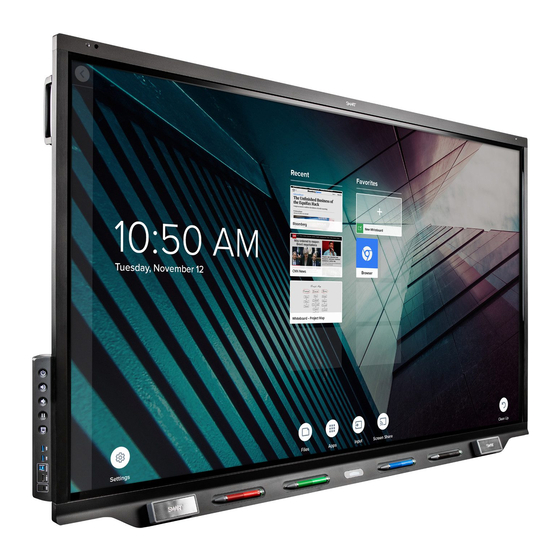
SMART Board 7000R Series User Manual

SMART Board 7000R Series User Manual

Hide thumbs Also See for 7000R Series:
Table of Contents

Advertisement

Quick Links

SMART Board®
7000R and 7000R Pro series
interactive displays
USER GUIDE
SBID-7275R
|
SBID-7286R
|
SBID-7275R-P
SBID-7075R
|
SBID-7086R
|
SBID-7075R-P
IDR775-1
|
IDR786-1
Was this document helpful?
smarttech.com/docfeedback/171539
|
SBID-7286R-P
|
SBID-7086R-P

Advertisement

Table of Contents
loading
Need help?

Need help?

Do you have a question about the 7000R Series and is the answer not in the manual?

Questions and answers

Summary of Contents for SMART Board 7000R Series

  • Page 1 SMART Board® 7000R and 7000R Pro series interactive displays USER GUIDE SBID-7275R SBID-7286R SBID-7275R-P SBID-7286R-P SBID-7075R SBID-7086R SBID-7075R-P SBID-7086R-P IDR775-1 IDR786-1 Was this document helpful? smarttech.com/docfeedback/171539...
  • Page 2 Learn more This guide and other resources for SMART Board 7000R and 7000R Pro series interactive displays are available in the Support section of the SMART website (smarttech.com/support). Scan this QR code to view these resources on your mobile device. Licenses The terms HDMI and HDMI High-Definition Multimedia Interface, and the HDMI logo are trademarks or registered trademarks of HDMI Licensing LLC in the United States and other countries.
  • Page 3: Important Information

    Important information ENERGY STAR® NOTE Refer to the SMART Board 7000R and 7000R Pro series ENERGY STAR is the government-backed symbol interactive displays installation and maintenance guide for energy efficiency, providing simple, credible, (smarttech.com/kb/171538) for important information about and unbiased information that consumers and installing and maintaining the display.
  • Page 4 Important information This device complies with Part 15 of the FCC Rules. Operation is NOTE subject to the following two conditions: This equipment has been tested and found to comply with the 1. This device may not cause harmful interference, and limits for a Class A digital device, pursuant to part 15 of the FCC Rules.
  • Page 5 Important information Regulatory IDRMOD1 (iv) De plus, les utilisateurs devraient aussi être avisés que les Model: utilisateurs de radars de haute puissance sont désignés utilisateurs principaux (c.-à-d., qu’ils ont la priorité) pour les bandes 5 250–5 350 MHz et 5 650–5 850 MHz et que ces This device complies with ICES-003 of the Innovation, Science radars pourraient causer du brouillage et/ou des dommages and Economic Development Canada Rules.
  • Page 6: Table Of Contents

    Contents Important information Chapter 1: Welcome About this guide About the display Identifying your specific model Accessories More information Chapter 2: Using basic features Waking up the display and putting it back in to an energy saving mode Using the Home button Using the convenience panel Using the remote control Using touch...
  • Page 7 Contents The display is turning on when it shouldn’t The screen is blank or there’s a problem with the image on the screen There’s no sound or there’s a problem with the sound Touch isn’t working as expected The pens and erasers aren’t working as expected iQ apps aren’t working as expected SMART software on connected computers isn’t working as expected The SMART OPS PC module isn’t working as expected...
  • Page 8: Chapter 1: Welcome

    Chapter 1 Welcome About this guide About the display Touch Writing, drawing, and erasing iQ experience Display Audio Network connectivity Room computers and guest laptops Accessory slot Convenience panel Proximity sensors Ambient light sensor Remote control and IR sensor Mounting hardware Identifying your specific model Accessories SMART OPS PC module...
  • Page 9: About The Display

    Chapter 1 Welcome About the display The SMART Board 7000R or 7000R Pro series interactive display is a powerful but easy-to-use collaboration tool that you can use to achieve better outcomes. The display includes an extensive set of features and components. Touch You can do everything on the display that you can do at your computer—open and close applications, meet with others, create new documents or edit existing ones, visit websites, play and manipulate videos, and so...
  • Page 10 Chapter 1 Welcome Writing, drawing, and erasing The display comes with black, red, blue, and green pens, which you can use to write or draw on the screen. In addition to the pens, the display includes two erasers, which you can use to erase digital ink on the screen.
  • Page 11 Chapter 1 Welcome The size of the display varies by model: Models Size (diagonal) SBID-7275R, SBID-7275R-P, SBID-7075R, and SBID-7075R-P 75" SBID-7286R, SBID-7286R-P, SBID-7086R, and SBID-7086R-P 86" Audio The display includes two 15 W integrated speakers, which are designed to provide sound at the front of a room.
  • Page 12 Unlike with older SMART Board interactive displays, you don’t need to install an AM30, AM40, or AM50 appliance in the accessory slot to use the iQ experience on SMART Board 7000R and 7000R series displays. The iQ experience is embedded on these displays (see iQ experience on page 10). For this reason, SMART doesn’t recommend installing AM30, AM40, or AM50 appliances in these displays’...
  • Page 13 Chapter 1 Welcome For more information, see Waking up the display and putting it back in to an energy saving mode on page 16. Ambient light sensor The ambient light sensor is located in the top-right corner of the display’s frame. The ambient light sensor detects the brightness of the room and adjusts the screen’s brightness accordingly.
  • Page 14: Identifying Your Specific Model

    Chapter 1 Welcome Identifying your specific model SMART offers different models of the SMART Board 7000R and 7000R Pro series interactive display: Model Frame style Screen size (approximate) SBID-7275R White 75" SBID-7286R White 86" SBID-7275R-P Black 75" SBID-7275R-PW White 75" SBID-7286R-P Black 86"...
  • Page 15: More Information

    Chapter 1 Welcome SMART OPS PC module SMART Open Pluggable Specification (OPS) PC modules provide a hassle-free Windows 10 Pro installation based on eighth generation Intel® Core™ processors and are designed specifically to work with a SMART display. All OPS PC modules are WHQL certified and fully licensed with Windows 10 Pro.
  • Page 16: Chapter 2: Using Basic Features

    Chapter 2 Using basic features Waking up the display and putting it back in to an energy saving mode Using the Home button Using the convenience panel Using the remote control Using touch Using the pens and erasers Pairing the pens with the display Writing and drawing in digital ink Using the SMART Ink dynamic (floating) toolbar Changing a pen’s default color, thickness, and other properties...
  • Page 17: Using The Home Button

    Chapter 2 Using basic features The display remains in this energy saving mode until all pens are fully charged. The display enters a full energy saving mode after all pens are fully charged and the sensor or sensors don’t detect anyone in the room.
  • Page 18: Using The Convenience Panel

    Chapter 2 Using basic features Using the convenience panel The convenience panel contains buttons for turning the display on and off, controlling the volume, freezing and unfreezing the screen, and showing and hiding a screen shade. It also includes connectors for USB peripherals and a computer or other input source.
  • Page 19: Using The Remote Control

    Chapter 2 Using basic features NOTE The Power button indicates the display’s status: Power button Display status Not receiving power Amber In an energy saving mode White In normal operating mode Using the remote control The display comes with one of two infrared remote control models. These models are similar, except one has a screen sharing button.
  • Page 20 Chapter 2 Using basic features Name Procedure Press to wake the display or put it back to sleep (see Waking up the Power display and putting it back in to an energy saving mode on page 16). Press and hold for four seconds to turn off the display. Press and hold for 10 seconds to reset the display.
  • Page 21: Using Touch

    Chapter 2 Using basic features Name Procedure Settings Open iQ Settings. Hide screen contents behind a screen shade (see Showing and Screen shade hiding the screen shade on page 26). Freeze and unfreeze the screen (see page 26). Freeze frame Volume increase Increase the volume (see Adjusting the volume on page 25).
  • Page 22 Chapter 2 Using basic features Pan (one finger) Pan (two fingers) / scroll Pinch to zoom in / scale (enlarge) Pinch to zoom out / scale (reduce) Rotate Flick Erase with palm Erase with fist smarttech.com/kb/171539...
  • Page 23: Using The Pens And Erasers

    SMART Board 7000R and 7000R Pro series interactive displays (see smarttech.com/kb/171230). If you previously paired a pen with a SMART Board 7000R or 7000R Pro series interactive display, you must pair it with another display to use it with that display.
  • Page 24: Using The Smart Ink Dynamic (Floating) Toolbar

    Chapter 2 Using basic features To write or draw in digital ink 1. Pick up one of the display’s pens. 2. Use the pen to write or draw in digital ink. TIPS When you’re writing or drawing with a pen, you can rest your palm on the screen. The display won’t interpret your palm as a pen or an eraser.
  • Page 25: Adjusting The Volume

    Chapter 2 Using basic features Determining a pen’s status When you first turn on the display or pick up a pen from the magnetic holder, the pen’s light turns on to indicate the pen’s status: Light Pen status Action Solid green The pen is charging slowly Pick up the pen and use it to write on the display.
  • Page 26: Freezing Or Hiding The Screen

    Chapter 2 Using basic features To turn the volume up or down Press the Volume Up or Volume Down button on the convenience panel or the remote control. NOTES Press and hold the Volume Down button to rapidly decrease the volume. When you press the Volume Up or Volume Down button on the convenience panel or the...
  • Page 27 Chapter 2 Using basic features To remove the screen shade and reveal the screen contents, press the Screen Shade button again. smarttech.com/kb/171539...
  • Page 28: Chapter 3: Using The Iq Apps

    Chapter 3 Using the iQ apps The display comes with the following iQ apps: SMART Whiteboard Browser Input Screen Share kapp Whiteboard You can use these apps along with the Files Library and Apps Library to deliver lessons in a classroom or coordinate meetings and other collaborative activities.
  • Page 29: Using The Files Library

    Chapter 3 Using the iQ apps Using the Files Library The Files Library contains kapp Whiteboard sessions, SMART Notebook files, SMART Whiteboards, PDFs, and screenshots. If a USB drive is connected to the display, the files on the USB drive are also available in the Files Library.
  • Page 30: Using Input

    Chapter 3 Using the iQ apps You can also download the SMART Screen Share app for Chromebooks, Windows computers, Mac computers, iOS devices, and Android devices. To learn how to use the other features of Screen Share, see Sharing your device’s screen to the display.
  • Page 31: Using Kapp Whiteboard

    Chapter 3 Using the iQ apps NOTE Tapping Clean Up doesn’t perform a factory reset on the display. To learn more, see About the iQ experience and navigating the Home screen. Using kapp Whiteboard Use the kapp Whiteboard to write and erase notes on the display just as you do on a traditional dry erase board.
  • Page 32: Chapter 4: Connecting Computers And Other Devices

    Chapter 4 Connecting computers and other devices Installing and using SMART software Downloading and installing SMART software Using SMART software Connecting room computers and guest laptops Viewing a connected computer’s input Setting a connected computer’s resolution and refresh rate Using recommended cables Sharing USB Type-B receptacles Connecting a SMART OPS PC module Connecting USB drives, peripherals, and other devices...
  • Page 33 Chapter 4 Connecting computers and other devices Software Description Notes SMART Product Drivers Software that enables the computer to detect Included with input from the display. SMART Learning Suite, SMART TeamWorks, and SMART Meeting Pro software SMART Ink Software that enables you to write and draw in Included with digital ink over applications, files, folders, SMART Learning Suite,...
  • Page 34: Connecting Room Computers And Guest Laptops

    Chapter 4 Connecting computers and other devices SMART Learning Suite SMART TeamWorks SMART Meeting Pro SMART Product Drivers SMART Ink SMART Remote Management SMART Product Drivers and Ink are installed and used on the computer input of the display to enable touch and digital inking features. This supporting software is included with SMART’s software products, such as SMART Notebook, SMART Meeting Pro, and SMART TeamWorks, or is available for free download on...
  • Page 35 Chapter 4 Connecting computers and other devices The following are the locations of the connectors and the connector and cable information for the display’s input sources: USB Type-C Connector Standard Connection type Cable USB Type-C USB 3.1 Video/audio/touch USB Type-C HDMI 1 Connector Standard...
  • Page 36 Chapter 4 Connecting computers and other devices HDMI 2 Connector Standard Connection type Cable HDMI 2 HDMI 2.0 Video/audio HDMI Touch 1 (USB Type-B) Up to USB 3.0 Touch USB 2.0/USB 3.0 HDMI 3 Connector Standard Connection type Cable HDMI 3 HDMI 2.0 Video/audio HDMI Touch 2 (USB Type-B) Up to USB 3.0 Touch USB 2.0/USB 3.0...
  • Page 37 Chapter 4 Connecting computers and other devices HDMI 4 Connector Standard Connection type Cable HDMI 4 HDMI 2.0 Video/audio HDMI Convenience panel Up to USB 3.0 Touch USB 2.0/USB 3.0 USB Type-B Connector Standard Connection type Cable Video Audio In (Stereo 3.5 mm) Stereo 3.5 mm Audio Stereo 3.5 mm Touch 2 (USB Type-B)
  • Page 38 Chapter 4 Connecting computers and other devices Viewing a connected computer’s input Use the Input app to view a connected computer’s input on the display. To view a connected computer’s input 1. Connect the computer to the display. 2. Do one of the following: If iQ is enabled If iQ is disabled Tap Input...
  • Page 39 Chapter 4 Connecting computers and other devices Using recommended cables SMART recommends the following varieties of cable: Cable type Maximum length Recommendation HDMI 23' (7 m) Use only certified premium high-speed HDMI cables that have been tested to support the performance standard you require.
  • Page 40: Connecting A Smart Ops Pc Module

    Chapter 4 Connecting computers and other devices Sharing USB Type-B receptacles The HDMI and VGA connectors on the connector panel share USB Type-B receptacles: USB Type-B receptacle Video connectors Touch 1 HDMI 1 HDMI 2 Touch 2 HDMI 3 If two computers are connected to video connectors that share the same USB Type-B receptacle, you must disconnect the USB cable from the first computer and connect it to the second computer if you want to switch from one computer’s input to the other’s.
  • Page 41: Connecting Usb Drives, Peripherals, And Other Devices

    Chapter 4 Connecting computers and other devices Connecting USB drives, peripherals, and other devices The display includes two USB 3.0 Type-A receptacles on the convenience panel and three USB 3.0 Type-A receptacles on the connector panel. You can connect USB drives, peripherals (such as keyboards), and other devices to these connectors and use the devices with the iQ experience, connected computers, and devices installed in the accessory slot (such as the SMART OPS PC module).
  • Page 42 Chapter 4 Connecting computers and other devices NOTE If you connect an audio output device to any of the display’s USB Type-A receptacles, all the display’s audio output will be routed through this audio output device rather than through the display’s internal speakers or any external audio systems connected to the stereo 3.5 mm out connector or the S/PDIF out connector.
  • Page 43: Chapter 5: Troubleshooting

    Chapter 5 Troubleshooting The display isn’t turning on The display is turning on when it shouldn’t The screen is blank or there’s a problem with the image on the screen There’s no sound or there’s a problem with the sound Touch isn’t working as expected The pens and erasers aren’t working as expected iQ apps aren’t working as expected...
  • Page 44: The Display Is Turning On When It Shouldn't

    Chapter 5 Troubleshooting The display is turning on when it shouldn’t Symptom Troubleshooting steps The display turns on or enters Ready Check for and, if possible, move the display away from the following: mode when it shouldn’t. Direct sunlight Bright lights Forced air ducts Plasma displays Infrared audio systems and other infrared sources...
  • Page 45 Chapter 5 Troubleshooting Symptom Troubleshooting steps There is no image when using the Make sure that the computer supports Display Port Alternate Mode video via USB USB Type-C receptacle with a Type-C. Look for the Display Port logo beside the USB Type-C receptacle on the computer computer.
  • Page 46: There's No Sound Or There's A Problem With The Sound

    Chapter 5 Troubleshooting There’s no sound or there’s a problem with the sound Symptom Troubleshooting steps There’s no sound. If you’re using an external audio system, make sure it is turned on. Make sure the cables connecting the display to the computer are securely fastened. There is sound, but the volume is low.
  • Page 47: Touch Isn't Working As Expected

    Chapter 5 Troubleshooting Touch isn’t working as expected Symptom Troubleshooting steps The display doesn’t respond to touch. Make sure SMART Product Drivers 12.14 or later are installed and running on any connected computers. Make sure the USB cable between the display and the computer doesn’t exceed the supported maximum cable length.
  • Page 48: Iq Apps Aren't Working As Expected

    You’re experiencing other issues with Use only SMART Board 7000R or 7000R Pro series interactive display pens with the the pens. display. Pens from other interactive displays aren’t compatible. Return the pen to its magnetic holder to calibrate it.
  • Page 49: The Smart Ops Pc Module Isn't Working As Expected

    Chapter 5 Troubleshooting Symptom Troubleshooting steps SMART TeamWorks software isn’t Troubleshooting SMART TeamWorks. working as expected. SMART Meeting Pro software isn’t Basic troubleshooting for SMART Meeting Pro. working as expected. SMART Ink isn’t working as expected. Troubleshooting SMART Ink. SMART Product Drivers isn’t working Troubleshooting SMART Product Drivers.
  • Page 50 SMART TECHNOLOGIES smarttech.com/support smarttech.com/contactsupport smarttech.com/kb/171539...

Table of Contents