Advertisement
Quick Links
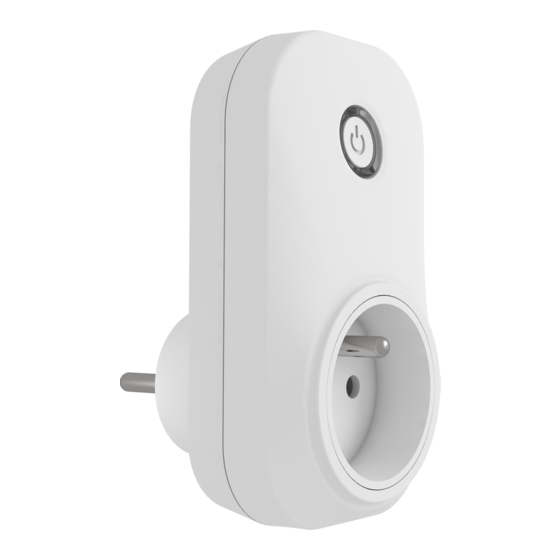
RFDSC-71N
Dimming socket
EN
Utičnica za preklapanje
RS
WARNING /
UPOZORENJE
•
Newly produced drivers work in the RFIO
ers are loaded in the actuators in a different way than before. Among other
!
things, it eliminates the risk of inadvertently loading another randomly occur-
ring controller within range.
•
Drivers can still be switched to so-called compatibility mode, and loaded
in a simpler (older way)
•
The mode in which the controller is located is indicated after inserting the
battery and after 5 seconds have passed, at which the LED is lit by subsequent
different intervals of flashing of the LED.
RFIO
2
mode
= Double flash (flash, flash, gap, flash, flash)
Compatibility mode
= Flash fast (flash, flash, flash, flash, flash)
• If you do not want to change the function of the controller, you must not press any buttons during
this time.
• If we need to change the operating mode of the controller, after inserting the battery, when the
LED is permanently lit, we press at the same time:
• button 1 and 3 on RF KEY-40/60
• button 1 and 2 on RFWB-20/40
• button 1 and 2 on RFGB-20/40
• button 1 and 2 on RF KEY
you hold the buttons until the LED starts to signal the changed mode (double fl ash or fast fl ash).
After that, the buttons must be released. The selected mode of the function is stored in memory
and after replacing the battery, the controller continues to operate in the same mode.
NOTE: after each removal of the battery, we press one of the buttons several times to discharge the
device and reinsert the battery
UPDATE THE CONTROLLER ACTUATORS IN RFIO
If the controller is used in RFIO
2
mode, then to update the controller actuators, it is necessary to
switch not only the actuator to the update mode (according to the instructions for the actuator),
but also the controller in the following way: You remove the battery from the controller, press some
of the buttons several times to discharge the device, and reinsert the battery. At the moment when
the LED lights up, you press the 1 button and hold it down until the controller starts signaling the
updating mode with a short fl ashing of the LED. Then you release the button and the controller
now works in RFIO
2
update mode. To end the update mode, you remove the battery, press one of
the buttons several times, and then reinsert the battery. Now you do not press any button and the
controller starts again in RFIO
2
operating mode,
1
1
3
3
Characteristics /
Karakteristike
• The dimmed socket is used to control light sources that are connected by power cord - especially
lamps:
R - classic lamps.
L - halogen lamps with wound transformer.
C - halogen lamps with electronic transformer.
ESL - dimmable energy-efficient fluorescent lamps.
LED - LED light sources (230V).
• They can be combined with detectors, controllers, iNELS RF Control or system components.
• Thanks to the socket design, installation is simple by direct insertion into the existing socket.
• Output load 300W.
• Multi-function 6 light functions - smooth increase or decrease with time setting 2s-30 min.
• When switched off, the set level is stored in the memory, and when switched back on, it returns
to the most recently set value.
• Thanks to setting the min. brightness by potentiometer, you will eliminate flashing of the LED
and ESL light sources.
• The universal dimmer may be controlled by up to 32 channels (1 channel represents 1 button on
the controller).
• The programming button on the socket is also used for manual control of the output.
• Memory status can be pre-set in the event of a power failure.
• Range up to 160 m (in open space), if the signal is insufficient between the controller and unit, use
the signal repeater RFRP-20N or protocol component RFIO
• Communication frequency with bidirectional protocol iNELS RF Control
• You will find more on light sources and dimming options at www.elkoep.com/solutions.
• Produced in 3 designs of sockets and plugs: French, Schuko, British
Made in Czech Republic
R
2
data protocol mode. These driv-
2
MODE
1
1
2
2
2
that support this feature.
2
(RFIO
2
).
ELKO EP, s.r.o. | Palackého 493 | 769 01 Holešov, Všetuly | Česká republika | e-mail: elko@elkoep.cz
Support: +420 778 427 366 |
EN
www.elkoep.com
L
C
•
Novoproizvedeni regulatori rade u modu protokola podataka RFIO
regulatori se u aktuatore obučavaju na drugi način nego dosad. Na taj način je
!
osim ostalog eliminisan rizik nepoželjnog obučavanja nekog drugog regula-
tora koji bi bio prisutan u dometu.
•
Regulatori se i dalje mogu preuključiti u mod tako zvane kompatibilnosti, i
obučavati se na jednostavniji (stariji način).
•
Mod u kojem se regulator nalazi indikuje se nakon ubacivanja baterije i na-
kon što protekne 5 sekundi, za vreme kojih je led dioda upaljena, i to sledećim
različitim intervalima blicanja led diode.
2
Mod RFIO
= Dvostruko blicanje (blik, blik, pauza, blik, blik)
Mod Kompatibilnosti
= Brzo blicanje (blik, blik, blik, blik, blik)
Ako ne želimo da menjamo funkcionisanje regulatora, u toku tog vremena ne smemo pritiskati ni-
kakvu dugmad.
Ako treba da promenimo radni mod regulatora, nakon što je stavljena baterija, kad je neprekidno
upaljena LED pritisnemo istovremeno:
• dugme 1 i 3 kod RF KEY-40/60
• dugme 1 i 2 kod RFWB-20/40
• dugme 1 i 2 kod RFGB-20/40
• dugme 1 i 2 kod RF KEY
dugmad pridržimo sve dok LED ne počne da signalizira promenjeni mod (dvostruko blicanje ili
brzo blicanje). Nakon toga treba dugmad osloboditi. Izabrani mod funkcionisanja je memorisan i
nakon zamene baterije regulator radi u istom modu.
NAPOM: nakon svakog vadjenja baterije nekoliko puta pritisnemo bilokoje od dugmadi da dodje do
pražnjenja uredjaja, pa bateriju ubacimo natrag
OBUČAVANJE REGULATORA U AKTUATORE U MODU RFIO
Ako se regulator koristi u modu RFIO
čavanja preuključiti ne samo aktuator (prema uputstvu za aktuator), već i regulator, i to na sledeći
način: Iz regulatora izvadimo bateriju, nekoliko puta pritisnemo bilokoje od dugmadi da dodje do
pražnjenja uredjaja, pa bateriju ubacimo natrag. U trenutku kad se upali LED pritisnemo dugme 1 i dr-
žimo ga pritisnuto sve dok regulator ne počne da signalizira mod obučavanja kratkim blicanjem LED.
Nakon toga dugme oslobodimo i regulator sad radi u modu obučavanja RFIO
obučavanja, izvadimo bateriju, nekoliko puta pritisnemo bilokoje od dugmadi i nakon toga ubacimo
bateriju natrag. Tad više ne pritiskamo nikakvo dugme i regulator krene opet u radnom modu RFIO
1
2
• Dimer utičnica koristi se za regulaciju izvora svetlosti koji su povezani kablom za napajanje - po-
sebno lampe:
R – klasične sijalice.
L - halogen sijalice sa namotanim transformatorom.
C - halogen sijalice sa elektronskim transformatorom.
ESL – štedljive sijalice sa zatamnjivanjem.
LED - LED izvori svetlosti (230V).
• Može se kombinovati sa Detektorima, Kontrolerima ili Sistemskim elementima iNELS RF Control.
• Dizajnirana je kao utičnica tako da je montaža jednostavna i to direktnim uključivanjem u po-
stojeću utičnicu.
• Izlazna snaga 300W.
• Višenamenska - 6 funkcija osvetljenja - blago povećanje ili smanjenje sa vremenskim podešava-
njem od 2 s do 30 min.
• Kada se utičnica isključi, podešeni nivo osvetljenja se čuva u memoriji, a kada se utičnica ponovo
uključi, vrać a se na poslednju podešenu vrednost.
• Zahvaljujući podešavanju minimalne jačine svetlosti pomoću potenciometra eliminiše se trepe-
renje LED i ESL izvora svetlosti.
• Univerzalnim dimerom moguće je upravljati do 32 kanala (1 kanal je jedan taster na kontroleru).
• Taster za programiranje na utičnici, takođe služi i kao ručna kontrola.
• Status memorije može se podesiti unapred u slučaju nestanka struje.
• Domet do 160 m (na otvorenom prostoru), ukoliko signal nema dovoljnu jačinu između kont-
rolera i elementa koristi se repetitor signala RFRP-20N ili komponente sa RFIO
podržava ovu funkciju.
• Frekvencijska komunikacija sa dvosmernim iNELS RF Control2 (RFIO
• Više informacija o izvorima svetlosti i mogućnostima zatamnjivanja možete pronaći na www.elkoep.cz/reseni.
• Proizvodi se u 3 tipa utičnica i utikača: French, Schuko, British
Technická podpora: +420 775 444 609
CZ
ESL
LED
2
2
, onda za obučavanje regulatora u aktuatore treba u mod obu-
1
2
2
) protokolom.
02-156/2021 Rev.0
2
. Ovi
2
. Da bi završili mod
2
.
1
2
2
protokolom koja
1/8
Advertisement

Related Manuals for iNels RFDSC-71N


Summary of Contents for iNels RFDSC-71N
- Page 1 • Može se kombinovati sa Detektorima, Kontrolerima ili Sistemskim elementima iNELS RF Control. • They can be combined with detectors, controllers, iNELS RF Control or system components. • Dizajnirana je kao utičnica tako da je montaža jednostavna i to direktnim uključivanjem u po- •...
- Page 2 RFDSC-71N Dimming socket Utičnica za preklapanje 02-156/2021 Rev.0 Assembly / Montaža Radio frequency signal penetration through various construction materials / Prolaženje radiofrekventnih signala kroz razne gradjevinske materijale 60 - 90 % 80 - 95 % 20 - 60 %...
- Page 3 RF Control i iNELS RF Control2. The detector can be assigned an iNELS RF Control (RFIO ) communication pro- Mogu se priključiti i detektori označeni komunikacijskim protokolom iNELS RF tocol. Control2 (RFIO Functions and programming with RF transmitters /...
- Page 4 Programiranje Press of programming but- Two presses of your selected Press of programming button ton on socket RFDSC-71N for button on the RF transmitter as- on socket RFDSC-71N shorter 1 second will activate socket signs the function light scene 2 then 1 second will fi...
- Page 5 Programming / Programiranje Press of programming but- Four presses of your selected Press of programming button ton on socket RFDSC-71N for button on the RF transmitter on socket RFDSC-71N shorter 1 second will activate socket assigns the function light scene 4 then 1 second will fi...
- Page 6 Programiranje Press of programming but- Assignment of the sunset func- Press of programming button ton on socket RFDSC-71N for tion is performed by six presses longer then 5 seconds, will 1 second will activate socket of the selected button on the RF...
-
Page 7: Additional Information
Brisanje nema uticaj na podešenu memorijsku funkciju. Selecting the memory function / Biranje memorijske funkcije Press of programming button on receiver RFDSC-71N for 1 second Pressing the programming button on the RFDSC-71N receiver for will activate receiver RFDSC-71N into programming mode. LED is less than 1 second will fi... - Page 8 Tolerancija napona napajanja: +10 %; -15 % Attention: Output Izlaz When you instal iNELS RF Control system, you have to keep minimal dis- Contactless: Beskontaktno: 2 x MOSFET tance 1 cm between each units. Between the individual commands must be an interval of at least 1s.
Need help?
Do you have a question about the RFDSC-71N and is the answer not in the manual?
Questions and answers