Table of Contents
Advertisement
Quick Links
INSTRUCTIONS
DP26
MICROSCOPE DIGITAL CAMERA
This instruction manual is for the Olympus microscope digital camera DP26.
We recommend that you study this manual thoroughly before operating the camera and familiarize
yourself fully with the use of this camera, which is important to ensure the safety, and to obtain optimum
performance.
Retain this instruction manual in an easily accessible place near the work desk for future reference.
AX7970
Advertisement
Table of Contents

Subscribe to Our Youtube Channel
Related Manuals for Olympus DP26


Summary of Contents for Olympus DP26
- Page 1 DP26 MICROSCOPE DIGITAL CAMERA This instruction manual is for the Olympus microscope digital camera DP26. We recommend that you study this manual thoroughly before operating the camera and familiarize yourself fully with the use of this camera, which is important to ensure the safety, and to obtain optimum performance.
- Page 2 Refer to your local Olympus distributor in EU for return and/or collection systems available in your country. NOTE: This equipment has been tested and found to comply with the limits for a Class A digital device, pursu- ant to Part 15 of the FCC Rules.
-
Page 3: Table Of Contents
DP26 IMPORTANT -- Be sure to read this section for safe use of the equipment. -- 1-12 Intended use ....................................... Handling Precautions..................................Maintenance and Storage ................................Cautions for using ....................................PC and Software ..................................... 1 SYSTEM CHART ..........................2 NOMENCLATURE .......................... - Page 4 3 INSTALLATION ............................. Installing the Camera Head ................................Connecting the Camera Cable ..............................Connecting the AC adapter ................................4 IMAGE RECORDING PROCEDURE ................. 4-1 Software ....................................4-2 Image Recording Flow ............................5 SPECIFICATIONS ..........................6 TROUBLESHOOTING GUIDE ....................
- Page 5 DP26 IMPORTANT The microscope digital camera DP26 is designed to be connected to a camera adapter mounted on an Olympus UIS2/UIS series microscope for recording of microscopic magnified images. When the DP26 is used with a camera adapter from other manufacturers than Olympus, the optical performance may not be fully manifested.
- Page 6 2. To avoid electric shock or equipment failure, never connect or disconnect a cable while the main switch is set to 3. If the main switch of the camera is turned OFF using DP26, PC the application may malfunction. Be sure not to turn OFF the switch during using DP26.
-
Page 7: Intended Use
DP26 Safety Symbols The following symbols are found on the microscope. Study the meaning of the symbols and always use the equipment in the safest possible manner. Symbol Explanation Indicates that the main switch is ON. Indicates that the main switch is OFF. -
Page 8: Handling Precautions
5. Never set the main switch of the camera to “ \ ” (OFF) or unplug the camera cable or AC adapter during use of the DP26. Otherwise, the PC application may malfunction. 6. Since we are not responsible for any image data, please be sure to check images, backup or edit the data on your own. -
Page 9: Maintenance And Storage
OFF and that the camera head, AC adaptor and lamp housing is cool enough. 6. When smoking the room for cleaning, etc., move the DP26 to a place not exposed to smoke. 7. Care is required against condensation as this may sometimes cause malfunction. Condensation is the phenomenon in which the vapor in the air is condensed into water drops, which attach to the surface of a metallic plate, etc. -
Page 10: Cautions For Using
Image data The recorded image data may be lost (destroyed) in the following cases. Note that Olympus will not assume any liabilities for the loss (destruction) of recorded data. The image data may also be destroyed by an unexpected cause. It is recommended to back up the data periodically. - Page 11 3. When a fluorescent lamp illumination or an illumination stand of the SZX/SZX2 series is used, the image may flicker. 4. Combinations of this product and non-Olympus microscopes have not been evaluated extensively. Non-Olympus microscopes and commercially available C-mount lenses can be used provided that they match a CCD with a size of no less than 2/3 inch and the lens projection length from the C-mount body attaching section is no more than 6 mm.
- Page 12 8. The image of dark specimens under reflected light or in the darkfield (specimens that need exposure of 1/2 sec. or more at ISO 100 equivalent) cannot be recorded. When recording the image of the particularly dark specimen, the lack of pixel caused by the cosmic ray effect or the constant bright point may be noticeable, but they are not failures.
-
Page 13: Pc And Software
DP26 is uninstalled, DP26 cannot be operated.) 4) When connecting the DP26 to the PC, connect the DP26’s camera head directly to the 1394 connector of the PC. Connection through a commercially available 1394 hub or conversion connector may lead to malfunction. - Page 14 Recommended operating environment Common to Desktop PC/Laptop PC (except No. 7) Item Operating Environment Intel Core i5, Intel Core i7, Intel Xeon ® , (or compatible) Memory 8 GB recommended (4GB minimum) HD space 1 GB hard disk space for installation Recommended for high speed image acquisition: SSD hard disk Display 1280 x 1024 (min.
- Page 15 “Restricted account,” please change it to the “Computer Administrator account.” When using desktop PC or laptop PC 1. Olympus will not assume any liabilities for any damage due to the use or non-usability of this system, including compensation for the lost data.
-
Page 16: System Chart
Power cord * DP26 combined with certain PCs may not be operated properly. Confirm PCs whose actions have already been checked in website. There are some PCs which request IEEE 1394 PCI board or PC card (Express card). - Page 17 DP26 SAL (Standalone) System DP26-CU DP21-SAL Control box Camera head D21-CB Control box for D26-CU coded units Camera cable · U-CBS · U-CBM · BX3-CBH AC adapter Power cord DVI protection Camera adapter adapter Display cable LAN cable Monitor display...
-
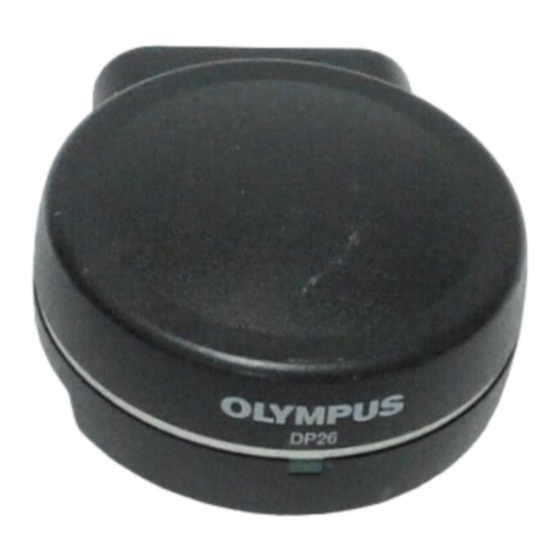
Page 18: Nomenclature
NOMENCLATURE Camera head Main switch Pilot LED C-mount thread Camera cable connector Camera cable Attached with DP21-SAL, DP2-DKTB (9pin - 9pin) Attached with DP21-DKT (9pin - 6pin) Attached with DP21-LPT (9pin - 4pin) -
Page 19: Installation
DP26 INSTALLATION Installing the Camera Head • The C-mount thread has a sharp edge that should not be CAUTION touched. • The camera head and camera adapter are precision modules. Be careful not to drop them during attaching or detaching. - Page 20 If a C-mount camera adapter from other manufacturer Field number than Olympus is used, the optical performance of the system may not be manifested fully. (FN 10.7) } The view field range illustrated in left figure is a guide. Check the actual view field range by observing the specimen equipped with a scaling function, etc.
-
Page 21: Connecting The Camera Cable
• Be sure to switch off the computer before proceeding to the connections. • Always use the cables designated by Olympus. • When connecting the cable, insert the connector plug in the proper direction. • Keep the cables well away from the equipments generating high heats, such as the lamp housing of microscope. -
Page 22: Connecting The Ac Adapter
2) Insert the connector 3 of the power cord into the input connector 4 of the AC adapter. • Always use the power cord provided by Olympus. If no pow- CAUTION er cord is provided with the camera head, please select a proper power cord by referring to chapter “PROPER SELEC-... - Page 23 Power supply to the camera The camera head of the DP26 has a main switch. Set this switch to ON when using the camera. The pilot LED on the camera head lights when power is supplied to the camera head.
-
Page 24: Image Recording Procedure
Microscope cannot be operated though connected. (Note that DP25 cannot be used.) • If you want to use an IEEE 1394 device other than the DP26, open the Device Manager and update the driver software of “OLYMPUS(R) MICROSCOPE 1394 DIGITAL CAMERA SYSTEM” under “1394 Bus Host Controllers”. -
Page 25: Image Recording Flow
DP26 4-2 Image Recording Flow For detail use procedures, refer to the Instruction Manual or Help of Software you will use. Brightfield Observation Flow Set up the microscope. Reconfirmation / fine adjustment as required Set the exposure mode. Manual Exposure mode? -
Page 26: Specifications
SPECIFICATIONS Item Specifications System C-mount CCD camera unit Image pickup Size 2/3-inch color CCD device Effective pixels 5.05 million pixels (total pixels 5.24 million pixels) Scanning method Progressive scanning Color filters RGB primary color on-chip filters Recording area 8.45(H) x 6.62(V) mm, diagonal length 10.733 mm Max. - Page 27 DP26 Item Specifications Input/output connectors DC input: Main power supply Camera: IEEE 1394b Image sizes (File formats) Dependent on compatible application Applicable OS Microsoft ® Windows ® 7 Ultimate / Professional (32bit / 64bit) SP1 Microsoft ® Windows ® Vista Ultimate / Business (32bit) SP2 Microsoft ®...
-
Page 28: Troubleshooting Guide
Under certain conditions, performance of the system may be adversely affected by factors other than defects. If problems occur, please review the following list and take remedial action as needed. If you cannot solve the problem after checking the entire list, please contact Olympus for assistance. Problem... - Page 29 – may be required to press the Cancel button on the status bar and record the image again. The cellSens / OLYMPUS Stream is Wait until processing completes before – processing file save, etc. starting recording of the next image.
- Page 30 Problem Cause Remedy Page Picture is too dark. Exposure correction is set in the – Set the desired exposure correction – direction. value. The metering area is set to a bright Move the metering area to the area area outside the region of interest. where you want to obtain optimum –...
- Page 31 – the font size of the screen. the screen. Another 1394 device cannot be used The DP26-dedicated driver is installed. When the DP26 is connected to a PC, simultaneously. other 1394 devices cannot be used on 10,21 the same PC.
- Page 32 If no power cord is provided, please select the proper power cord for the equipment by referring to “ Specifications ” and “ Certified Cord ” below: In case you use a non-approved power cord for Olympus products, Olympus can not warrant the electrical safety of the equipment.
- Page 33 DP26 Country Agency Country Agency Certification Certification Mark Mark Argentina IRAM Italy Australia Japan JET, JQA Austria ÖVE Netherlands KEMA Belgium CEBEC Norway NEMKO Canada Spain Denmark DEMKO Sweden SEMKO Finland Switzerland United ASTA France Kingdom Germany U.S.A. Ireland NSAI...
- Page 34 Table 2 HAR Flexible Cord APPROVAL ORGANIZATIONS AND CORDAGE HARMONIZATION MARKING METHODS Alternative Marking Utilizing Printed or Embossed Harmoniza- Black-Red-Yellow Thread (Length tion Marking (May be located on of color section in mm) Approval Organization jacket or insulation of internal wiring) Black Yellow...
- Page 35 DP26 Österreichischer Verband für <ÖVE> <HAR> Elektrotechnik (ÖVE) Danmarks Elektriske Materialkontroll <DEMKO> <HAR> (DEMKO) National Standards Authority of Ireland <NSAI> <HAR> (NSAI) Norges Elektriske Materiellkontroll NEMKO <HAR> (NEMKO) Asociacion Electrotecnica Y <UNED> <HAR> Electronica Espanola (AEE) Hellenic Organization for ELOT <HAR>...
- Page 36 Manufactured by Distributed by AX7970 06...
Need help?
Do you have a question about the DP26 and is the answer not in the manual?
Questions and answers