Table of Contents
Advertisement
Available languages
Available languages
Quick Links
Istruzioni per l'uso
LAVASTOVIGLIE
Sommario
IT
EN
FR
Italiano, 1
English,13
Français, 25
PL
HU
DE
Magyar, 61
Polski, 49
Deutsch, 37
Ecodesign Regulation
Vista d'insieme
LSPA+ 720A.1
Regolazione cesto superiore
Programmi, 9
Tabella dei programmi
Escludere acqua e corrente elettrica
Pulire la lavastoviglie
Evitare i cattivi odori
Pulire gli irroratori
Pulizia filtro entrata acqua
Advertisement
Chapters
Table of Contents

Related Manuals for Hotpoint Ariston LSPA+ 720A.1


Summary of Contents for Hotpoint Ariston LSPA+ 720A.1
-
Page 1: Table Of Contents
Assistenza Descrizione dell’apparecchio, 6 Vista d’insieme Pannello comandi Caricare i cesti, 7 Cesto inferiore Cesto superiore LSPA+ 720A.1 Regolazione cesto superiore Avvio e utilizzo, 8 Avviare la lavastoviglie Caricare il detersivo Programmi, 9 Tabella dei programmi Brillantante e sale rigenerante, 10... -
Page 2: Scheda Prodotto
Scheda prodotto Scheda prodotto HOTPOINT ARISTON Marchio LSPA+ 720A.1 Modello Capacità nominale in numero di coperti standard (1) Classe di efficienza energetica su una scala da A+++ (bassi consumi) a D (alti consumi) 237.0 Consumo energetico annuo in kWh (2) 0.81... -
Page 3: Precauzioni E Consigli
Precauzioni e consigli Smaltimento L’apparecchio è stato progettato e costruito • Smaltimento del materiale di imballaggio: in conformità alle norme internazionali di sicurezza. attenersi alle norme locali, così gli imballaggi Queste avvertenze sono fornite per ragioni di potranno essere riutilizzati. sicurezza e devono essere lette attentamente. -
Page 4: Installazione E Assistenza
Installazione e Assistenza Fare attenzione che nel tubo non ci siano né pieghe né In caso di trasloco tenere l’apparecchio in posizione strozzature. verticale; se fosse necessario, inclinarlo sul lato posteriore. Collegamento del tubo di scarico dell’acqua Posizionamento e livellamento Collegare il tubo di scarico, senza piegarlo, a una conduttura 1. Disimballare l’apparecchio e controllare che non abbia subìto di scarico con diametro minimo di 4 cm. -
Page 5: Dati Tecnici
Assistenza L’Azienda declina ogni responsabilità qualora queste norme non vengano rispettate. Striscia anticondensa Prima di contattare l’Assistenza: Dopo aver incassato la lavastoviglie aprire la porta e incollare (vedi • Verificare se l’anomalia può essere risolta da soli la striscia adesiva trasparente sotto al ripiano in legno per Anomalie e Rimedi) proteggerlo dalla eventuale condensa. • Riavviare il programma per controllare se l’inconveniente è... -
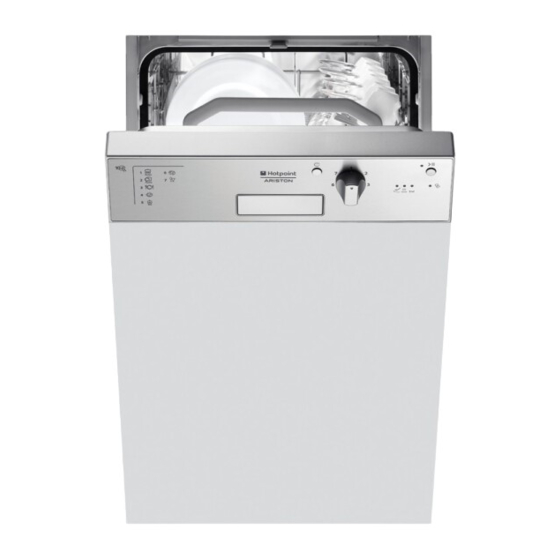
Page 6: Descrizione Dell'apparecchio
Descrizione dell’apparecchio Vista d’insieme Cestello superiore Irroratore superiore Ribaltine Regolatore altezza cestello Cestello inferiore Irroratore inferiore Cestello posate Filtro lavaggio Serbatoio sale Vaschette detersivo e serbatoio brillantante 11. Targhetta caratteristiche Pannello comandi Pannello comandi Manopola Selezione Programmi Tasto e spia Tasto Avvio/Pausa On-Off/Reset Spia Maniglia apertura porta Spia Lavaggio Mancanza Sale... -
Page 7: Caricare I Cesti
Caricare i cestelli Inclinazione A Inclinazione B Inclinazione C Prima di caricare i cesti, eliminare dalle stoviglie i residui di cibo e vuotare bicchieri e coppe dei liquidi rimasti. Sistemare le stoviglie in modo che siano ben ferme e non si ribaltino. -
Page 8: Avvio E Utilizzo
Avvio e utilizzo Avviare la lavastoviglie Caricare il detersivo Il buon risultato del lavaggio dipende anche dal corretto 1. Aprire il rubinetto dell’acqua. dosaggio del detersivo, eccedendo non si lava in modo 2. Premere il tasto ON-OFF: tutte le spie presenti sul pannello più efficace e si inquina l’ambiente. comandi si illuminano per alcuni secondi. 3. -
Page 9: Programmi
Programmi Se le stoviglie sono poco sporche o sono state sciacquate precedentemente sotto l’acqua, ridurre sensibilmente la dose del detersivo. Il numero e il tipo di programmi ed opzioni variano in base al modello di lavastoviglie. Detersivo Programmi Durata del (A) = vaschetta A Indicazioni per la scelta dei programma... -
Page 10: Brillantante E Sale Rigenerante
Brillantante e sale rigenerante (Il decalcificatore è impostato dalla fabbrica sul livello 3). Usare solo prodotti specifici per lavastoviglie. - Per uscire dalla funzione attendere alcuni secondi o premere Non usare sale alimentare o industriale nè detersivi un tasto delle opzioni o spegnere la macchina con il tasto per il lavaggio a mano. -
Page 11: Manutenzione E Cura
Manutenzione e cura Periodicamente, pulire il filtro entrata acqua posizionato all’uscita del rubinetto. - Chiudere il rubinetto dell’acqua. - Svitare l’estremità del tubo di carico acqua, togliere il filtro e pulirlo delicatamente sotto un getto di acqua corrente. - Inserire nuovamente il filtro e avvitare il tubo. Pulire i filtri Il gruppo filtrante è... -
Page 12: Anomalie E Rimedi
Anomalie e rimedi Qualora l’apparecchio presenti delle anomalie di funzionamento, controllare i seguenti punti prima di rivolgersi all’Assistenza. Anomalie: Possibili cause / Soluzione: La lavastoviglie non parte o non • Spegnere la macchina con il tasto ON/OFF, riaccendere dopo un minuto risponde ai comandi circa e reimpostare il programma. - Page 13 Advice regarding the first wash cycle Technical data Assistance Ecodesign Regulation Description of the appliance, 18 Overall view Control panel LSPA+ 720A.1 Loading the racks, 19 Lower rack Upper rack Adjusting upper rack Start-up and use, 20 Starting the dishwasher...
-
Page 14: Product Fiche
Product Fiche Product Fiche HOTPOINT/ARISTON Brand LSPA+ 720A.1 Model Rated capacity in standard place settings (1) Energy efficiency class on a scale from A+++ (low consumption) to D (high consumption) 237.0 Energy consumption per year in kWh (2) 0.81 Energy consumption of the standard cleaning cycle in kWh... -
Page 15: Precautions And Advice,15
Precautions and advice Disposal This appliance was designed and manufactured • Disposal of packaging material: observe local in compliance with international safety standards legislation so that the packaging may be The following information has been provided for reused. safety reasons and should therefore be read • The European Directive 2012/19/EU relating carefully. -
Page 16: Installation And Assistance
Installation and Assistance Connecting the water outlet hose If the appliance must be moved at any time, keep it in an Connect the outlet hose (without bending it) to a drain duct with upright position; if absolutely necessary, it may be tilted onto its a minimum diameter of 4 cm. -
Page 17: Advice Regarding The First Wash Cycle
Anti-condensation strip (depending on the The machine has a buzzer/set of tones After installing the dishwasher, open the door and stick the dishwasher model ) to inform the user that a command has adhesive transparent strip under the wooden shelf in order been implemented: power on, cycle end etc. -
Page 18: Description Of The Appliance
Description of the appliance Overall view Upper rack Upper sprayer arm Tip-up compartments Rack height adjuster Lower rack Lower sprayer arm Cutlery basket Washing filter Salt dispenser Detergent and rinse aid dispensers Data plate Control Panel Control panel Select wash cycle knob Start/Pause button ON/OFF/RESET button and indicator light... -
Page 19: Loading The Racks
Loading the racks Tilt A Tilt B Tilt C Before loading the racks, remove all food residues from the crockery and empty liquids from glasses and cups. Arrange the crockery so that it is held in place firmly and does not tip over. After loading the appliance, check that the sprayer arms can rotate freely. -
Page 20: Start-Up And Use
Start-up and use Measuring out the detergent Starting the dishwasher A good wash result also depends on the correct amount 1. Turn the water tap on. of detergent being used; exceeding the stated amount 2. Press the ON/OFF button: all the indicator lights on the does not result in a more effective wash and increases control panel will light up for a few seconds. -
Page 21: Wash Cycles
Wash cycles If the crockery is only lightly soiled or if it has been rinsed with water before being placed in the dishwasher, reduce the amount of detergent used accordingly. The number and type of wash cycles and options may vary depending on the dishwasher model. Detergent Wash cycle Wash cycles... -
Page 22: Rinse Aid And Refined Salt
Rinse aid and refined salt every wash cycle: Only use products which have been specifically E.g.: wash cycle 1, water hardness level 1 designed for dishwashers. wash cycle 2, water hardness level 2, etc. etc., up to a maximum Do not use table salt or industrial salt, or washing of 5 levels. up liquid. (The default water softener setting is level 3). Follow the instructions given on the packaging. -
Page 23: Care And Maintenance
Care and maintenance Clean the water inlet filter at the tap outlet regularly. - Turn off the water tap. - Unscrew the end of the water inlet hose, remove the filter and clean it carefully under running water. - Replace the filter and screw the water hose back into position. -
Page 24: Troubleshooting
Troubleshooting Whenever the appliance fails to work, check for a solution from the following list before calling for Assistance. Problem: Possible causes / Solutions: The dishwasher does not start or • Switch off the appliance by pressing the ON/OFF button, switch it back on after cannot be controlled approximately one minute and reset the program. • The appliance has not been plugged in properly. •... - Page 25 Conseils pour le premier lavage Service Ecodesign Regulation Description de l’appareil, 30 Vue d’ensemble Tableau de bord LSPA+ 720A.1 Charger les paniers, 31 Panier inférieur Panier supérieur Panier à couverts Réglage du panier supérieur Mise en marche et utilisation, 32...
-
Page 26: Fiche De Produit
Fiche de produit Fiche de produit Marque HOTPOINT/ARISTON Modèle LSPA+ 720A.1 Capacité nominale dans un environnement standard (1) Classe énergétique sur une échelle de A+++ (faible consommation) à D (consommation élevée) Consommation d''énergie par année en kWh (2) 237.0 Consommation d''énergie du cycle de lavage standard en kWh 0.81... -
Page 27: Précautions Et Conseils
Précautions et conseils Mise au rebut Cet appareil a été conçu et fabriqué conformément • Mise au rebut du matériel d’emballage : se conformer aux normes internationales de sécurité. Ces consignes aux réglementations locales de manière à ce que sont fournies pour des raisons de sécurité, il faut les les emballages puissent être recyclés. -
Page 28: Installation Et Service
Installation et Service Raccordement du tuyau d’évacuation de l’eau En cas de déménagement, transporter l’appareil Raccorder le tuyau d’évacuation, sans le plier, à une conduite verticalement; si besoin est, l’incliner sur le dos. d’évacuation ayant au moins 4 cm de diamètre. Mise en place et mise à... -
Page 29: Caractéristiques Techniques
Ruban anti-condensation (selon Cet électroménager dispose de signaux sonores/bips le modèle de lave-vaisselle ) qui signalent que la commande Après avoir encastré le lave-vaisselle, ouvrir la porte et coller le a été activée: allumage, fin de cycle etc.. ruban adhésif transparent sous le plan en bois pour le protéger contre la formation de condensation. Tous les symboles/voyants/led lumineux du bandeau de commande/afficheur peuvent avoir des couleurs différentes, Conseils pour le premier lavage... -
Page 30: Description De L'appareil
Description de l’appareil Vue d’ensemble Panier supérieur Bras de lavage supérieur Clayettes rabattables Réglage hauteur du panier Panier inférieur Bras de lavage inférieur Panier à couverts Filtre lavage Réservoir à sel Bacs produit de lavage et réservoir à produit de rinçage Plaque signalétique Tableau de bord Tableau de bord... -
Page 31: Charger Les Paniers
Charger les paniers Inclinaison A Inclinaison B Inclinaison C Avant de charger les paniers, débarrasser la vaisselle des déchets plus importants et vider les verres et les coupes. Ranger la vaisselle de manière à ce qu’elle ne bouge pas pour éviter tout risque de renversement. Après avoir chargé... -
Page 32: Mise En Marche Et Utilisation
Mise en marche et utilisation Mettre en marche le lave-vaisselle Charger le produit de lavage 1. Ouvrir l’arrivée d’eau. Un bon résultat de lavage dépend aussi d’un bon 2. Appuyer sur la touche ON-OFF: tous les voyants du dosage du produit de lavage. Un excès de produit de bandeau de commande s’allument pendant quelques lavage ne lave pas mieux et pollue l’environnement. -
Page 33: Programmes
Programmes En cas de vaisselle peu sale ou précédemment rincée à l’eau, réduire considérablement la quantité de produit de lavage. Le nombre et les types de programmes et des options, varient selon le modele de lave-vaisselle. Produit de lavage Durée du Programmes (A) = bac A Indications sur le choix des... -
Page 34: Produit De Rinçage Et Sel Régénérant
Produit de rinçage et sel régénérant N’utiliser que des produits de lavage spéciaux à présent possible. A chaque programme son degré de dureté: Par ex. : 1er programme, degré de dureté 1 lave-vaisselle. 2ème programme, degré de dureté 2 etc..etc... jusqu’à 5 Ne pas utiliser de sel alimentaire ou industriel ni de niveaux maximum. produits pour lavage de la vaisselle à la main. (L’adoucisseur d’eau est réglé... -
Page 35: Entretien Et Soin
Entretien et soin Nettoyer, périodiquement le filtre d’entrée de l’eau situé à la sortie du robinet. - Fermer le robinet de l’eau. - Dévisser l’extrémité du tuyau d’arrivée de l’eau, retirer le filtre et le laver soigneusement à l’eau courante. - Remettre le filtre en place et visser le tuyau. Nettoyer les filtres Les trois filtres qui composent le groupe filtrant débarrassent l’eau de lavage des résidus d’aliments avant de la remettre... -
Page 36: Anomalies Et Remèdes
Anomalies et remèdes Si l’appareil présente des anomalies de fonctionnement, procéder aux contrôles suivants avant de prendre contact avec le service d’assistance technique. Anomalies: Causes / Solutions possibles: Le lave-vaisselle ne démarre pas • Eteindre l’appareil à l’aide de la touche ON-OFF, rallumer au bout d’une minute environ ou n’obéit pas aux commandes et présélectionner le programme. - Page 37 Installation und Kundendienst, 40-41 Positionierung und Nivellierung Wasser- und Elektroanschlüsse Technische Daten Hinweise zur ersten Inbetriebnahme Kundendienst Ecodesign Regulation Beschreibung Ihres Geschirrspülers, 42 LSPA+ 720A.1 Geräteansicht Schalterblende Körbe beladen, 43 Geschirrspüler-Unterkorb Geschirrspüler-Oberkorb Besteckkorb Starten und Gebrauch, 44 Starten des Geschirrspülers Einfüllen des Spülmittels...
-
Page 38: Datenblatt
Datenblatt Datenblatt HOTPOINT ARISTON Marke LSPA+ 720A.1 Modell Nennkapazität in Standardgedecken für den Standardreinigungszyklus (1) Energieeffizienzklasse (A+++ niedriger Verbrauch) bis D (hoher Verbrauch) 237.0 Energieverbrauch pro Jahr in kWh (2) 0.81 Energieverbrauch Standardreinigungszyklus in kWh Gewichtete Leistungsaufnahme im Aus-Zustand in W Gewichtete Leistungsaufnahme im unausgeschalteten Zustand in W 2800.0... -
Page 39: Vorsichtsmaßregeln Und Hinweise
Vorsichtsmaßregeln und Hinweise Entsorgung D a s G e r ä t w u r d e n a c h d e n s t r e n g s t e n • B e f o l g e n S i e d i e l o k a l e n V o r s c h r i f t e n ; internationalen Sicherheitsvorschriften entworfen und Verpackungsmaterial kann wiederverwertet werden. -
Page 40: Installation Und Kundendienst
Installation - Kundendienst Anschluss des Ablaufschlauchs Im Falle eines Umzugs sollte das Gerät möglichst in vertikaler Schließen Sie den Ablaufschlauch, ohne ihn zu krümmen, an eine Position transportiert werden, falls erforderlich, neigen Sie das Ablaufleitung mit Mindestdurchmesser von 4 cm an. Gerät zur Rückseite hin. -
Page 41: Technische Daten
Kundendienst Technische Daten Breite 44,5 cm Abmessungen Höhe 82 cm Bevor Sie den Kundendienst anfordern: Tiefe 57 cm • sollten einige Kontrollen vorab selbst durchgeführt werden Fassungsvermögen 10 Maßgedecke (siehe Störungen und Abhilfe). 0,05 ÷ 1MPa (0,5 ÷10 bar) • Starten Sie das Programm erneut, um sicherzustellen, dass Wasserversorgungsdruck 7,25 – 145 psi die Störung behoben wurde. -
Page 42: Beschreibung Ihres Geschirrspülers
Beschreibung Ihres Geschirrspülers Geräteansicht Oberkorb Oberer Sprüharm Hochklappbare Ablagen Einstellung der Korbhöhe Unterkorb Unterer Sprüharm Besteckkorb Spülsiebe Salzbehälter Spülmittelkammern und Klaspülerbehälter Typenschild Bedienblende Bedienblende Programmwählerknopf Taste und Kontrollleuchte Taste Start/Pause EIN/AUS/Reset Türgriff Salz- Anzeigeleuchte Nachfüllanzeige Spülen Anzeigeleuchte Ende Anzeigeleuchte Trocknen Nur bei den komplett integrierten Modellen. -
Page 43: Körbe Beladen
Beschickung der Körbe Neigung A Neigung B Neigung C Bevor Sie das Geschirr in den Geschirrspüler einräumen, befreien Sie es von Speiserückständen und entleeren Sie Gläser und Schalen von Getränkeresten. Ordnen Sie das Geschirr so ein, dass es fest steht und nicht kippen kann. -
Page 44: Starten Und Gebrauch
Start und Inbetriebnahme Starten des Geschirrspülers Unbeabsichtigtes Unterbrechen des Spülprogramms Wird während des Spülgangs die Gerätetür geöffnet, 1. Öffnen Sie den Wasserhahn. oder sollte ein Stromausfall stattfinden, wird der Spülgang 2. Drücken Sie die ON/OFF-Taste: alle Kontrollleuchten auf unterbrochen. Wird die Gerätetür wieder geschlossen, oder der Bedienblende leuchten für einige Sekunden auf. kehrt der Strom zurück, läuft das Programm an der Stelle 3. -
Page 45: Spülprogramme
Spülprogramme Für nur leicht verschmutztes Geschirr, oder für Geschirr, das vorher unter laufendem Wasser abgespült wurde, kann die Spülmittelmenge erheblich reduziert werden. Die Anzahl und die Art der Spülprogramme und -optionen ist abhängig vom jeweiligen Geschirrspülermodell. Spülmittel Program- (A) = Dosierkammer A mdauer Spülop- (B) = Dosierkammer B... -
Page 46: Klarspüler Und Regeneriersalz
Klarspüler und Regeneriersalz Verwenden Sie bitte nur Spezialspülmittel für 2. Spülprogramm, Härtestufe 2... etc., etc. bis maximal fünf Geschirrspüler. Stufen. Verwenden Sie bitte kein Koch- oder Industriesalz, und (Der Entkalker ist ab Werk auf den Wert 3 eingestellt). auch keine Handspülmittel. - Zum Verlassen der Funktion warten Sie bitte einige Sekunden, Bitte befolgen Sie die auf der jeweiligen Verpackung oder drücken Sie eine Taste der Optionen... -
Page 47: Reinigung Und Pflege
Reinigung und Pflege - Schließen Sie den Wasserhahn. - Schrauben Sie den Wasserschlauch ab, nehmen Sie den Filter heraus und reinigen Sie ihn vorsichtig unter fließendem Wasser. - Setzen Sie den Filter wieder ein und verschrauben Sie den Schlauch. Reinigung der Filtersiebe Die Siebgruppe setzt sich aus drei Filtern zusammen, die Spülwasser reinigen, von Speiseresten befreien und wieder in Umlauf bringen. -
Page 48: Störungen Und Abhilfe
Störungen und Abhilfe Sollten Betriebsstörungen auftreten, kontrollieren Sie bitte folgende Punkte, bevor Sie sich an den Kundendienst wenden. Störungen: Mögliche Ursachen / Lösungen: Die Spülmaschine startet nicht • Schalten Sie das Gerät durch Drücken der ON/OFF-Taste aus und nach etwa oder reagiert nicht auf die einer Minute wieder ein und wiederholen Sie die Programmeinstellung. - Page 49 Ostrzeżenia dotyczące pierwszego mycia Dane techniczne Serwis Techniczny Ecodesign Regulation Opis urządzenia, 54 Widok ogólny Panel sterowania Napełnianie koszy, 55 LSPA+ 720A.1 Kosz dolny Kosz na sztućce Kosz górny Uruchomienie i użytkowanie, 56 Uruchomienie zmywarki Dozowanie środka myjącego Programy, 57 Tabela programów...
-
Page 50: Karta Produktu
Karta produktu Karta produktu HOTPOINT ARISTON Marka LSPA+ 720A.1 Nazwa modelu Pojemność znamionowa, wyrażona liczbą standardowych kompletów naczyń (1) Klasa efektywności energetycznej, skla od A+++ (niskie zużycie) do D (wysokie zużycie) 237.0 Zużycie energii w kWh rocznie (2) 0.81 Zużycie energii w standardowym cyklu zmywania w kWh Zużycie energii w trybie wyłączenia i trybie czuwania w W... -
Page 51: Środki Ostrożności I Zalecenia
Zalecenia i środki ostrożności Utylizacja Niniejsze urządzenie zostało zaprojektowane i • Utylizacja materiałów opakowaniowych: dostosować wyprodukowane zgodnie z międzynarodowymi się do lokalnych przepisów; w ten sposób opakowanie normami bezpieczeństwa. Poniższe ostrzeżenia będzie mogło zostać ponownie wykorzystane. podane zostały ze względów bezpieczeństwa i należy •... -
Page 52: Instalacja Serwis Techniczny
Instalacja Serwis Techniczny Podłączenie węża odprowadzającego wodę W przypadku przenoszenia należy trzymać urządzenie w Podłączyć przewód odprowadzający, nie zginając go, do pozycji pionowej; w razie konieczności przechylić je do tyłu. przewodu kanalizacyjnego o średnicy minimum 4 cm. Ustawienie i wypoziomowanie Przewód odprowadzający musi znajdować... -
Page 53: Ostrzeżenia Dotyczące Pierwszego Mycia
Serwis Techniczny Pasek antykondensacyjny Po zabudowaniu zmywarki otworzyć drzwi i przykleić przezroczysty pasek samoprzylepny pod drewnianym blatem, aby zabezpieczyć Przed zwróceniem się do Serwisu Technicznego: go przed ewentualnymi skroplinami. • Sprawdzić, czy problemu nie można rozwiązać samodzielnie (patrz Nieprawidłowości w działaniu i Ostrzeżenia dotyczące pierwszego mycia sposoby ich usuwania). -
Page 54: Opis Urządzenia
Opis urządzenia Widok ogólny Kosz górny Spryskiwacz górny Półeczki Regulacja wysokości kosza Kosz dolny Spryskiwacz dolny Kosz na sztućce Filtr zmywania Pojemnik na sól Pojemniki na środek myjący i nabłyszczający Tabliczka znamionowa Panel sterowania Panel sterowania Pokrętło Wybór programów Przycisk i kontrolka Przycisk Start/Pauza On-Off/Reset... -
Page 55: Napełnianie Koszy
Napełnianie koszy Nachylenie A Nachylenie B Nachylenie C Przed napełnieniem koszy usunąć z naczyń resztki żywności i opróżnić szklanki oraz kieliszki z pozostałych w nich płynów.Ustawić naczynia w taki sposób, aby nie poruszały się i i nie przewracały się. Po napełnieniu koszy sprawdzić czy spryskiwacze obracają się... -
Page 56: Uruchomienie I Użytkowanie
Uruchomienie i użytkowanie Dozowanie środka myjącego Uruchomienie zmywarki Dobry rezultat mycia zależy również od właściwego 1. Otworzyć zawór dopływu wody. dozowania środka myjącego, jego nadmierna ilość nie 2. Nacisnąć przycisk ON-OFF: wszystkie kontrolki znajdujące zwiększa skuteczności mycia, powoduje natomiast się na panelu sterowaniawłącząsię na kilka sekund. zanieczyszczenie środowiska. -
Page 57: Programy
Programy Jeśli naczynia są mało zabrudzone lub zostały uprzednio spłukane wodą, należy znacznie zmniejszyć ilość środka myjącego. Numery i rodzaje programów zmieniają się w zależności od modelu zmywarki. Środek myjący Czas trwania (A) = pojemnik A programu Wskazówki ułatwiające Programy z Program Opcje (B) = pojemnik B... -
Page 58: Nabłyszczacz I Sól Regeneracyjna
Środek nabłyszczający i sól regeneracyjna - Nacisnąć przycisk ON/OFF, kontrolki faz cyklu pulsują.; teraz Stosować wyłącznie produkty przeznaczone do można wybrać poziom twardości wody. Każdemu programowi zmywarek. odpowiada poziom twardości: Nie używać soli spożywczej lub przemysłowej ani Np.: Program 1, poziom twardości 1 środków do mycia ręcznego. -
Page 59: Konserwacja I Utrzymanie
Konserwacja i utrzymanie Od czasu do czasu czyścić filtr dopływu wody znajdujący się na wyjściu zaworu. - Zamknąć zawór wody. - Po zamknięciu zaworu należy odkręcić końcówkę przewodu doprowadzającego wodę do zmywarki, wyjąć filtr i delikatnie umyć go pod bieżącą wodą. - Następnie ponownie włożyć... -
Page 60: Anomalie I Środki Zaradcze
Anomalie i środki zaradcze Jeśli w pracy urządzenia pojawiają się anomalie w pracy, należy skontrolować następujące punkty przed zwróceniem się do Obsługi technicznej (patrz Obsługa techniczna). Niektóre z usterek są sygnalizowane za pomocą lampek zapalających się na panelu sterowania. Przed wezwaniem pomocy technicznej należy zanotować, które z lampek świecą. Możliwe przyczyny / Rozwiązanie: Problemy: •... - Page 61 Elhelyezés és vízszintezés Vízbekötés és elektromos csatlakoztatás Tanácsok az első mosáshoz Műszaki adatok Ecodesign Regulation Készülékleírás, 66 Áttekintő nézet Kezelőpanel LSPA+ 720A.1 Berámolás a kosarakba, 67 Alsó kosár Evőeszköztartó kosár Felső kosár Indítás és használat, 68 A mosogatógép elindítása A mosogatószer betöltése Programok, 69 Programtáblázat...
-
Page 62: Termékismertető Adatlap
Termékismertető adatlap Termékismertető adatlap HOTPOINT ARISTON Márka LSPA+ 720A.1 Típusazonosító Előírt kapacitás szabványos terítékben kifejezve. (1) Energiahatékonysági osztály A+++ (alacsony fogyasztás) osztálytól G (magas fogyasztás) osztályig. 237.0 Éves energiafogyasztás kWh/év-ben kifejezve. (2) 0.81 A szabványos tisztítási ciklus energiafogyasztása kWh-ban. Energiafogyasztás kikapcsolt üzemmódban W-ban. -
Page 63: Óvintézkedés És Tanácsok
Óvintézkedés és tanácsok Hulladékelhelyezés Őrizze meg a kézikönyvet, hogy bármikor • A csomagolóanyagok megsemmisítése: tartsa használhassa! A mosogatógép értékesítése, be a helyi előírásokat, így a csomagolóanyagok átadása, és/vagy áthelyezése esetén biztosítsa, újrahasznosíthatók! hogy a kézikönyv a készülékkel együtt maradjon! • Az Európai Parlament és Tanács, elektromos és elektronikus berendezések hulladékairól (WEEE) Figyelmesen olvassa el az utasításokat: fontos szóló... -
Page 64: Üzembe Helyezés - Szerviz
Üzembe helyezés - Szerviz A leeresztőcső bekötése Költözködés esetén a készüléket tartsa függőleges A leeresztőcsövet – a cső megtörése nélkül – kösse legalább helyzetben; ha ez nem lehetséges, a hátsó oldalára döntse! 4 cm átmérőjű lefolyóba. A leeresztőcsőnek a padlótól vagy a mosogatógép alátámasztási Elhelyezés és vízszintezés felületétől számítva 40 és 80 cm között kell lennie (A). -
Page 65: Tanácsok Az Első Mosáshoz
Szerviz Vízlecsapódásgátló csík A mosogatógép beszerelése után nyissa ki az ajtót, és ragassza az átlátszó öntapadó csíkot a fapolc alsó oldalára, hogy megvédje Mielőtt a szervizhez fordul: azt a kondenzvíztől. • Győződjön meg arról, hogy a rendellenességet nem tudja maga elhárítani (lásd Rendellenességek és Tanácsok az első... -
Page 66: Készülékleírás
Készülékleírás Áttekintő nézet Felső kosár Felső permetezőkar Billenőpolc Kosármagasság szabályozó Alsó kosár Alsó permetezőkar Evőeszköztartó kosár Mosogatószűrő Sótartály Mosogatószeres és öblítőszeres rekesz Adattábla Kezelőpanel Kezelőpanel PROGRAMVÁLASZTÓ tárcsa Indítás/ szüneteltetés ON/OFF-Reset gomb és lámpa gomb Sóhiányjelző Ajtónyitó fogantyú MOSOGATÁS lámpa lámpa PROGRAM VÉGE lámpa SZÁRÍTÁS lámpa Csak teljes beépítésű... -
Page 67: Berámolás A Kosarakba
Berámolás a kosarakba A lejtés B lejtés C lejtés Mielőtt berámolna a kosarakba, távolítsa el az ételmaradékokat az edényekről, és öntse ki a poharakból és tálkákból a bennük maradt folyadékot. Az edényeket úgy helyezze el, hogy stabilan álljanak, és ne borulhassanak le. -
Page 68: Indítás És Használat
Indítás és használat A mosogatószer betöltése A mosogatógép elindítása A mosogatás eredményessége a mosogatószer helyes 1. Nyissa ki a vízcsapot. adagolásán is múlik – túlzott használatával a mosás 2. Nyomja meg a BE/KI gombot: néhány másodpercig a nem lesz hatékonyabb, csak a környezetszennyezés kezelőpanel valamennyi lámpája kigyullad. -
Page 69: Programok
Programok Amennyiben az edények nem túl koszosak vagy korábban vízzel el lettek öblítve, csökkentse jelentősen a mosogatószer-adagot! A programok és opciók száma és típusa a mosogatógép típusától függően változhat. Mosogatószer Program Szárítást (A) = A rekesz időtartama Javaslatok a program Program tartalmazó... -
Page 70: Öblítőszer És Regeneráló Só
Öblítőszer és regeneráló só Pl. az 1. program 1. keménységi szintet jelent. Kizárólag mosogatógépekhez használatos A 2. program 2. keménységi szintet stb... max. 5. szintig. termékeket használjon! (A vízlágyító berendezés gyárilag a 3. szintre van állítva). Ne használjon se étkezési, se ipari sót, se kézi - A funkcióból való... -
Page 71: Karbantartás És Ápolás
Karbantartás és tisztítás Rendszeresen tisztítsa meg a csap kimeneténél elhelyezett bemenővíz-szűrőt. - Zárja el a vízcsapot. - Csavarja le teljesen a vízbevezetőcső végét, vegye ki a szűrőt, és óvatosan tisztítsa meg folyó vízsugár alatt. - Helyezze vissza a szűrőt, és csavarja vissza a csövet. A szűrők tisztítása A szűrőblokkot három szűrő... -
Page 72: Rendellenességek És Elhárításuk
Rendellenességek és 195118061.00 elhárításuk 10/2013 pb - Xerox Fabriano Amennyiben a készülék működésében rendellenességet észlel, mielőtt a szervizhez fordulna, ellenőrizze a következő pontokat! Hiba: Lehetséges okok / elhárításuk: A mosogatógép nem indul vagy • A BE/KI gombbal kapcsolja ki a készüléket, és kb. egy perc elteltével indítsa újra, majd nem reagál a parancsokra.
Need help?
Do you have a question about the LSPA+ 720A.1 and is the answer not in the manual?
Questions and answers