Table of Contents
Advertisement
Quick Links
Advertisement
Table of Contents

Related Manuals for Mitsubishi Electric FR-CV-7.5K


Summary of Contents for Mitsubishi Electric FR-CV-7.5K
- Page 1 TRANSISTORIZED INVERTER FR-CV INSTRUCTION MANUAL POWER REGENERATION COMMON CONVERTER FR-CV-7.5K to 30K(-AT) FR-CV-37K, 55K FR-CV-H7.5K to H30K(-AT) FR-CV-H37K, H55K FR-CVL-7.5K to 55K FR-CVL-H7.5K to H55K OUTLINE INSTALLATION AND WIRING PROTECTIVE FUNCTIONS SPECIFICATIONS...
- Page 2 Thank you for choosing this Mitsubishi transistorized inverter option unit. This instruction manual provides handling information and precations for use of the equipment. Before using the inverter option, always read this instruction manual carefully to use the equipment to its optimum. Please forward this instruction manual to the end user.
- Page 3 4. Additional Instructions Also note the following points to prevent an accidental failure, injury, electric shock, etc. 1) Transportation and installation CAUTION When carrying products, use correct lifting gear to prevent injury. Do not stack the inverter option boxes higher than the number recommended. Ensure that installation position and material can withstand the weight of the inverter.
-
Page 4: Table Of Contents
CONTENTS 1 OUTLINE Pre-Operation Information ..................2 1.1.1 Precautions for operation ......................2 Basic Configuration....................4 1.2.1 Basic configuration ........................4 Structure ........................ 5 1.3.1 Appearance and structure ......................5 1.3.2 Removal and reinstallation ......................6 1.3.3 Structure of the power regeneration common converter ............8 2 INSTALLATION AND WIRING Installation...................... - Page 5 4 SPECIFICATIONS Standard Specifications ..................44 4.1.1 Model specifications ........................ 44 4.1.2 Internal block diagram ......................47 4.1.3 Outline drawings........................48...
-
Page 6: Outline
CHAPTER 1 OUTLINE This chapter gives information on the basic "outline" of this product. Always read the instructions in this chapter before using the equipment. 1.1 Pre-Operation Information ......2 1.2 Basic Configuration........4 1.3 Structure ............5... -
Page 7: Pre-Operation Information
If you have found any discrepancy, damage, etc., please contact your sales representative. (2) Confirmation of the peripheral device types The dedicated stand-alone reactor must be installed. Power regeneration common converter Dedicated stand-alone reactor (required) FR-CV-7.5K(-AT) FR-CVL-7.5K FR-CV-11K(-AT) FR-CVL-11K FR-CV-15K(-AT) - Page 8 Pre-Operation Information (3) Installation To operate the power regeneration common converter with high performance for a long time, install the inverter in a proper place, in the correct direction, and with proper clearances. (Refer to page 10.) (4) Wiring Connect the power supply, inverter and control signals to the terminal block. Note that incorrect connection may damage the power regeneration common converter , inverter and peripheral devices.
-
Page 9: Basic Configuration
Basic Configuration 1.2 Basic Configuration 1.2.1 Basic configuration The following devices are required to operate the power regeneration common converter. Proper peripheral devices must be selected and correct connections made to ensure proper operation. Incorrect system configuration and connections can cause the inverter to operate improperly, its life to be reduced considerably, and in the worst case, the inverter to be damaged. -
Page 10: Structure
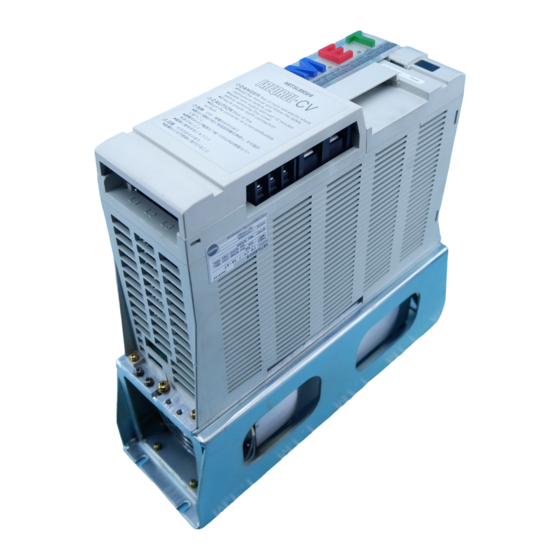
Structure 1.3 Structure 1.3.1 Appearance and structure FR-CV-7.5K to 30K (-AT), FR-CV-H7.5K to H30K (-AT) (1) Front view (2) Without front cover Connector cover for manufacturer setting Connector for manufacturer LED display setting (Note) Capacity plate Control circuit terminal block cover... -
Page 11: Removal And Reinstallation
1.3.2 Removal and reinstallation (1) Main circuit terminal block cover FR-CV-7.5K to 30K (-AT), FR-CV-H7.5K to H30K(-AT) Removal 1)Hold both ends of the cover bottom and pull it toward you. 2)When the bottom of the cover has come off, hold both ends of the cover top and pull it toward you. - Page 12 Structure (2) Control circuit terminal block cover Opening 1)Hold the right end of the cover and pull it toward you. 2)The cover opens, with the left-hand side of the cover acting as a support. Closing 1)Securely press the right end of the cover against the unit. Note: Make sure that the cover has been fitted securely.
-
Page 13: Structure Of The Power Regeneration Common Converter
Structure of the power regeneration common converter The power regeneration common converter is available in two types: a heat sink outside mounting structure model and an enclosure inside installation structure model. (1) Heat sink outside mounting structure model (FR-CV-7.5K to 55K, FR-CV-H7.5 to H55K) Enclosure Inside... -
Page 14: Installation And Wiring
CHAPTER 2 INSTALLATION AND WIRING This chapter gives information on the basic "Installation and wiring" of this product. Always read the instructions in this chapter before using the equipment. 2.1 Installation ........... 10 2.2 Wiring............12 2.3 Operation ............. 23 2.4 Other wiring.......... -
Page 15: Installation
Installation 2.1 Installation 2.1.1 Instructions for installation Handle the unit carefully. The power regeneration common converter uses plastic parts. Handle it gently to protect it from damage. Also, hold the unit with even strength and do not apply too much strength to the terminal block cover alone. Install the inverter in a place where it is immune to vibration. - Page 16 Installation 3) Note on ambient temperature 4) Clearances around the inverter 10cm (3.94 inches) Clearances required to or more change the cooling fan of the enclosure inside Measurement position installation structure model (-AT). (Refer to page 36 for FR-CV (1.97 inches) fan replacement.) (1.97 inches) FR-CV...
-
Page 17: Wiring
Wiring 2.2 Wiring 2.2.1 Terminal connection diagram Main circuit terminal Control circuit input terminal Control circuit output terminal FR-A720 R/L1 S/L2 (Note 1) T/L3 FR-CVL FR-CV R1/L11 (Note 3) R/L11 R2/L12 S1/L21 R2/L1 S/L21 S2/L22 P/L+ S2/L2 T/L31 T2/L32 (Note 2) N/L- T2/L3 3-phase... - Page 18 Wiring (1) Description of main circuit terminals Symbol Terminal Name Description R2/L1, S2/ AC power input Connect to the dedicated stand-alone reactor terminals R2/L12, S2/L22, T2/L32. L2,T2/L3 Connect to the inverter terminals P, N, and keep the inverter terminals R, S, T open. P/L+, N/L- DC power output For the FR-A700, F700, A500, F500 or V500 series, set 2 (for use of high power...
-
Page 19: Wiring Of The Main Circuit
Wiring 2.2.2 Wiring of the main circuit (1) Wiring instructions Crimping terminals with insulation sleeves are recommended for use with the power and inverter cables. Strictly observe the order of wiring in the connection example when performing wiring between the dedicated stand-alone reactor and power regeneration common converter and wiring between the power supply and terminals R/L11, S/L21, T/MC1. - Page 20 Wiring (2) Terminal block layout of the power circuit In the main circuit of the power regeneration common converter, the terminals are arranged as shown below: FR-CV-7.5K/11K(-AT) FR-CV-15K(-AT), FR-CV-H7.5K/H11K/H15K(-AT) <DC power output <DC power output terminals> terminals> Screw size Connect to inverter...
- Page 21 Wiring FR-CV-37K Screw size (M4) R/L11 S/L21 T/MC1 <Supply phase detection terminals> Connect to FR-CVL R, S and T terminals (main supply) R2/L1 S2/L2 T2/L3 N/L- P/L+ <AC power supply input terminals> <DC power output terminals> Connect to FR-CVL R2, S2, and T2 Connect to invertor P and terminals (secondary side) N terminals...
- Page 22 Wiring (3) Cables, crimping terminals, etc. Refer to the following for the cables, crimping terminals and terminal tightening torques used for the power regeneration common converter. FR-A720 R/L1 S/L2 T/L3 FR-CVL FR-CV R1/L11 R/L11 R2/L12 S1/L21 R2/L1 (Note 3) S/L21 S2/L22 S2/L2 P/L+...
- Page 23 Wiring Connection of power supply and dedicated stand-alone reactor Dedicated stand-alone reactor (FR-CVL) R/L11 R2/L12 S/L21 S2/L22 T/L31 T2/L32 Dedicated Cables Terminal Tightening Crimping Stand-Alone Terminal Name Screw Size Torque N•m Terminals Reactor Model FR-CVL-7.5K 14-5 FR-CVL-11K 14-5 FR-CVL-15K 22-6 FR-CVL-22K 38-6 FR-CVL-30K...
- Page 24 Wiring Power Cables Regeneration Terminal Tightening Crimping Terminal Name Common Screw Size Torque N•m Terminals Converter Model FR-CV-7.5K 14-5 FR-CV-11K 14-5 22-S6 FR-CV-15K (Note 2) FR-CV-22K 38-8 CB60-S8 FR-CV-30K (Note 2) FR-CV-37K R2/L1, S2/L2, 14.7 100-10 FR-CV-55K T2/L3 24.5 150-12 MCM300 FR-CV-H7.5K...
- Page 25 Wiring « » Example of connecting two or more inverters You can connect up to six inverters to one power regeneration common converter. The capacity of the power regeneration common converter should always be greater than the sum of the connected inverter capacities or the sum of rated inverter currents.
-
Page 26: Wiring Of The Control Circuit
Wiring Power Cables Regeneration Terminal Tightening Crimping Terminal Name Common Screw Size Torque N•m Terminals Converter Model FR-CV-7.5K 1.25-4 1.25 FR-CV-11K 1.25-4 1.25 FR-CV-15K 1.25-4 1.25 FR-CV-22K 1.25-4 1.25 FR-CV-30K 1.25-4 1.25 FR-CV-37K 1.25-4 1.25 FR-CV-55K R/L11, S/L21, 1.25-4 1.25 T/MC1 FR-CV-H7.5K... -
Page 27: Design Information
Wiring (2) Terminal block layout In the control circuit of the power regeneration common converter, the terminals are arranged as shown below: RDYB RDYA (3) Wiring procedure For the wiring of the control circuit, strip the sheaths of the cables and use them as they are. Over-stripping may cause a short circuit with the neighboring cable.Under-stripping may cause cable disconnection. -
Page 28: Operation
Operation 2.3 Operation 2.3.1 Pre-operation checks When installation and wiring are over, make the following checks prior to power-on. Check the wiring for incorrect connection. Especially check that the phase sequence and polarity of the main circuit wiring are correct. Check for a short circuit caused by wire off-cuts. -
Page 29: Other Wiring
Other wiring 2.4 Other wiring 2.4.1 Power harmonics Power harmonics may be generated from the power regeneration common converter, affecting generators, power capacitors, etc. Power harmonics are different in generation source, frequency and transmission path from radio frequency (RF) noise and leakage currents. The differences between harmonics and RF noise indicated below: Item Harmonics... -
Page 30: Noise Types And Reduction Techniques
Other wiring 2.4.2 Noise types and reduction techniques Some noises enter the power regeneration common converter causing it to misoperate and others are radiated by the power regeneration common converter causing misoperation of peripheral devices. Though the power regeneration common converter is designed to be insusceptible to noise, it handles low-level signals, so it requires the following basic measures to be taken. -
Page 31: Peripheral Devices
Power Regeneration Applicable Capacity Power Supply Rated current of Magnetic Common Converter Type (kW (HP)) Capacity (kVA) Circuit Breaker Contactor FR-CV-7.5K (-AT) 7.5 (10) 100AF 60A S-N35 FR-CV-11K (-AT) 11 (15) 100AF 75A S-N50 FR-CV-15K (-AT) 15 (20) 225AF 125A... - Page 32 Other wiring (2) Selection the rated sensitivity current for the earth leakage circuit breaker When using the earth leakage circuit breaker with the inverter circuit, select its rated sensitivity current as follows, independent of the carrier frequency setting: Breaker for harmonic and surge Example of leakage current Leakage current example Rated sensitivity current:...
-
Page 33: Instructions For Ul And Cul
Other wiring 2.4.4 Instructions for UL and cUL (Standards to comply with: UL 508C, CSA C22.2 No. 14) (1) Installation The equipment has been approved as a product for use in an enclosure. Design the enclosure so that the ambient temperature, humidity and ambience of the power regeneration common converter will satisfy the above specifications. -
Page 34: Protective Functions
CHAPTER 3 PROTECTIVE FUNCTIONS This chapter explains the "protective functions" of this product. Always read the instructions before using the equipment. 3.1 Errors (Alarms)..........30 3.2 Precautions for Maintenance and Inspection..........32... -
Page 35: Errors (Alarms)
Errors (Alarms) 3.1 Errors (Alarms) If any fault has occurred in the power regeneration common converter, the corresponding protective function is activated and the error (alarm) indication appears automatically on the LED display. When the protective function is activated, find the cause and take proper action. If an alarm stop has occurred, the power regeneration common converter must be reset to restart it. -
Page 36: Alarm Symptoms And Check Points
Errors (Alarms) CAUTION At occurrence of an instantaneous power failure alarm or power supply alarm, the inverter output may be shut off to coast the motor before the power regeneration common converter outputs an alarm. In a system where an alarm will cause an emergency stop, configure up a system that will not only provide alarm outputs of the power regeneration common converter and inverter but also make a stop if the RUN signal of the inverter turns off. -
Page 37: Precautions For Maintenance And Inspection
Precautions for Maintenance and Inspection 3.2 Precautions for Maintenance and Inspection The power regeneration common converter is a static unit mainly consisting of semiconductor devices. Daily inspection must be performed to prevent any fault from occurring due to adverse influence by the operating environment, such as temperature, humidity, dust, dirt and vibration, changes in the parts with time, service life, and other factors. -
Page 38: Insulation Resistance Test Using Megger
Precautions for Maintenance and Inspection 3.2.4 Insulation resistance test using megger Before performing the insulation resistance test using a megger on the external circuit, disconnect the cables from all terminals of the power regeneration common converter so that the test voltage is not applied to the inverter. -
Page 39: Daily And Periodic Inspection
Precautions for Maintenance and Inspection 3.2.6 Daily and Periodic Inspection Interval Periodic Area of Inspection Description Method Criterion Instrument Inspection Item Ambient temperature: (constant torque) -10°C to + 50°C (14°F to 122°F), Check ambient non-freezing. Thermometer, Surrounding temperature, (Refer to page 10) (Variable torque) hygrometer, environment... - Page 40 Precautions for Maintenance and Inspection Interval Periodic Area of Inspection Description Method Criterion Instrument Inspection Item (1) Perform sequence (1) Simulatively Control protective connect or (1) Fault must circuit Operation operation test to disconnect inverter occur because check make sure of no Protective protective circuit of sequence.
-
Page 41: Replacement Of Parts
Change the cooling fan in the following procedure. Heat sink outside mounting structure model FR-CV-7.5K to 30K, FR-CV-H11K to H30K 1) Disconnect the wiring of the power regeneration common converter unit and remove the unit from the enclosure. - Page 42 Precautions for Maintenance and Inspection FR-CV-37K/55K, FR-CV-H37K/H55K 1) Disconnect the wiring of the power regeneration common converter unit. 2) Remove the front cover. 3) Unplug the cooling fan connector from the cooling fan connection cable fastening holder. Cooling fan connector Cooling fan connection cable fastening holder 4) Shift the protective covers and unplug the connectors.
- Page 43 Precautions for Maintenance and Inspection 5) Loosen the screws that fasten the cooling fan mounting fixture and pull out the cooling fan mounting fixture. Pull it out slowly, exercising care not to bring the cooling fan into contact with the printed board. (The screw holes of the cooling fan mounting fixture are pear-shaped.) Cooling fan mounting fixture 6) Pinch the cable bushing with a pair of long-noise pliers etc.
- Page 44 Precautions for Maintenance and Inspection Enclosure inside installation structure model FR-CV-7.5K to 30K(-AT), FR-CV-H7.5K to H30K(-AT) 1) Disconnect the wiring of the power regeneration common converter unit. 2) Remove the screws in the L-bracket that fasten the cooling fan. L-bracket Remove screws.
-
Page 45: Measurement Of Main Circuit Voltages, Currents And Power
Precautions for Maintenance and Inspection 3.2.8 Measurement of main circuit voltages, currents and power Measurement of voltages and currents When instruments for commercial frequency are used for measurement, measure the following circuits using the instruments given below. When installing measuring instruments etc. on the output side of the power regeneration common converter, choose the measuring instruments that have allowance in current rating since they may generate heat under the influence of line-to-line leakage currents if the wiring distance between the power regeneration common converter and inverter is long. - Page 46 Precautions for Maintenance and Inspection Remarks Item Measuring Point Measuring Instrument (Reference Measured Value) * At R2/L1, S2/L2 and T2/L3 Power supply side power and across R2/L1-S2/L2, Electrodynamic type S2/L2-T2/L3, and T2/L3-R2/ single-phase wattmeter (3-wattmeter method) Calculate after measuring power supply voltage, power supply side current and power supply side power.
- Page 47 MEMO...
-
Page 48: Specifications
CHAPTER 4 SPECIFICATIONS This chapter provides the "specifications" of this product. Always read the instructions before using the equipment. 4.1 Standard Specifications ......44... -
Page 49: Standard Specifications
Standard Specifications 4.1 Standard Specifications 4.1.1 Model specifications 200V class Heat sink outside mounting structure FR-CV- (Note 4) (Note 4) Enclosure inside installation structure FR-CV- K-AT Applicable inverter capacity (Note 1) Applicable current (A) (Note 1) Short-duration 150% torque 60s rating Regenerative braking torque... - Page 50 Standard Specifications 400V class Heat sink outside mounting structure FR-CV-H (Note 4) (Note 4) Enclosure inside installation structure FR-CV-H K-AT Applicable inverter capacity (Note 1) Applicable current (A) (Note 1) Short-duration 150% torque 60s rating Regenerative braking torque Continuous 100% torque rating Rated input AC voltage, Three phase 380 to 480V 50Hz/60Hz...
- Page 51 Standard Specifications Note: 1. The applicable inverter capacity is the sum total of the inverter capacities (up to six inverters). For the FR-V500 series inverter, the capacity of the main circuit smoothing capacitor is larger than that of other types of transistorized inverter with same capacity. Therefore, use the substituted inverter capacity in the table below for selection.
-
Page 52: Internal Block Diagram
Standard Specifications 4.1.2 Internal block diagram FR-CV P/L+ R2/L1 S2/L2 T2/L3 N/L- RDYA R/L11 CHARGE Control power supply S/L21 Phase detection RDYB Power supply voltage detection T/MC1... -
Page 53: Outline Drawings
Standard Specifications 4.1.3 Outline drawings (1) Heat sink outside mounting structure model FR-CV-7.5K/11K/15K, FR-CV-H7.5K/H11K/H15K φ 6 hole Panel cutting dimensions 2-M5 screw Through hole 6 (0.24) 200 (7.87) Note : FR-CV-H7.5K is not provided Converter type with the cooling fan. - Page 54 Standard Specifications FR-CV-37K/55K, FR-CV-H37K/H55K φ 10 hole 10 (0.39) (4.53) (5.31) (1.77) 310 (12.20) 45 (1.77) 400 (15.75) 250 (9.84) Can be installed inside enclosure by changing mounting foot position. Panel cutting dimensions (0.39) (0.39) 380 (14.96) 390 (15.35) (1.57) (1.57) 310 (12.2) Through...
- Page 55 Standard Specifications (2) Enclosure inside installation structure model FR-CV-7.5K/11K/15K-AT, FR-CV-H7.5K/H11K/H15K-AT 2-φ6 hole Converter type FR-CV-7.5K/ 11K-AT (4.33) (2.36) (12.40) (4.53) FR-CV-15K-AT FR-CV-H7.5K/ (5.12) (3.54) (12.60) (4.72) 200 (7.87) H11K/H15K-AT (0.24) Note : FR-CV-H7.5K-AT is not provided with the cooling fan.
- Page 56 Standard Specifications (3) Dedicated stand-alone reactor 1) 200V class FR-CVL-7.5K/11K/15K/22K S/L21 R/L11 T/L31 Note : Wire the cables so that the primary side characters read at top and the secondary side ones at bottom on the capacity plate. S2/L22 T2/L32 R2/L12 Capacity plate (Note) 4-8 15 slot...
- Page 57 Standard Specifications FR-CVL-30K S/L21 R/L11 T/L31 Note : Wire the cables so that the primary side characters read at top and the secondary side ones at bottom on the capacity plate. R2/L12 S2/L22 T2/L32 Capacity plate (Note) 4-8 15 slot Terminal cover 2-M4 screw 70 (2.76) 120 (4.72) 1.5 (0.06)
- Page 58 Standard Specifications FR-CVL-37K/55K T/L31 R/L11 S/L21 4-10 15 slot Note : Wire the cables so that the primary side characters read at top and the secondary side ones at bottom on the capacity plate. Capacity plate (Note) R2/L12 S2/L22 T2/L32 4-M4 screw Terminal cover D1 1.5 (0.06)
- Page 59 Standard Specifications 2) 400V class FR-CVL-H7.5K/H11K/H15K 4-8 15 slot Note : Wire the cables so that the primary side characters read at top and the secondary side ones at bottom on the capacity plate. Capacity plate (Note) 135 (5.31) maximum 2-M4 screw Terminal cover 200 (7.87) 1.5 (0.06)
- Page 60 Standard Specifications FR-CVL-H22K/H30K 15 slot Note : Wire the cables so that the primary side characters read at top and the secondary side ones at bottom on the capacity plate. Capacity plate (Note) 2-M4 screw Terminal cover D1 1.5 (0.06) Reactor type Approximately weight (kg (lbs)) 215 (8.46)
- Page 61 Standard Specifications FR-CVL-H37K/H55K R/L11 S/L21 T/L31 4-10 15 slot Note : Wire the cables so that the primary side characters read at top and the secondary side ones at bottom on the capacity plate. R2/L12 S2/L22 T2/L32 Capacity plate (Note) 4-M4 screw Terminal cover W1 1.5 (0.06)
- Page 62 MEMO...
- Page 63 REVISIONS * The manual number is given on the bottom left of the back cover. Print Date Manual Number Revision Aug., 2001 IB(NA)-0600075-A First edition Additions •Support the FR-V500, C500 and F500J. Jan., 2003 IB(NA)-0600075-B Partial additions •Wiring Partial additions Sep., 2008 IB(NA)-0600075-C •Note for terminal connection diagram...
- Page 64 Additional notes for Instructions for UL and cUL General precaution CAUTION - Risk of Electric Shock - The bus capacitor discharge time is 10 minutes. Before starting wiring or inspection, switch power off, wait for more than 10 minutes. ATTENTION - Risque de choc électrique - La durée de décharge du condensateur de bus est de 10 minutes.
Need help?
Do you have a question about the FR-CV-7.5K and is the answer not in the manual?
Questions and answers