JUNO JH084C1 User Manual
Hide thumbs
Also See for JH084C1:
- User manual (52 pages) ,
- User manual (64 pages) ,
- User manual (124 pages)
Table of Contents
Advertisement
Quick Links
Advertisement
Table of Contents

Subscribe to Our Youtube Channel
Related Manuals for JUNO JH084C1


Summary of Contents for JUNO JH084C1
- Page 1 User Manual Oven JH084C1...
-
Page 2: Table Of Contents
VISIT OUR WEBSITE TO: Get usage advice, brochures, trouble shooter, service and repair information: www.juno.de/support CONTENTS 1. SAFETY INFORMATION...................2 2. SAFETY INSTRUCTIONS.................4 3. INSTALLATION....................7 4. PRODUCT DESCRIPTION................8 5. CONTROL PANEL.................... 8 6. BEFORE FIRST USE..................9 7. DAILY USE...................... 10 8. - Page 3 be kept away from the appliance unless continuously supervised. Children should be supervised to ensure that they do not • play with the appliance. Keep all packaging away from children and dispose of it • appropriately. WARNING: The appliance and its accessible parts become •...
-
Page 4: Safety Instructions
WARNING: Ensure that the appliance is switched off before • replacing the lamp to avoid the possibility of electric shock. WARNING: The appliance and its accessible parts become • hot during use. Care should be taken to avoid touching heating elements or the surface of the appliance cavity. Always use oven gloves to remove or insert accessories or •... - Page 5 fuses removed from the holder), earth leakage trips and contactors. Ventilation opening mini‐ 560x20 mm • The electrical installation must have an mum size. Opening isolation device which lets you disconnect placed on the bottom the appliance from the mains at all poles. rear side The isolation device must have a contact opening width of minimum 3 mm.
- Page 6 • To prevent damage or discoloration to the enamel: Cable types applicable for installation or – do not put aluminium foil directly on replacement for Europe: the bottom of cavity of the appliance. H07 RN-F, H05 RN-F, H05 RRF, H05 VV-F, H05 –...
-
Page 7: Installation
2.7 Disposal appliances, such as temperature, vibration, humidity, or are intended to signal information about the operational WARNING! status of the appliance. They are not Risk of injury or suffocation. intended to be used in other applications and are not suitable for household room •... -
Page 8: Product Description
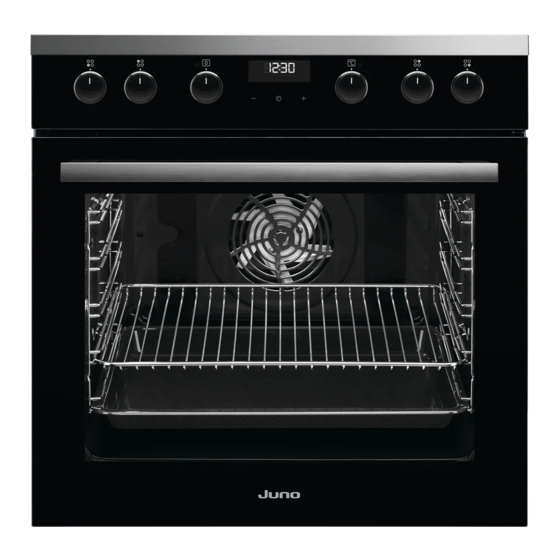
3.2 Securing the oven to the cabinet 4. PRODUCT DESCRIPTION 4.1 General overview Control panel Knobs for the hob Power lamp / symbol Knob for the heating functions Display Control knob (for the temperature) Temperature indicator / symbol Heating element Lamp Cavity embossment - Aqua cleaning container... -
Page 9: Before First Use
You can operate the hob with the knobs for the cooking zones. 5.2 Heat settings 1. Turn the knob clockwise to position 9. 2. Turn the knob slowly to the symbol Knob indication Function until you can hear a click. The two cooking zones are on. -
Page 10: Daily Use
6.1 Before first use The oven can emit an odour and smoke during preheating. Make sure that the room is ventilated. Step 1 Step 2 Step 3 Set the clock Clean the oven Preheat the empty oven 1. Remove all accessories 1. - Page 11 Step 2 Fill the cavity embossment with tap water. The maximum capacity of the cav‐ ity embossment is 250 ml. Do not refill the cavity embossment during cooking or when the oven is hot. Step 3 Set the function: Step 4 Turn the control knob for the temperature to set temperature.
-
Page 12: Clock Functions
7.4 Notes on: Moist Fan Baking Heating Application This function was used to comply with the function energy efficiency class and ecodesign requirements (according to EU 65/2014 and To roast large meat joints or EU 66/2014). Tests according to: poultry with bones on one shelf position. -
Page 13: Using The Accessories
How to change: Time of Day Step 1 - press repeatedly to change the time of day. - starts to flash. Step 2 - press to set the time. After approximately 5 sec., the flashing stops and the display shows the time. How to set: Duration Step 1 Set an oven function and the temperature. -
Page 14: Additional Functions
Wire shelf Push the shelf between the guide bars of the shelf support and make sure that the feet point down. Deep pan: Push the tray between the guide bars of the shelf support. Wire shelf, Deep pan: Push the tray between the guide bars of the shelf support and the wire shelf on the guide bars above. - Page 15 Count the shelf positions from the bottom of To prevent too much smoke in the oven the oven floor. during roasting, add some water into the deep pan. To prevent the smoke Your oven may bake or roast differently to the condensation, add water each time after it oven you had before.
- Page 16 (°C) (min) Brownie baking tray or dripping pan 45 - 50 Soufflè, 6 pieces ceramic ramekins on wire 45 - 55 shelf Sponge flan base flan base tin on wire shelf 35 - 45 Victoria sandwich baking dish on wire shelf 35 - 50 Poached fish, 0.3 baking tray or dripping pan...
- Page 17 (°C) (min) Small Conven‐ Baking 20 - 30 cakes, tional Cook‐ tray 20 per tray Small True Fan Baking 150 - 20 - 35 cakes, Cooking tray 20 per tray Small True Fan Baking 2 and 4 150 - 20 - 35 cakes, Cooking tray...
-
Page 18: Care And Cleaning
(°C) (min) Short Conven‐ Baking 140 - 25 - 45 bread tional Cook‐ tray Toast, 4 Grill Wire shelf max. 2 - 3 mi‐ Preheat the oven nutes first for 3 minutes. pieces side; 2 - 3 minutes second side Beef Grill Wire shelf... - Page 19 Clean all accessories after each use and let them dry. Use a microfibre cloth with warm water and a mild detergent. Do not clean the accessories in a dishwasher. Do not clean the non-stick accessories using abrasive cleaner or sharp-edged objects. Accesso‐...
- Page 20 Step 1 Open the door fully and hold both hinges. Step 2 Lift and pull the latches until they click. Step 3 Close the oven door halfway to the first opening position. Then lift and pull to re‐ move the door from its seat. Step 4 Put the door on a soft cloth on a stable surface.
-
Page 21: Troubleshooting
Step 9 After cleaning, install the glass panel and the oven door. If the door is installed correctly, you will hear a click when closing the latches. The screen-printing zone must face the inner side of the door. Make sure that after the installation the surface of the glass panel frame on the screen- printing zones is not rough when you touch it. -
Page 22: Energy Efficiency
......... 14. ENERGY EFFICIENCY 14.1 Product Information and Product Information Sheet* Supplier's name Juno Model identification JH084C1 949723405 Energy Efficiency Index 95.3 Energy efficiency class Energy consumption with a standard load, conventional mode 0.93 kWh/cycle Energy consumption with a standard load, fan-forced mode 0.81 kWh/cycle... -
Page 23: Environmental Concerns
Energy efficiency class is not applicable for Russia. EN 60350-1 - Household electric cooking appliances - Part 1: Ranges, ovens, steam ovens and grills - Meth‐ ods for measuring performance. 14.2 Energy saving Residual heat When the cooking duration is longer than 30 min, reduce the appliance temperature to The appliance has features which minimum 3 - 10 min before the end of... - Page 24 867359840-C-212022...
Need help?
Do you have a question about the JH084C1 and is the answer not in the manual?
Questions and answers