Advertisement
Quick Links
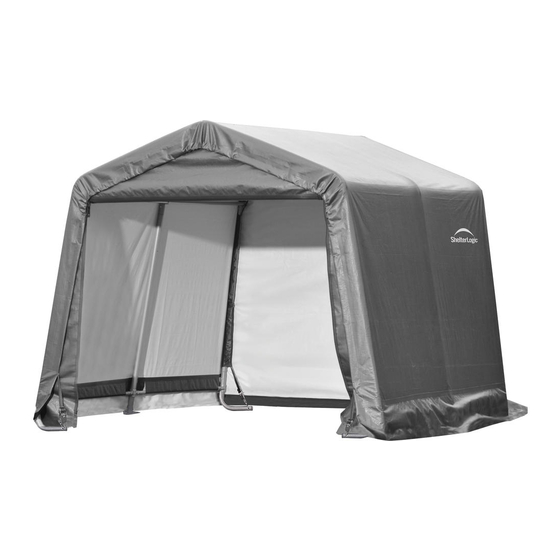
12' x 12' x 8' Shed-in-a-Box
12' x 12' x 8' Shed-in-a-Box
Please read instructions COMPLETELY before assembly. This shelter MUST be securely anchored.
THIS IS A TEMPORARY STRUCTURE AND NOT RECOMMENDED AS A PERMANENT STRUCTURE.
Before you start: 2 or more individuals recommended for assembly, approximate time 2 hours.
150 Callender Road
Watertown, CT 06795
www.shelterlogic.com
5/23/12
shed-in-a-Box
Assembly Manual
Description
- Gray
®
- Sandstone
®
recoMMenDeD tools
www.shelterlogic.com/UserFiles/video/index.html
1
®
MoDel #
70443
70743
or
VieW An online instrUctionAl ViDeo
oF A GArAGe BeinG BUilt!
1-800-524-9970
1-800-559-6175
7/16"
11
mm
Canada:
05_70443_70743_F3
Advertisement

Summary of Contents for ShelterLogic Shed-in-a-Box
- Page 1 ® Assembly Manual Description MoDel # 70443 12' x 12' x 8' Shed-in-a-Box - Gray ® 70743 12' x 12' x 8' Shed-in-a-Box - Sandstone ® recoMMenDeD tools 7/16" Please read instructions COMPLETELY before assembly. This shelter MUST be securely anchored.
-
Page 2: Service Hotline
SERVICE HOTLINE TEL.: +49 (0) 6571 / 95117-0 FAX: +49 (0) 6571 / 95117-98 E-MAIL: INFO@50NRTH.COM 50NRTH GmbH STRASSBURGSTR. 14-16 54516 WITTLICH / GERMANY www.50NRTH.com 05_70443_70743_F3... - Page 3 05_70443_70743_F3...
- Page 4 pArts list 10016 10015 10014 801256 801257 802600 - Gray 801215 - Sandstone 802637 13202 13201 800318 - Gray 801217 - Sandstone 10114 03032 10066 10115 800317 - Gray 801216 - Sandstone 10240 01011 800938 12270 01010 05_70443_70743_F3...
- Page 5 1. AsseMBle 2 enD riBs 01010 801256 800938 802130 802130 #03032 10114 800938 800938 801209 801209 #10114 801209 #03032 802694 802694 #10115 802637 802637 2. AsseMBle 2 MiDDle riBs 801257 802130 802130 #03032 800938 800938 801209 801209 #10114 #03032 802693 802693 #10115 12270...
- Page 6 3. connect Front enD riB to A MiDDle riB A. Connect 2 Side Cross Rails (802130) at front end rib with ShelterLock 3X (800938) as shown. ® B. Connect Side Cross Rails at middle rib with ShelterLock 3X as shown. Leave open for next rib connection. ®...
- Page 7 4. connect reMAininG riBs A. Use #802129 Side Cross Rails and ShelterLock 3X (800938) to connect middle ribs as shown. ® B. Use #802129 Side Cross Rails and ShelterLock 3X to connect rear end rib. ® C. Use Top Cross Rail (801258) to connect ribs at the top. 03032 03032 800938...
- Page 8 B. Thread cable provided through the eyelets of the Anchor as indicated in figure. Secure the cable with the clamps provided. NOTE: 15" Augers are for temporary use only! For best results ShelterLogic recommends using our Easy Hooks (#10036 4-pack, #10035 6-pack, or #10038 8-pack) or 30" Augers (#10075 4-pack, #10078 6-pack, or #10079 8-pack) for a stronger, more secure installation.
- Page 9 7. Door pAnel AnD BAcK pAnel instAllAtion A. (1) Hold end panel at the top center with white inner surface facing inside of the shelter. (2) Wrap the edges of the fabric panel around the end rib and line up the cross rails with the pre made slits in the fabric. B.
- Page 10 7. enD pAnel instAllAtion - continued D. At the bottom, where the webbing exits the pocket on each side of end panel, pull webbing as you would a drawstring to remove the slack. Be careful not to pull the webbing strap out of the webbing pocket. END PANEL vIEW FROM INSIDE...
- Page 11 D. Disassemble cover rails and slide through fabric pockets at each leg and reattach with clamps to each leg. Repeat this on other side. Push down on cover rails to tighten cover, before tightening bolts completely. E. Check and tighten Ratchets and Cover Rails monthly to ensure the cover is tight. NOTE: The ShelterLogic logo should ®...
- Page 12 9. UsinG BUnGees to HolD Door open (optional) A. Unzip the door to the height of the grommets. B. Roll up door section to the height of the grommets. C. Insert 1 Bungee Cord (#10066) through grommet. D. Secure Bungee around ball. 05_70443_70743_F3...


Need help?
Do you have a question about the Shed-in-a-Box and is the answer not in the manual?
Questions and answers