
Related Manuals for Tesvor R5


Summary of Contents for Tesvor R5
- Page 1 R5 Cordless Wet-Dry Vacuum Cleaner User Manual (Note: Please read this User Manual carefully before using to avoid danger or damage to the Product caused by improper operation.)...
-
Page 3: Table Of Contents
Contents 1. Safety Instruction 2. Packing list 3. Product Figure 3.1 Mop Assembly 4. Assemble Product 4.1 Assemble Machine Body and Handle Assembly 4.2 Assemble Clean Water Bucket Assembly 4.3 Assemble Sewage Bucket Assembly 4.4 Assemble Roller Brush Assembly 4.5 Assemble Roller Brush Cover 5. -
Page 4: Safety Instruction
1. Safety Instructions Please read the following safety instructions before using this product, and follow all routine safety precautions. Please read this manual carefully. Please keep this manual. Any operation inconsistent with this manual may cause damage to the product. Be careful 01. - Page 5 Safety Precautions for Rechargeable Battery Danger 01. Be sure to use the special battery adapter, otherwise leakage, heating or rupture may occur. 02. Do not make the battery short circuit or remove the battery, otherwise leakage, heating or rupture may occur. 03.
-
Page 6: Packing List
2. Packing list Main Body Handle Assembly Clean Water Bucket Charging Stand Power Adapter Accessory box Roller Brush Cleaning Tool High-efficient Filter Accessories of some models may be slightly different and they are subject to the actual received products. -
Page 7: Product Figure
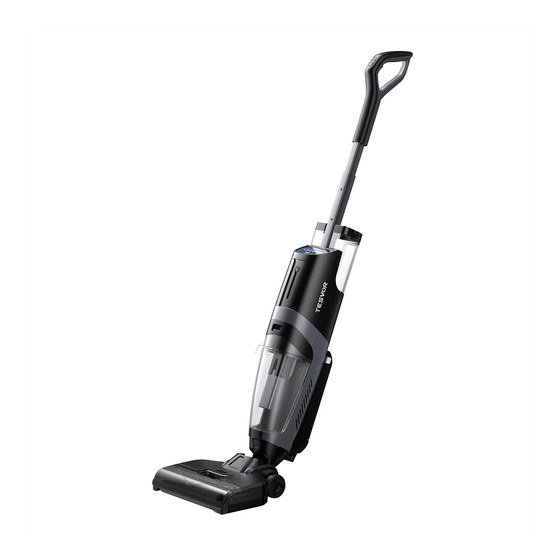
3. Product Figure Component Name Switch Button Auto-cleaning Button UV Disinfection/MAX Handle Assembly Clean Water Bucket Display Voice Button Battery Sewage Bucket Machine Body Assembly Roller Brush Cover Mop Assembly Roller Brush Adapter Charging Stand... -
Page 8: Mop Assembly
3.1 Mop Assembly Roller Brush Scraper Small Wheel Floor Penetrating UV Disinfection Lamp Rear Wheel 4. Assemble Product 4.1 Assemble Machine Body and Handle Assembly Insert handle assembly into top of machine body from the direction as shown in figure; snap positioning is set inside; assembling is successful when a “ka” sound is heard. -
Page 9: Assemble Clean Water Bucket Assembly
4.2 Assemble Clean Water Bucket Assembly Turn cap of clean water bucket counterclockwise to open it, add appropriate amount of clean water, turn cap clockwise to tighten it. Insert clean water bucket assembly into corresponding position of machine body in the direction as shown in figure. -
Page 10: Assemble Sewage Bucket Assembly P8
4.3 Assemble Sewage Bucket Insert sewage bucket assembly into corresponding position of machine body in the direction as shown in figure. Snap positioning is set in sewage bucket assembly; assembling is successful when a “ka” sound is heard. 4.4 Assemble Roller Brush Insert roller brush assembly into corresponding position of machine body in the direction as shown in figure. -
Page 11: Assemble Roller Brush Cover
4.5 Assemble Roller Brush Cover Insert the roller brush cover into the corresponding position at the bottom of the floor brush assembly in the direction shown in the figure. Then press the roller brush cover until you hear a "ka" to complete the assembly. Buttonhole Buttonhole 5. -
Page 12: Instructions For Cleaning Sewage Bucket
6.Instructions for Cleaning Sewage Bucket A hallow (as indicated by the arrow in figure) is set above sewage bucket, press the button inside such hallow downward to remove sewage bucket. Place sewage bucket on floor, hold bucket body with left hand, slowly pull bucket cap upward (do not use to much force to avoid sewage splashing) to remove it;... - Page 13 7. Introduction of Icons on Display AUTO Battery level: Displayed from “0” to “100”, “0” indicates no power, “100” indicates fully charged. Illuminating indicates working, flashing indicates charging. Auto-cleaning: After auto-washing is finished, the icon will flash to remind auto-cleaning. When machine is placed onto charging stand and its battery level is above 30%, press “Auto-cleaning Button”, the icon will illuminate and machine will enter auto-cleaning mode (auto-cleaning takes 80 s).
-
Page 14: Introduction Of Function Buttons
Fan suction level: Under auto-washing mode, machine will automatically identify stains on floor and intelligently adjust fan suction level, the more bars illuminate, the higher fan suction level is. Under auto-washing mode, short press UV Disinfection/MAX Button for 0.5 s to enter MAX suction mode, progress bar will fully illuminate;... -
Page 15: Product Specifications
9. Product Specifications Product Specifications Rated Voltage DC 25.2V Machine Power 255W Adapter Parameters 29.5V Frequency Bands & Signal Transmission Bluetooth 5.0 BLE, 2,4GHz; 18dBm Battery Capacity 3800mAh ≥45min Working Time (General Mode) Working Time (Max Suction Mode) ≥15min Charging Time 240min Effective Capacity of Sewage Bucket 700ml... -
Page 16: Information On Disposal And Recycling
10. Information on disposal and recycling 7. Information on disposal and recycling The symbol means that this product must be disposed of separately from normal household waste at the end of its useful life. Please note that it is your responsibility to dispose of electronic equipment at recycling centers to help conserve natural resources. - Page 18 MORE FAMILY TIME. LESS CLEANING. Manufacturer: Tesvor, Shenzhen Tian You Intelligence Co., Ltd. Address: Room 301,Building 5, Lixin Xinwei Industrial Park,Xili North Road No.50, Licheng Community, Xili Street,Nanshan District, Shenzhen China Customer Service: service@tesvor.com...
Need help?
Do you have a question about the R5 and is the answer not in the manual?
Questions and answers