
Related Manuals for Tesvor M1


Summary of Contents for Tesvor M1
- Page 1 Der Spezialist für Roboter in deinem Zuhause. The Expert for Robots in Your Home. L’expert pour les robots dans votre ménage. myRobotcenter...
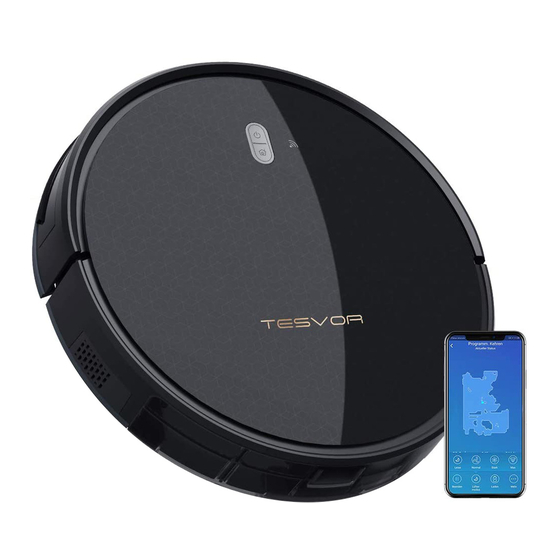
- Page 2 M1 Smart Robot Vacuum User Manual MORE FAMILY TIME. LESS CLEANING.
- Page 3 1-19 19-38 37-57 55-76...
-
Page 4: Table Of Contents
CONTENTS 1. Safety Instructions 2. What’s in the Box 3. Using Your M1 Important Tips before Use Preparation LED Indication Charging Modes Switching Modes Cleaning Modes Set Time and Scheduled Cleaning 4.Cleaning and Maintenance M1 Anatomy Clean the Rolling Brush... - Page 5 To reduce the risk of injury or damage, read these safety instructions carefully and keep them at hand when setting up, using, and maintaining this device. Safety Instructions for M1 and Accessories Warning 1. Do not disassemble, repair or refit the product without authorization;...
- Page 6 Please recycle the battery safely for environmental protection. Safety Instructions for M1 and Accessories Danger 1. Always use a dedicated battery adapter to avoid leakage, heating or rupture.
- Page 7 11. The power supply must be removed from the socket-outlet before cleaning or maintaining the device. 12. The battery must be removed from the device before it is scrapped. 13. The device must be disconnected from the mains supply when removing the battery.
-
Page 8: What's In The Box
2. What’s in the Box Main Body Remote Control Charging Base Power Adapter (2 * AAA Batteries required but NOT included) High-effective Cleaning Tool Side Brushes(4) Filter/Sponge While the accessories provided for some models are slightly different, they are subject to the actual product. -
Page 9: Using Your M1
Remove power cords and small objects from the floor that may become entangled with the M1. The M1 may climb on top of objects less than 0.63 in/16 mm in height. Remove these objects if possible. Do NOT stand around narrow places, such as thresholds and aisles, to reduce the uncovered rate. -
Page 10: Preparation P7
Preparation Install the side brushes before use. Please note L and R should correspond to each other when installing the side brushes. Turn on the main power switch on the side of M1. Remove before use Remove the protective film before use. - Page 11 Install 2 AAA batteries (Not included in the package) into the remote control. Power On/Off Display Screen Return for Auto Plan Cleaning Charging Confirm Direction Clock Settings Suction Settings Edge Cleaning Schedule Note: For App users, please refer to our User Guide for App&Alexa. When the device is in the vicinity of the charging base and the virtual protection wall, it may not be able to receive the instructions issued by the remote control.
-
Page 12: Led Indication P9
Method 1: Press on the remote control to return the M1 to the Charging Base. Method 2: When cleaning is completed, or the battery is too low, the M1 will automatically start finding the charging base to charge itself. Please keep the... -
Page 13: Switching Modes P10
The pause function switches the M1 from the operating mode to the selected mode, and it can be paused by the following operations: Press on the remote control to pause it. Note : If the M1 is out of service for a long time, please turn the power switch off. -
Page 14: Cleaning Modes P11
Spot Cleaning mode. 3. Edge Cleaning The Tesvor M1 reduces its speed when it detects a wall and then follows the wall to ensure the edge is cleaned thoroughly. Click the Edge Cleaning icon... -
Page 15: Set Time And Scheduled Cleaning P12
Note: Make sure the time is set correctly to your local time before setting a scheduled cleaning. 1. Make sure the main power switch on the bottom of the M1 is turned on. 2. Press on the remote control. The time will blink on the display. -
Page 16: Cleaning And Maintenance
4.Cleaning and Maintenance regularly. The cleaning/replacement frequency will depend on the way you use the M1. M1 Anatomy Top & Side Bumper Control button DC power jack Power switch Dust box release button Bottom Swivel Wheel Charging shrapnel Side brushes... -
Page 17: Clean The Rolling Brush P14
Charging Base Charging indicator light DC power jack Charging terminal Dust box Pre-filter High-performance filter Filter sponge Dust box Dust box cover Clean the Rolling Brush 1.Open the rolling brush components. 2.Remove the rolling brush shaft and clean off any debris and hair. Clean the Side Brushes Foreign substances, such as hair, can easily get tangled in the side brushes, and dirt may adhere to them. -
Page 18: Clean The Box And Filters P15
2) Carefully unwind and pull off any hair or string that is wrapped between the main unit and the side brushes. 3) Use a cloth dampened with warm water to remove dust from the brushes or to gently reshape them. Note Only use the side brushes when they are completely dry. -
Page 19: Replace The Side Brushes P16
Replace the Side Brushes The side brushes may become bent or damaged after being used for a period of time. Follow the instructions below to replace them. Pull off the old side brushes and snap the new ones into place. Clean the Sensors and Charging Terminals To maintain the best performance, clean the drop sensors and charging terminal regularly. -
Page 20: Troubleshooting
Clean the sensors carefully with movements or the M1’s software. a dry cloth. travel path are Restart the M1 by turning the abnormal. power switch off and back on. The side The side brushes are mounted Please install the side brushes brushes deform in reverse. - Page 21 300 - 360 mins 330mm Diameter of main unit 75mm Thickness of main unit Net weight of main unit 3.0kg 7. Customer Service If you have any issues, please contact us by Online Service on the app or send email to service@tesvor.com.
- Page 22 6.The appliance must be disconnected from the supply mains when removing the battery; 7.The battery is to be disposed of safely. 8.WARNING: For the purposes of recharging the battery, only use the detachable supply unit (model:M1) provided with this appliance.
- Page 23 Importer: Luxus Lebenswelt GmbH Address: Kochstr. 1, 47877, Willich, Germany Company website: h�ps://www.tesvor.com Customer Service: service@tesvor.com Manufacturer: Tesvor, Shenzhen Tian You Intelligence Co., Ltd. Address: Room 301,Building 5, Lixin Xinwei Industrial Park, Xili North Road No.50, Licheng Community, Xili Street,Nanshan District, Shenzhen China...
Need help?
Do you have a question about the M1 and is the answer not in the manual?
Questions and answers
пробывал подключиться к приложению WeBack ,неудачно не подключаеться,зато остался мигать индикатор подключения к Wi-Fi,и все время мигает,что делать?
To connect the Tesvor M1 to the WeBack app when the Wi-Fi indicator keeps blinking, follow these steps:
1. Download the WeBack app from the Google Play Store or App Store.
2. Sign up or log in to your account.
3. Tap "Add a device" in the app.
4. Allow app permissions (e.g., camera).
5. Scan the QR code located on the bottom of the robot vacuum.
6. Connect the vacuum to your home Wi-Fi network (2.4 GHz only).
7. Wait for the connection to complete.
If the Wi-Fi indicator continues to blink and does not connect:
- Make sure the vacuum is in pairing mode. The correct pairing mode for M1 may not involve "rapid flashing" like other models.
- Ensure your phone is connected to the same 2.4 GHz Wi-Fi network.
- Restart the vacuum and try the process again.
- If issues persist, consider resetting the vacuum and repeating the steps.
This answer is automatically generated
и как сделать сброс до заводских настроек?