Advertisement
Quick Links
®
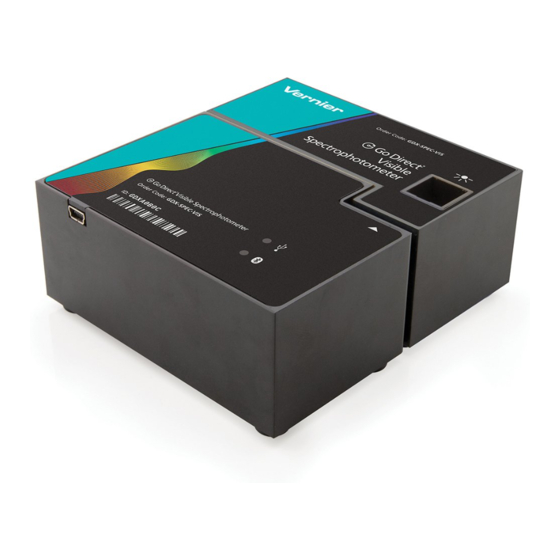
Go Direct
Visible
Spectrophotometer
(Order Code GDX-SPEC-VIS)
The Go Direct Visible Spectrophotometer is a robust and
accurate portable visible light spectrophotometer that connects easily to your
®
device via Bluetooth
wireless technology or USB to conduct Beer's law
experiments, kinetic or equilibrium studies of absorbance, or emission spectrum
analysis.
Note: Vernier products are designed for educational use. Our products are not
designed nor are they recommended for any industrial, medical, or commercial
process such as life support, patient diagnosis, control of a manufacturing
process, or industrial testing of any kind.
What's Included
Go Direct Visible Spectrophotometer
l
Plastic cuvettes and lids (15)
l
Mini USB cable
l
USB Power Adapter
l
Compatible Software and Interfaces
See
www.vernier.com/manuals/gdx-spec-vis
compatible with the Go Direct Visible Spectrophotometer.
Getting Started
Please see the following link for platform-specific connection information:
www.vernier.com/start/gdx-spec-vis
Bluetooth Connection
1. Install Vernier Spectral Analysis
your computer, Chromebook™, or
mobile device. See
www.vernier.com/spectral-analysis
for Spectral Analysis availability.
2. To power the Bluetooth radio,
connect the spectrometer to the USB
Power Adapter or to a powered USB
®
hub. The Bluetooth
LED will blink.
Note: Do not plug the USB into a
computer USB port to run with
Bluetooth wireless technology.
3. Launch Spectral Analysis.
4. Click or tap Connect a Spectrometer.
Select your Go Direct Visible
Spectrophotometer from the list of
for a list of interfaces and software
USB Connection
®
on
1. Connect the spectrometer to the
USB port.
2. Launch the software. Options
include
Computer: Spectral Analysis
l
Chromebook: Spectral Analysis
l
LabQuest 2 or 3: LabQuest App
l
Mobile Device: Spectral Analysis
l
3. The software will identify the
spectrometer and enter data-
collection mode. You are now
ready to continue your experiment.
Note: This sensor does not work with
Discovered Wireless Devices. Your
spectrometer's ID is located near the
barcode on the label. The Bluetooth
LED on the sensor will now glow
blue (no longer flashing).
5. Click or tap Done to enter data-
collection mode. You are now ready
to continue your experiment.
Connecting the Sensor
See the following link for up-to-date connection information:
www.vernier.com/start/gdx-spec-vis
Connecting via Bluetooth
Ready to connect
Connected
Connecting via USB
Connected
Using the Product with Spectral Analysis
Connect the sensor following the steps in the Getting Started section of this user
manual.
Select the Type of Data to Measure
The three options for Experiment Types are
1. Measurement vs. Wavelength—collect a full spectrum.
2. Measurement vs. Concentration—conduct a Beer's law experiment.
3. Measurement vs. Time—collect time-based data for a kinetics experiment.
By default, Absorbance is expanded. You can also choose from % Transmittance,
Emissions, or Advanced Full Spectrum. Use the Advanced Full Spectrum mode to
switch among all the measurement types in the same session. For complete
instructions, refer to the Spectral Analysis user manual at
www.vernier.com/spectral-analysis
Measurement vs. Wavelength (Full Spectrum)
1. Select Measurement vs. Wavelength.
2. If applicable, follow instructions for calibration. Align the cuvette so the clear
side of the cuvette is facing the light source. Note: Calibration is not required
for intensity.
1
the original LabQuest. It works via
USB with LabQuest 2 or LabQuest 3.
Connect the USB to the USB power adapter or to
a powered USB hub. Blue LED next to Bluetooth
icon flashes when sensor is ready to connect.
Blue LED next to Bluetooth icon is solid when
sensor is connected via Bluetooth wireless tech-
nology.
LED next to Bluetooth icon is off. LED next to
USB icon is solid green.
Advertisement

Summary of Contents for Vernier Go Direct Visible Spectrophotometer
- Page 1 Connecting the Sensor See the following link for up-to-date connection information: Note: Vernier products are designed for educational use. Our products are not www.vernier.com/start/gdx-spec-vis designed nor are they recommended for any industrial, medical, or commercial Connecting via Bluetooth process such as life support, patient diagnosis, control of a manufacturing process, or industrial testing of any kind.
- Page 2 LED or a gas discharge tube. To do so, you will need to 6. Repeat the previous step for the remaining samples. When finished, click or purchase the Vernier Optical Fiber (order code: VSP-EM-FIBER). tap Stop to end data collection. The data are automatically stored.
- Page 3 If you want to measure %T or intensity, do the following: absorbance value. Tap the Graph tab and choose Interpolate from the Analyze menu. Trace the linear regression equation to determine the concentration of 1. From the Sensors menu, choose Change Units ► USB: Spectrophotometer. the unknown.
- Page 4 Handle the device with care. This instrument can be damaged if it is dropped. (1) this device may not cause harmful interference and Do not use this instrument if it is damaged in any way. Contact Vernier (2) this device must accept any interference received, including interference that may cause undesired operation Technical Support for troubleshooting and technical assistance.
- Page 5 • www.vernier.com Rev. 1/20/2022 Go Direct, Vernier Spectral Analysis, Logger Pro, Vernier LabQuest, and other marks shown are our trademarks or registered trademarks in the United States. All other marks not owned by us that appear herein are the property of their respective owners, who may or may not...


Need help?
Do you have a question about the Go Direct Visible Spectrophotometer and is the answer not in the manual?
Questions and answers