Advertisement
®
Go Direct
Cyclic
Voltammetry System
(Order Code GDX-CVS)
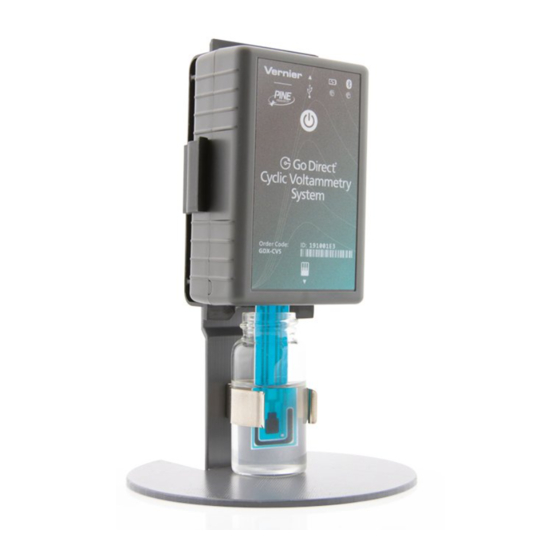
Go Direct Cyclic Voltammetry System is a potentiostat that
students can use to easily control and apply potential to a
chemical system and measure the response as electrical current.
It has three modes of data collection: cyclic voltammetry, bulk
electrolysis, and open-circuit potentiometry. It includes a stand,
scintillation vials, and disposable screen-printed electrodes. Free
®
Vernier Instrumental Analysis
software and free experiments are available for
download.
Note: Vernier products are designed for educational use. Our products are not
designed nor are they recommended for any industrial, medical, or commercial
process such as life support, patient diagnosis, control of a manufacturing
process, or industrial testing of any kind.
What's Included
Go Direct Cyclic Voltammetry System
l
Screen printed electrodes (25)
l
Scintillation vials (4)
l
Cyclic voltammetry system stand
l
Electrochemistry Experiments with the Go Direct Cyclic Voltammetry System
l
(free e-book download)
Micro USB Cable
l
Compatible Software
See
www.vernier.com/manuals/gdx-cvs
Direct Cyclic Voltammetry System.
Getting Started
Please see the following link for platform-specific connection information:
www.vernier.com/start/gdx-cvs
Bluetooth Connection
1. Install Vernier Instrumental
®
Analysis
on your computer,
Chromebook™, or mobile device. If
using LabQuest, make sure
LabQuest App is up to date. See
www.vernier.com/ia for
Instrumental Analysis availability or
www.vernier.com/downloads to
update LabQuest App.
2. Charge your sensor for at least 2
for a list of software compatible with the Go
USB Connection
1. If using a computer or Chromebook,
install Vernier Instrumental
Analysis. If using LabQuest, make
sure LabQuest App is up to date.
See www.vernier.com/ia for
Instrumental Analysis availability or
www.vernier.com/downloads to
update LabQuest App.
2. Connect the sensor to the USB port.
3. Launch Instrumental Analysis or
hours before first use.
3. Turn on your sensor by pressing the
power button once. The Bluetooth
LED will blink red.
4. Launch Instrumental Analysis or
turn on LabQuest.
5. If using Instrumental Analysis, click
or tap Voltammetry. If using
LabQuest, choose Wireless Device
Setup > Go Direct from the Sensors
menu.
6. Select your Go Direct sensor from
the list of Discovered Wireless
Devices. Your sensor's ID is located
near the barcode on the sensor. The
LED will blink green when it is
successfully connected.
7. Click or tap Done. You are now
ready to continue your experiment.
Connecting the Sensor
See the following link for up-to-date connection information:
www.vernier.com/start/gdx-cvs
Connecting via Bluetooth
Ready to connect
Connected
Connecting via USB
Connected
Powering the Sensor
Turning on the sensor
Putting the sensor in sleep
mode
1
turn on LabQuest. If using
Instrumental Analysis, click or tap
®
Voltammetry. You are now ready to
continue your experiment.
Note: This sensor does not work with
the original LabQuest. It works with
LabQuest 2 or LabQuest 3.
Red LED next to Bluetooth icon flashes when the
sensor is awake and ready to connect. At the same
time, the red LED next to the power icon is
steady.
Green LED next to Bluetooth icon flashes when
the sensor is connected via Bluetooth.
Red LED next to power icon on steady when
sensor is connected to Graphical Analysis via
USB. LED next to Bluetooth icon off.
Red LED is on steady when connected to AC
power.
Red LED is off when disconnected from AC
power.
Advertisement
Table of Contents

Summary of Contents for Vernier Go Direct
- Page 1 Discovered Wireless download. Devices. Your sensor's ID is located Note: Vernier products are designed for educational use. Our products are not near the barcode on the sensor. The designed nor are they recommended for any industrial, medical, or commercial...
- Page 2 Electrochemistry segments in the waveform, known as the experiment's sweep rate. The potential is Experiments with the Go Direct Cyclic Voltammetry System e-book. measured between the working electrode and the reference electrode on the SPE,...
- Page 3 while the current is measured between the working electrode and the counter the chemical system is at equilibrium. In fact, some systems may be far from electrode on the SPE. equilibrium and their passive potential changes as a function of homogeneous reactions.
- Page 4 You may want to adjust these settings according to the student instructions in to perform here. There are multiple parameters listed in the dialog box that will the Electrochemistry Experiments with the Go Direct Cyclic Voltammetry vary based on the experiment you have selected.
-
Page 5: Specifications
–1200 mV to +1200 mV vs REF through reduction or oxidation. Analyzing the resulting data can help determine typical of using the Vernier screen- the electric charge passed over time. The experimental parameters to set are the printed electrodes in aqueous solutions. -
Page 6: Troubleshooting
After such The Go Direct Cyclic Voltammetry System is a potentiostat that uses a screen- storage, charge the device for a few hours, and the unit will be ready for use. -
Page 7: Federal Communication Commission Interference Statement
Bluetooth SIG, Inc. and any use of such Consult the dealer or an experienced radio/TV technician for help. marks by Vernier Software & Technology is under license. Other trademarks and trade names are those of their FCC Caution respective owners.


Need help?
Do you have a question about the Go Direct and is the answer not in the manual?
Questions and answers