Advertisement
Quick Links
®
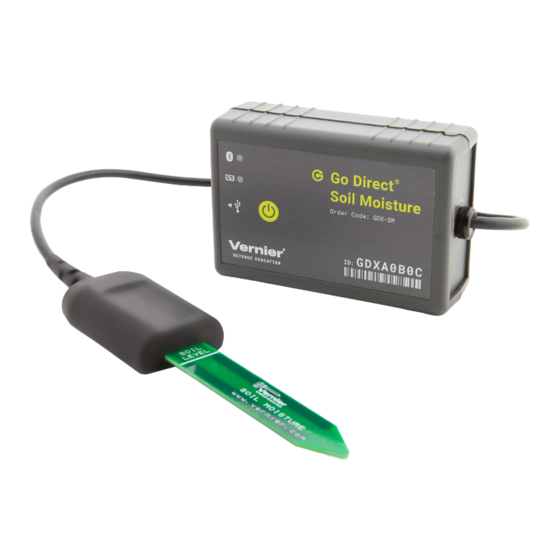
Go Direct
Soil Moisture
(Order Code GDX-SM)
Go Direct Soil Moisture is used to measure the volumetric water content of soil.
This makes it ideal for performing experiments in courses such as soil science,
agricultural science, environmental science, horticulture, botany, and biology. Use
Go Direct Soil Moisture to
Measure the loss of moisture over time due to evaporation and plant uptake.
l
Evaluate optimum soil moisture contents for various species of plants.
l
Monitor soil moisture content to control irrigation in greenhouses.
l
Enhance your Bottle Biology™ experiments.
l
Note: Vernier products are designed for educational use. Our products are not
designed nor are they recommended for any industrial, medical, or commercial
process such as life support, patient diagnosis, control of a manufacturing
process, or industrial testing of any kind.
What's Included
Go Direct Soil Moisture
l
Micro USB Cable
l
Compatible Software
See
www.vernier.com/manuals/gdx-sm
Direct Soil Moisture.
Quick Start: Vernier Graphical Analysis
1. Charge your sensor for at least 2 hours before first use.
2. Turn on your sensor. The LED will blink red.
3. Launch Graphical Analysis, then click
4. Select your sensor from the list. The sensor ID is located on the sensor label
near the bar code. Note: If you don't see a list of available sensors, click
. After selecting your sensor, click
WIRELESS
5. Click
. You are now ready to collect data.
DONE
Using other Vernier data-collection apps or want to connect via
USB?
Visit
www.vernier.com/start-go-direct
for a list of software compatible with Go
®
®
and Bluetooth
.
Sensor Data Collection
.
Pair
Note: This sensor also works with LabQuest 2 and LabQuest 3; it does not work
with the original LabQuest.
Charging the Sensor
Connect Go Direct Soil Moisture to the included USB Charging Cable and any
USB device for two hours.
You can also charge up to eight Go Direct Soil Moisture Sensors using our Go
Direct Charge Station, sold separately (order code: GDX-CRG). An LED on each
Go Direct Soil Moisture indicates charging status.
Charging
Fully charged
Powering the Sensor
Turning on the sensor
Putting the sensor in sleep
mode
Connecting the Sensor
See the following link for up-to-date connection information:
www.vernier.com/start/gdx-sm
Connecting via Bluetooth
Ready to connect
Connected
1
Orange LED next to the battery icon is solid while
the sensor is charging.
Green LED next to the battery icon is solid when
the sensor is fully charged.
Press button once. Red LED indicator next to the
Bluetooth icon flashes when the unit is on.
Press and hold button for more than three seconds
to put into sleep mode. Red LED indicator next to
Bluetooth icon stops flashing when sleeping.
Red LED next to the Bluetooth icon flashes when
sensor is awake and ready to connect.
Green LED next to the Bluetooth icon flashes
when sensor is connected via Bluetooth.
Advertisement

Related Manuals for Vernier Go Direct GDX-SM


Summary of Contents for Vernier Go Direct GDX-SM
- Page 1 Enhance your Bottle Biology™ experiments. Press and hold button for more than three seconds Putting the sensor in sleep Note: Vernier products are designed for educational use. Our products are not to put into sleep mode. Red LED indicator next to mode designed nor are they recommended for any industrial, medical, or commercial Bluetooth icon stops flashing when sleeping.
- Page 2 Although the battery is warranted for one year, the expected battery life should be of the sensor is covered. Press down on the soil along either side of the sensor several years. Replacement batteries are available from Vernier (order code: with your fingers. Continue to compact the soil around the sensor by pressing GDX-BAT-300).
- Page 3 Cet appareil numérique respecte les limites de bruits radioélectriques applicables aux appareils numériques de Classe B prescrites dans la Vernier Technical Support at support@vernier.com or call 888-837-6437. Support norme sur le matériel interférant-brouilleur: “Appareils Numériques,” NMB-003 édictée par industrie Canada. L’utilisation est soumise aux...
- Page 4 The Bluetooth word mark and logos are registered trademarks owned by the Bluetooth SIG, Inc. and any use of such marks by Vernier Software & Technology is under license. Other trademarks and trade names are those of their respective owners.
Need help?
Do you have a question about the Go Direct GDX-SM and is the answer not in the manual?
Questions and answers