Table of Contents
Advertisement
Quick Links
®
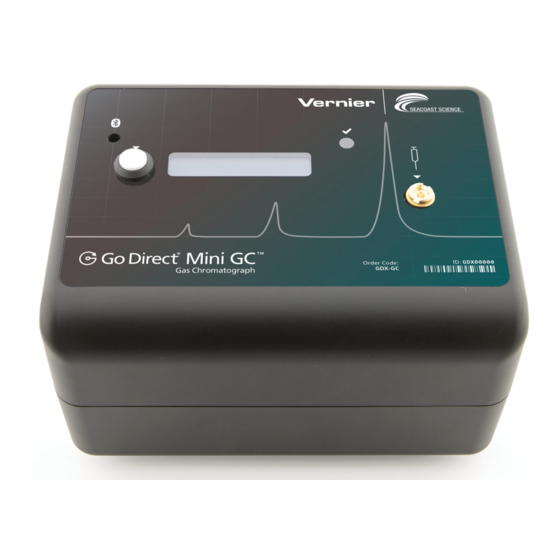
Go Direct
Mini GC™
(Order Code GDX-GC)
Use Go Direct Mini GC and the free Vernier
Instrumental Analysis™ app to teach students
chromatography with a portable gas chromatograph
that detects polar and nonpolar compounds.
Students can separate, analyze, and identify
substances contained in a volatile liquid or gaseous
sample.
Go Direct Mini GC can connect via Bluetooth
via USB to your device.
Developed with Seacoast Science, Go Direct Mini GC uses an efficient,
software-controlled internal pump system. Go Direct Mini GC uses room air as
the carrier gas, so there is no need to purchase an external carrier gas tank and
deal with the associated safety measures or to maintain a gas filtration system.
This gas chromatograph can also be used to identify unknown compounds,
monitor chemical reactions, and measure products from distillations and
chemical reactions.
Note: Vernier products are designed for educational use. Our products are not
designed nor are they recommended for any industrial, medical, or commercial
process such as life support, patient diagnosis, control of a manufacturing
process, or industrial testing of any kind.
What's Included
Go Direct Mini GC
l
USB mini cable
l
AC power supply
l
Hamilton Syringe (1.0 µL volume)
l
Two extra septa (a third septum is already installed)
l
Chromatography Experiments with the Go Direct Mini GC™, an e-book
l
with five investigations, available as a free download from your Vernier
account
Carrying case
l
Compatible Software
See
www.vernier.com/manuals/gdx-gc
Go Direct Mini GC.
Getting Started
Please see the following link for platform-specific connection information:
www.vernier.com/start/gdx-gc
Bluetooth Connection
1. Install Vernier Instrumental
®
wireless technology or wired
for a list of software compatible with the
USB Connection
1. Install Vernier Instrumental
Analysis™ on your computer,
Chromebook™, or mobile device.
See www.vernier.com/ia for
Instrumental Analysis availability.
2. Connect the Go Direct Mini GC to
AC power.
3. Turn on your Go Direct Mini GC
by switching the power button to
the On position. The Bluetooth
LED will blink red.
4. Launch Instrumental Analysis.
5. Click or tap Gas Chromatography.
6. Select your Go Direct Mini GC
from the list of Discovered Wireless
Devices. Your sensor's ID is located
near the barcode on the sensor. The
Bluetooth LED will blink green
when it is successfully connected.
7. Click or tap Done. You are now
ready to continue your experiment.
Safety
Important: We strongly recommend that you read the entire manual thoroughly
before using Go Direct Mini GC for the first time. There are precautions and
usage suggestions throughout this manual that are important to know, prior to
doing your first data collection. Please wear the appropriate personal safety
equipment and use the instrument in accordance with the instructions in this
manual to prevent injury.
Caution: Go Direct Mini GC is designed to analyze volatile compounds. These
compounds may be toxic or highly flammable; therefore, follow the
manufacturer's instructions when operating this instrument. Serious personal
injury may result from improper use of this instrument. Misuse of this instrument
may cause injury to the user and should be avoided. All analytes recommended
for use with this instrument are flammable and potentially toxic. However, less
than a microgram of analyte is released during normal use. Due to the small
amounts of analytes, there is no hazard that exhaust from the chromatograph
could cause a fire when used according to the instructions. To minimize
exposure to vapors, use this instrument in well-ventilated areas. Refer to the
Safety Data Sheet for each compound to be injected into the chromatograph. For
personal protection, we recommend that open reagent containers be handled in a
hood or well-ventilated area. All users or observers should wear appropriate
personnel protective equipment when operating this instrument, at a minimum
eye protection and protective gloves. Users are cautioned to avoid spills and to
clean up spill immediately.
1
Analysis on your computer or
Chromebook. See
www.vernier.com/ia for
Instrumental Analysis availability.
2. Connect Go Direct Mini GC to AC
power and to the USB port.
3. Launch Instrumental Analysis.
4. Click or tap Gas Chromatography.
5. You are now ready to continue
your experiment.
Advertisement
Table of Contents

Related Manuals for Vernier Go Direct Mini GC


Summary of Contents for Vernier Go Direct Mini GC
- Page 1 Important: We strongly recommend that you read the entire manual thoroughly process such as life support, patient diagnosis, control of a manufacturing before using Go Direct Mini GC for the first time. There are precautions and process, or industrial testing of any kind.
-
Page 2: Using The Product
Because the Go Direct Mini GC can connect via Bluetooth wireless technology, Installation: The Go Direct Mini GC should be used in a room that is well there is also a button on the instrument itself that initiates data collection once ventilated to allow for normal heating and cooling. - Page 3 the plunger. If the plunger is accidentally pulled out of the glass barrel, reinserting it is extremely difficult, sometimes impossible. Never pull the plunger back more than 50% of its total volume. Be careful not to bend the plunger as you press it down. Do not remove the plastic spacer on the needle.
-
Page 4: Specifications
(counterclockwise) the septum retainer nut volume using a coin or a large screwdriver. Note: Two additional septa were shipped with your new Go Direct Mini GC (in a small Ziploc bag). With the retainer nut Operating pressure 1 to 21 kPa removed, spear the defective septum with a syringe needle and lift it out. - Page 5 Check cables. Or, make sure you are using correct software versions. How the Go Direct Mini GC Works Figure 2 shows a side view of the Go Direct Mini GC. The power input jack, No power Check to make sure power plugs are plugged power switch, USB connection to the Chromebook, or computer, and column in properly.
-
Page 6: Warning Labels
Appendix B If the plunger starts to catch in the syringe during sample collection or To comply with certification requirements for this instrument, the manufacturer injection, follow the procedure for cleaning the syringe. NEVER force the provides the following risk assessment: plunger. - Page 7 Step 2. 10.0 Injecting into the Go Direct Mini GC 1. Wait for the status indicator light on the Go Direct Mini GC to turn green 12.5 and the message “Ready for Injection” to appear before collecting your 15.0...
-
Page 8: Warranty
(1) this device may not cause harmful interference and such marks by Vernier Software & Technology is under license. Other trademarks and trade names are those of (2) this device must accept any interference received, including interference that may cause undesired operation their respective owners.
Need help?
Do you have a question about the Go Direct Mini GC and is the answer not in the manual?
Questions and answers