Table of Contents
Advertisement
CONTENTS
1. FUNDAMENTAL SAFETY WARNINGS ......... 115
2. SAFETY WARNINGS ................................ 116
2.1 Symbols used in these instructions ...........116
2.2 Designated use ..........................................116
2.3 Instruction for Use .....................................116
3. INTRODUCTION ...................................... 116
3.1 Letters in brackets .....................................116
3.2 Troubleshooting and repairs ......................116
4. DESCRIPTION......................................... 117
4.1 Description of the appliance ......................117
4.2 Description of the control panel ................117
4.3 Description of the accessories ....................117
4.4 Description of the milk container ..............117
5. BEFORE USE........................................... 117
5.1 Checking the appliance .............................117
5.2 Installing the appliance .............................117
5.3 Connecting the appliance ..........................117
5.4 Setting up the appliance ...........................118
6. TURNING THE APPLIANCE ON.................. 118
7. TURNING THE APPLIANCE OFF ................ 118
8. MENU SETTINGS .................................... 118
8.1 Rinsing ......................................................118
8.2 Descaling ..................................................119
8.3 Install filter................................................119
installed) ...................................................119
8.5 Adjust time ...............................................119
8.6 Auto-start .................................................119
8.7 Auto-off (standby) ....................................119
8.8 Cup warmer...............................................119
8.9 Energy saving ............................................120
8.10 Setting the temperature ...........................120
8.11 Setting water hardness .............................120
8.12 Setting the language ................................120
8.13 Beep ..........................................................120
8.14 Default values (reset) ................................120
8.15 Statistics function......................................120
9. MAKING COFFEE ..................................... 121
9.1 Selecting the coffee taste ..........................121
9.3 Customising the "my coffee" quantity ........121
9.4 Adjusting the coffee mill ...........................121
9.5 Tips for a hotter coffee...............................121
9.6 Making coffee using coffee beans .............121
................................................................122
COFFEES ................................................ 122
10.2 Adjusting the amount of froth ...................123
10.3 Making cappuccinos and milk-based coffees
automatically ............................................123
10.4 Preparing "MILK MENU" drinks ..................123
................................................................123
in the cup for the CAPPUCCINO, CAFFELATTE
and LATTE MACCHIATO buttons .................124
10.7 Programming the quantity of coffee and milk
in the cup for MILK MENU drinks ...............124
11. DELIVERING HOT WATER AND STEAM ...... 124
11.1 Hot water ..................................................124
automatically ............................................124
11.3 Steam delivery ..........................................124
11.4 Tips for using steam to froth milk ..............125
11.5 Cleaning the spout after use......................125
12. CLEANING.............................................. 125
12.1 Cleaning the machine ...............................125
12.6 Cleaning the water tank ............................126
12.7 Cleaning the coffee spouts ........................126
12.9 Cleaning the infuser ..................................126
12.10 Cleaning the milk container ......................127
nozzle........................................................127
13. DESCALING ............................................ 127
14. SETTING WATER HARDNESS .................... 128
14.1 Measuring water hardness ........................128
14.2 Setting water hardness .............................129
15. WATER SOFTENER FILTER ....................... 129
15.1 Installing the filter ....................................129
18. DISPLAYED MESSAGES ............................ 130
15.2 Replacing the filter ....................................130
15.3 Removing the filter ...................................130
16. TECHNICAL DATA .................................... 130
17. DISPOSAL .............................................. 130
19. TROUBLESHOOTING ............................... 132
114
Advertisement
Table of Contents
Troubleshooting

Related Manuals for DeLonghi Eletta ECAM45.760.W


Summary of Contents for DeLonghi Eletta ECAM45.760.W
-
Page 1: Table Of Contents
CONTENTS 10. MAKING CAPPUCCINOS AND MILK-BASED COFFEES ..........122 1. FUNDAMENTAL SAFETY WARNINGS ..115 10.1 Filling and attaching the milk container ..122 2. SAFETY WARNINGS ........ 116 10.2 Adjusting the amount of froth ....123 2.1 Symbols used in these instructions ...116 10.3 Making cappuccinos and milk-based coffees 2.2 Designated use ..........116 automatically ..........123... -
Page 2: Fundamental Safety Warnings
1. FUNDAMENTAL SAFETY WARNINGS • The appliance is not intended for use by persons (including children) with reduced physical, sensory or mental capabilities, or lack of experience and knowledge, unless they have been given supervision or instruction concerning use of the appliance by a person responsible for their safety. -
Page 3: Safety Warnings
2. SAFETY WARNINGS Any other use is considered improper and thus dangerous. The manufacturer is not liable for damage deriving from improper 2.1 Symbols used in these instructions use of the appliance. Important warnings are identified by these symbols. It is vital to respect these warnings. -
Page 4: Description
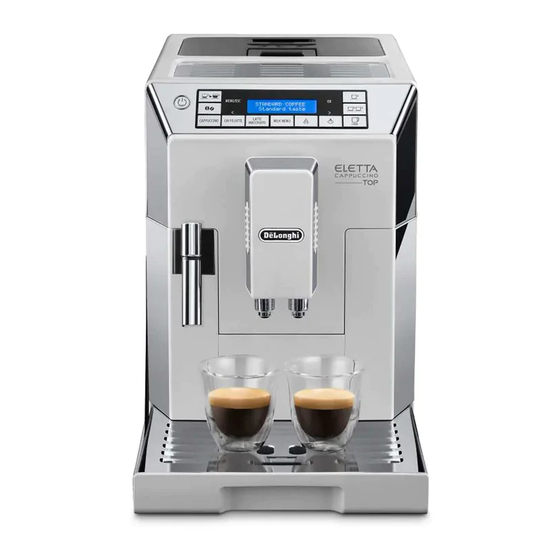
4. DESCRIPTION 4.3 Description of the accessories (page 2 - C ) 4.1 Description of the appliance C1. “Total Hardness Test” indicator paper (page 3 - A ) C2. Pre-ground coffee measure A1. Beans container lid C3. Descaler A2. Pre-ground coffee funnel lid C4. -
Page 5: Setting Up The Appliance
6. TURNING THE APPLIANCE ON If the power socket does not match the plug on the appliance, have the socket replaced with a suitable type by a qualified Please note! electrician. Before turning the appliance on, make sure the main switch (A20) is pressed (fig. -
Page 6: Install Filter
8.6 Auto-start To enable the function, proceed as follows: 1. Press the MENU/ESC button (B14) to enter the menu; You can set the auto-start time in order to have the appliance 2. Press < (B4) or > (B8) (fig. 9) until “Rinsing” appears on ready at a certain time (for example in the morning) so you can the display (B13);... -
Page 7: Energy Saving
8.12 Setting the language 4. Press the OK button to enable or disable the cup warmer (the message “Cup warmer Enabled” indicates that it is To modify the language of the display (B13), proceed as follows: active); 1. Press the MENU/ESC button (B14) to enter the menu; 5. -
Page 8: Making Coffee
how many times the water softener filter has been However, if after making the first few coffees you find that the replaced. coffee is either too weak and not creamy enough or delivery is 5. Press the MENU/ESC button twice to exit the menu. too slow (a drop at a time), this can be corrected by adjusting the grinding adjustment dial (fig. -
Page 9: Making Coffee Using Pre-Ground Coffee
9.9 Making LONG coffee using pre-ground coffee • At the end of delivery, to increase the quantity of coffee in the cup, just press (within 3 seconds) one of the coffee but- Follow the instructions in points 1, 2, 3 and 4 of the section tons ( ) (fig. -
Page 10: Preparing "Milk Menu" Drinks
• For a denser more even froth, you must use skimmed or 4. After a few seconds, frothed milk is delivered from the milk partially skimmed milk at refrigerator temperature (about spout (D5) into the cup below. Then the machine automat- 5°C). -
Page 11: Programming The Quantity Of Coffee And Milk
4. Turn the dial back to one of the froth selections. 7. Once the required quantity of coffee has been delivered into the cup, press the OK button again. Coffee delivery 5. Remove the milk container and always clean the steam connection nozzle (A8) with a sponge (fig. -
Page 12: Tips For Using Steam To Froth Milk
4. When the required temperature is obtained, interrupt infuser (A15), accessible after opening the service door steam delivery by pressing the button again. (You (A14); should not discharge steam for more than 3 minutes at a milk container (D); time). hot water/steam spout (C6 - section “11.5 Cleaning the spout after use”);... -
Page 13: Cleaning The Drip Tray And Condensate Tray 126
When removing the drip tray, the grounds container must be 2. Remove the filter (if present) and rinse with running water. emptied, even if it contains few grounds. 3. Replace the filter (if provided), fill the tank with fresh If this is not done, when you make the next coffees, the grounds water and replace the tank. -
Page 14: Cleaning The Milk Container
NO WASHING UP LIQUID - NO DISH WASHER Clean the infuser without using washing up liquid as it could be damaged. 6. Use the brush (C5) to remove any coffee residues left in the infuser housing, visible through the infuser door. 7. -
Page 15: Setting Water Hardness
• You should use De’Longhi descaler only. Using unsuitable solution. Extract the water tank, empty, rinse under run- descaler and/or performing descaling incorrectly may re- ning water, fill with fresh water up to the MAX level and sult in faults not covered by the manufacturer’s guarantee. put back in the appliance: “RINSING, Press OK”... -
Page 16: Setting Water Hardness
on the hardness of the water. Each square corresponds to 0,5 L one level. soft water slightly hard water hard water very hard water 4. Extract the tank (A16) from the appliance and fill with water. 14.2 Setting water hardness 5. -
Page 17: Displayed Messages
15.2 Replacing the filter 3. Press < (B4) or > (B8-fig. 9) until “Install filter, Enabled” is displayed; When “REPLACE FILTER” appears on the display (B13), after two 4. Press the OK button (B12- fig. 10); months (see date indicator) or when the appliance has not been 5. - Page 18 GROUND TOO FINE ADJUST The grinding is too fine and the coffee is delive- Repeat coffee delivery and turn the grin- MILL red too slowly or not at all. ding adjustment dial (A5, fig. 14) one click clockwise towards “7” while the coffee mill is in operation.
-
Page 19: Troubleshooting
INSERT MILK CONTAINER The milk container (D) is not inserted correctly. Insert the milk container (fig. 24) as far as it will go. 19. TROUBLESHOOTING Below is a list of some of the possible malfunctions. If the problem cannot be resolved as described, contact Customer Services. PROBLEM POSSIBLE CAUSE SOLUTION... -
Page 20: Electrical Requirements (Uk Only)
The milk does not The milk container lid (D2) is dirty. Clean the milk container lid as described in sec- come out of the milk tion "12.10 Cleaning the milk container" spout (D5) The milk contains The milk is not cold enough or is not Use skimmed or semi-skimmed milk at refrige- large bubbles and semi-skimmed.
Need help?
Do you have a question about the Eletta ECAM45.760.W and is the answer not in the manual?
Questions and answers