
Related Manuals for V-ZUG AdoraWash V4000 OptiDos


Summary of Contents for V-ZUG AdoraWash V4000 OptiDos
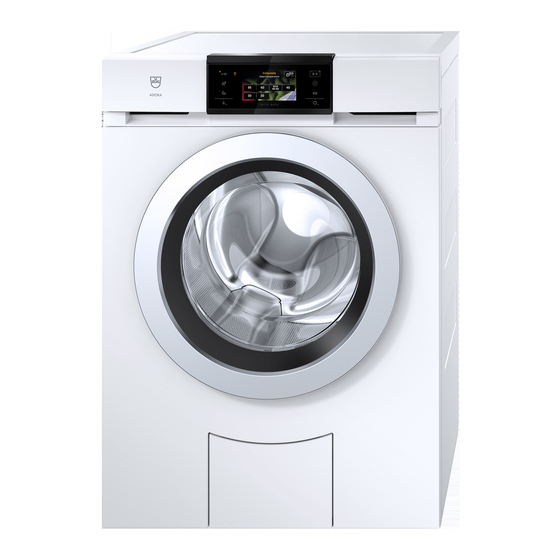
- Page 1 V-ZUG-Home Install the app, network your appliances and benefit from a wide range of useful functions. Operating instructions AdoraWash V4000 OptiDos Washing machine...
- Page 2 Validity These operating instructions apply to: Model designation Model number Type AdoraWash V4000 OptiDos 11023 AW4T-11023 Variations depending on the model are noted in the text. © V-ZUG Ltd, CH-6302 Zug, 2021...
-
Page 3: Table Of Contents
Defining and saving favourites...... 33 Selection guidance.......... 11 Changing or clearing favourites...... 33 Container selection and cleaning programme .. 11 Starting favourites.......... 34 Selection of agent.......... 12 V-ZUG-Home 34 Fill level display............ 12 10.1 Conditions .............. 34 Programme overview 12 10.2... - Page 4 11.17 Loosening up the washing......... 37 Service & Support 63 11.18 Soft water .............. 37 Quick instructions 64 11.19 OptiDos.............. 37 11.20 Water options * ............ 38 11.21 V-ZUG-Home............ 38 11.22 Factory settings............ 38 Demo mode 38 12.1 Switching on ............ 38 12.2 Switching off ............ 39 Care and maintenance 39...
-
Page 5: Safety Warnings
Safety warnings Symbols used Cleaning and user mainten- ance shall not be undertaken Denotes important safety precau- tions. by children without supervi- Failure to observe said precautions sion. can result in injury or in damage to ▪ If an appliance is not the appliance or fittings! equipped with a mains cable Information and precautions that... -
Page 6: Instructions For Use
1 Safety warnings Note on use Instructions for use ▪ If the appliance is not functioning prop- Before using for the first time erly, disconnect it from the power sup- ▪ The appliance must be installed and ply immediately. connected to the electricity supply in ▪... - Page 7 1 Safety warnings ▪ Before closing the appliance door and starting a programme, ensure that there are no foreign objects or pets in the washing drum, detergent compartment or around the foreign body trap. For- eign objects such as coins, nails, paper clips, etc.
-
Page 8: Using For The First Time
Using for the first time The appliance must be installed and connected to the electricity supply in accord- ance with the separate installation instructions. Have a qualified fitter/electrician carry out the necessary work. Transport lock Remove the transport lock (hexagon head screws at the back of the appliance) in order to avoid damage to the appliance (see installation instructions). -
Page 9: Drawers
3 Appliance description Drawers OptiDos drawer Drain valve B Container B * Drain valve A Container A * Coupling Release * Fill volume: 1.2 litres Detergent dispenser drawer Pre-wash detergent, compartment I Main wash detergent, compartment II Fabric conditioner, compartment Flap for liquid detergent / Drain tray opener / Release for OptiDos... -
Page 10: Operating And Display Elements
3 Appliance description Operating and display elements Operating panel Operating panel Buttons V-ZUG-Home display Door opener TouchDisplay EcoManagement Indicator lights Energy saving Standard and extra programmes Start/Pause/Drum illumination End of programme / Fast forward Favourites TouchDisplay Buttons Coloureds Textile programmes Select temperature Whites 95 °C... -
Page 11: Button State
4 OptiDos Button state Background colour Symbol colour State Blue White Function is active. Black White Function is selectable. Black Black Function is not selectable. OptiDos OptiDos consists of 2 containers to which regular washing detergent or fabric condi- tioner for automatic dosage are added. Whether the appliance should provide a recom- mendation for the most suitable agent and from which container it should be drawn can be defined in the user settings. -
Page 12: Selection Of Agent
5 Programme overview Selection of agent The following agents can be assigned to the two containers: Liquid detergent or fabric conditioner Universal detergent Detergent for woollens Detergent for coloureds Baby washing detergent Detergent for delicates Detergent for blacks Fabric conditioner Detergent for whites Detergent for outdoor garments Fill level display... -
Page 13: Textile Programmes
5 Programme overview Coloureds 60 °C For coloured cottons e.g. bright blouses, ▪ Load: 1–8 kg overalls, shirts, bed linen. Suitable for ▪ Spin speed: 1200 rpm ▪ Duration: 1h15, 1h32 washing with the fabric care ▪ Water: 65 l symbol. ▪ Energy:1.3 kWh Coloureds 40 °C For coloured cottons and mixed washing ▪... - Page 14 5 Programme overview Hand wash Very gentle treatment for textiles labelled with ▪ Load: 1–2 kg ▪ Spin speed: 600 rpm fabric care symbol. ▪ Duration: 0h45 The consumption values apply to Hand wash ▪ Water: 58 l 20 °C. ▪ Energy: 0.2 kWh Shirts Optimized for minimizing creasing, contains ▪...
-
Page 15: Standard And Extra Programmes
5 Programme overview Baby garments Very thorough rinsing for the protection of sens- ▪ Load: 1–5 kg itive baby skin. If 95 °C is selected as the tem- ▪ Spin speed: 1200 rpm perature, a pre-wash is included. ▪ Duration: 1h50 ▪ Water: 120 l The consumption values apply to Baby gar- ▪... -
Page 16: Additional Functions
5 Programme overview Proofing For starching or proofing laundry, add the ▪ Load: 1–3 kg agent to the fabric conditioner compart- ▪ Spin speed: 800 rpm ment. ▪ Duration: 0h28 ▪ Water: 12 l ▪ Energy: 0.1 kWh Appliance hygiene Steam cleaning without laundry. ▪... - Page 17 5 Programme overview Degree of soiling Adjustment to the degree of soiling of the washing. Light soiling: For lightly soiled washing. Medium soiling: Extended wash time. Heavy soiling: Extended wash time, higher water level, an additional rinsing cycle. Soaking: The duration can be set between 0.5 and 6 hours. Anti-mite: The main wash is extended and intensified.
-
Page 18: Ecomanagement
6 Preparations Steam anti-crease Reduces creasing significantly. Loosening-up period: 60 minutes. The washing is warm and should be hung up immediately to dry or be tumble dried. The spin speed is limited to 1000 rpm. The maximum load capacity is 2 kg. Separate rinsing / Separate spinning The programme starts at the desired parts of the programme and the programme sequence is shortened. -
Page 19: Loading The Washing
6 Preparations ▸ Insert the mains plug into a mains socket. ▸ Turn on water tap. ▸ Touch the button to open the appliance door. Loading the washing ▸ Load up to a maximum of 8 kg dry washing. ▪ Full: Normally soiled whites and coloureds ▪... -
Page 20: Operation With Optidos
7 Operation with OptiDos Operation with OptiDos Preparing OptiDos In order to use the OptiDos function, the containers in the OptiDos drawer must be filled with the desired liquid detergents or fabric conditioners and the user settings defined ac- cordingly. The containers can be used as follows: ▪... - Page 21 7 Operation with OptiDos Entering dosage Enter the dosage recommended on the detergent package for 4–5 kg of medium- soiled washing and in line with the local water hardness! When the function is turned on, the appliance takes the agent automatically from the Op- tiDos drawer.
-
Page 22: Selecting Programme
7 Operation with OptiDos Add the agent slowly! The container takes longer to fill if the agent is thick and viscous. Each container has a fill volume of 1.2 litres. Selecting programme Main wash programmes When a programme is selected, all the necessary settings for it are assigned automatic- ally. - Page 23 7 Operation with OptiDos Textile programmes ▸ Touch the button. Textile programmes – The selection of textile programmes appears in the TouchDisplay. Coloureds Woollens ▸ Touch the button repeatedly until the desired textile programme is displayed. Hand wash Shirts ▸ Touch the button for the desired textile pro- gramme, e.g.
-
Page 24: Selecting Additional Functions
7 Operation with OptiDos Selecting additional functions ▸ Touch the button for the desired programme, e.g. 60°C Coloureds 1 h 00 End 16 : 13 ▸ Touch the button for the desired container, e.g. – The programme selected, the container selec- and the selectable additional functions 1200 appear in the TouchDisplay. -
Page 25: Optitime
7 Operation with OptiDos Selecting programme start time The option «Programme start» must be enabled in the user settings under «Delayed start / OptiTime». (see page 36) ▸ Carry out steps analogous to those described in «Selecting programme end time» (see page 24). OptiTime The option «Programme end, OptiTime on»... -
Page 26: Correcting Entry
7 Operation with OptiDos Correcting entry During programme selection, entries can be corrected as follows: Clearing entries in the current view ▸ Touch the button. – The entries are discarded. – The previous TouchDisplay appears. Clearing all entries ▸ Touch the button repeatedly until the Touch- Display goes dark. -
Page 27: Drum Illumination
7 Operation with OptiDos Aborting programme / opening appliance door at end of programme ▸ Touch the button. Childproof lock – The input field for the code appears in the 0 0 0 Code TouchDisplay. ▸ Touch the digits 7, 3, 1 in sequence. ▸... - Page 28 7 Operation with OptiDos Door opener The user settings that are enabled determine whether the appliance door opens automat- ically when the programme ends (see page 36) and whether information on energy and water consumption is displayed or not (see page 37). ▪...
-
Page 29: Ecomanagement
7 Operation with OptiDos Each time after use ▸ Clean the detergent compartments (see page 44). ▸ To allow the washing drum and door seal to dry between wash days, open the appliance door and pull the detergent dispenser drawer out as far as it will go. -
Page 30: Operation Without Optidos
8 Operation without OptiDos Displaying total and average consumption Total and average consumption can be displayed if no programme is running. ▸ Hold the button depressed for 3 seconds. EcoManagement – Total and average consumption appear in the Statistics TouchDisplay. Total 390 kWh ▸... -
Page 31: Detergent Dosage
8 Operation without OptiDos Compartments Conventional washing Pre-wash detergent Compartment I Main wash detergent Compartment II Fabric conditioner Compartment Bio wash Alkaline detergent Compartment II Bleach Compartment I Fabric conditioner Compartment Soap wash Water softener Compartment I Soap detergent Compartment II Fabric conditioner Compartment Do not fill fabric conditioner past the upper mark. -
Page 32: Dyeing Textiles
8 Operation without OptiDos Dyeing textiles Textiles can be dyed in the appliance using suitable dyeing agents. Follow the manufac- turer’s safety instructions and warnings. ▸ Select the desired programme. – The programme starts with brief draining; water runs into the washing drum. ▸... -
Page 33: Favourites
9 Favourites Favourites The appliance door has to be open to define, change or delete a favourite. Defining and saving favourites ▸ Touch the button. Define favourite – The appliance door opens. ▸ Touch the button. empty – The Favourite programmes menu appears in empty the TouchDisplay. -
Page 34: Starting Favourites
– A 6-digit PIN appears in the display of the household appliance. ▸ Enter the 6-digit PIN in the V-ZUG App and confirm the bluetooth pairing request. – The name of the active WLAN/Wi-Fi appears in the V-ZUG App and then you are prompted to enter the WLAN/Wi-Fi password. -
Page 35: User Settings
11 User settings User settings Providing no programme is running and no error messages are displayed, the user settings can be changed. 11.1 Changing the user settings ▸ Close the appliance door. Extra ▸ Touch the button. – The selection of extra programmes appears in Steam anti-cr. -
Page 36: Spin Speed
11 User settings 11.6 Time The time must be reset if the power is cut for more ▪ Clock than about 5 weeks. The appliance must not be dis- connected from the mains supply for at least 30 minutes after making the settings. 19:43 11.7 Spin speed... -
Page 37: Hygiene Info
11 User settings 11.12 Hygiene info When the function is turned on, a wash of at least ▪ On (factory setting) 60 °C is recommended whenever for hygiene reas- ▪ Off ons the formation of foul smelling coatings in the ap- pliance is to be prevented. -
Page 38: Water Options
11.21 V-ZUG-Home With V-ZUG-Home (see page 34), you can access ▪ Operate and display your appliances over the V-ZUG App to, for instance ▪ Display ▪ Off (factory setting) ▪ switch off a running appliance ▪ call up the status of your household appliances. -
Page 39: Switching Off
13 Care and maintenance ▸ Touch the button. – The demo mode is selected. ▸ Touch the button. – The demo mode is switched on. – The TouchDisplay goes dark. 12.2 Switching off ▸ Touch the button. – The appliance door opens. –... -
Page 40: Cleaning The Optidos Drawer With The Cleaning Programme
13 Care and maintenance 13.2 Cleaning the OptiDos drawer with the cleaning programme ▸ Close the appliance door. OptiDos setting ▸ Touch the button. – The selection of extra programmes appears in OptiDos without selection guidance the TouchDisplay. OptiDos with selection guidance ▸... - Page 41 13 Care and maintenance ▸ Place the receptacle 3 beneath container B. ▸ Press down drain valve 4 in a controlled manner and then lock in an anti-clockwise direction. – Any washing detergent left runs into the recept- acle 3. Depending on the detergent used, this process can take several minutes. ▸...
- Page 42 13 Care and maintenance ▸ Hold the OptiDos drawer 1 with one hand. ▸ Take hold of the coupling 7 with the other hand. ▸ Using some force, remove the coupling 7 from the OptiDos drawer 1. Do not push the OptiDos drawer 1 down! Do not pull the hose connected to the coupling 7! This can damage the appliance! ▸...
- Page 43 13 Care and maintenance ▸ Hold the receptacle 3 beneath drain valves 4 and 5. ▸ Tilt the OptiDos drawer 1 so that any washing deter- gent left runs in the direction of drain valves 4 and 5. ▸ Press down drain valves 4 and 5 in a controlled manner and then lock in an anti-clockwise direction.
-
Page 44: Cleaning The Detergent Dispenser Drawer
13 Care and maintenance 13.4 Cleaning the detergent dispenser drawer Cleaning the detergent compartments ▸ Pull the detergent dispenser drawer 1 out as far as it will go. ▸ Push the blue release lever 2 to the left and pull the detergent dispenser drawer 1 completely out. -
Page 45: Cleaning The Foreign Body Trap
13 Care and maintenance ▸ Carefully release the foreign body trap somewhat by turning it anti-clockwise and steadily drain off the water. ▸ Close the foreign body trap by turning it clockwise and remove the drain tray from the front. ▸... -
Page 46: Cleaning The Drum Illumination
13 Care and maintenance The impeller 1 may turn stiffly. This is construction related and does not indicate the presence of any foreign object or defect. If the impeller does not turn, please contact our Customer Services. ▸ Insert the foreign body trap – with the arrow-like cam 3 pointing upwards –... -
Page 47: Trouble-Shooting
14 Trouble-shooting ▸ Insert emergency door release tool into blue opening cap 2 and turn in direction of arrow. – a. Door opens from right – b. Door opens from left – The appliance door springs open. If the emergency door release tool is missing, a screw driver can be used instead. Trouble-shooting You may be able to trouble-shoot the following malfunctions yourself. - Page 48 14 Trouble-shooting Display Possible cause Solution ▪ The water tap is turned ▸ Clean water inlet filter or restore wa- off. ter supply (see page 44). Check water inlet ▪ The water inlet filter is ▸ Touch the button. clogged. ▸...
- Page 49 14 Trouble-shooting Display Possible cause Solution Foam in main ▪ If there is very heavy ▸ Check whether the dosage entered wash: foaming, the pro- corresponds to the amount recom- Rinsing extended gramme is automatically mended on the detergent package extended by a rinsing for 4–5 kg of washing.
-
Page 50: Other Possible Problems
14 Trouble-shooting 14.2 Other possible problems Problem Possible cause Solution The washing has ▪ The spin speed set is ▸ Increase the spin speed for the next not been spun or too low. wash cycle (see page 36). has been spun in- ▪... - Page 51 14 Trouble-shooting Problem Possible cause Solution Traces of powder ▪ Damp or lumpy washing ▸ Store washing detergent in a dry detergent in deter- detergent. place. gent compartment. ▪ Detergent compartment ▸ Wipe detergent compartment dry be- was damp and a fore adding the detergent.
-
Page 52: Unsatisfactory Wash Results
14 Trouble-shooting Problem Possible cause Solution The programme The programme times ▸ Further information can be found in takes significantly given serve only as a the section on «Consumption val- longer than indic- guide. The duration can be ues». ated. extended by, for example, the following factors: ▪... - Page 53 14 Trouble-shooting Result Possible cause Solution Grey residue on ▪ Grease and dirt ▸ Check whether the dosage entered washing (with Op- particles left behind. corresponds to the amount recom- ▪ Residue from detergent, mended on the detergent package tiDos) limescale and dirt for 4–5 kg of washing.
- Page 54 14 Trouble-shooting Result Possible cause Solution Unsatisfactory ▪ Too much washing de- ▸ Adjust washing detergent dosage to rinsing (with Op- tergent. water hardness. tiDos) ▪ Very soft water (below ▸ Select user setting «Soft water» (see 15 °fH) page 37). Unsatisfactory ▪...
-
Page 55: Spare Parts
15 Spare parts Spare parts Please state the serial number (SN) when ordering parts. Drain hose 1.5 m / Emergency door Foreign body trap Drain tray 4.0 m release tool Siphon Detergent dis- Flap for liquid de- Insert for detergent penser drawer tergent dispenser drawer Technical data... -
Page 56: Note For Testing Institutes
17 Washing tips 16.2 Note for testing institutes Set to the standard programmes according to GB/T 4288-2008:. Programme Load capacity Standard 60 °C programme 8 kg or 4 kg ▸ Touch the button. ▸ Touch the button. ▸ Touch the button. 16.3 Networking ▪... -
Page 57: Avoiding Damage
17 Washing tips Spin speed The energy consumption, noise and remaining moisture content of subsequent tumble drying depend on the spin speed set. The higher the spin speed in the spinning phase, the higher the noise and the lower the remaining moisture content of the washing at the end of the programme. -
Page 58: Disposal
18 Disposal Disposal 18.1 Packaging Never allow children to play with packaging material due to the danger of injury or suffocation. Store the packaging material in a safe location or dispose of it in an environmentally-friendly way. 18.2 Safety Render the appliance unusable to prevent accidents caused by improper use (e.g. through children playing): ▸... -
Page 59: Index
Index Selecting............ 22 Correct use ............6 Aborting Coupling ............... 9 Programme entry ......... 26 Cleaning ............ 43 Running programme ...... 26, 27 Removing ............ 42 Adding fabric conditioner....... 21 Crease guard Adding washing detergent ......21 Steam anti-crease......... 15, 18 Additional functions Curtains Starting............ - Page 60 Fast wash ............10 During a wash .......... 27 Separate rinsing........ 18, 25 When programme has finished.... 28 Separate spinning......... 18, 25 OptiDos drawer Sprint.............. 17 Automatic cleaning........ 40 Favourites ............10 Manual cleaning........... 40 Starting............ 34 Pushing in ............. 43 Fill level ..............
- Page 61 Textile programmes Starting............ 23 Type............... 2 Using for the first time........8 Validity..............2 VAS Vibration Absorbing System ....56 V-ZUG App ............34 V-ZUG-Home..........10, 34 Switching on mode........ 38 Warranty extensions ........63 Washing efficiently Standard programmes........ 15 Water hardness ..........
-
Page 62: Notes
Notes... -
Page 63: Service & Support
V‑ZUG service centre. Technical questions, accessories, warranty extensions V-ZUG is happy to help you with any general administrative or technical queries, to take your orders for accessories and spare parts and to inform you about our progressive service agreements. -
Page 64: Quick Instructions
▸ Press the button. Programme starts. When programme has finished ▸ Press the button and unload the laundry. ▸ Clean detergent dispenser drawer. ▸ Push appliance door to, but do not close. 1098124-04 V-ZUG Ltd, Industriestrasse 66, CH-6302 Zug info@vzug.com, www.vzug.com...
Need help?
Do you have a question about the AdoraWash V4000 OptiDos and is the answer not in the manual?
Questions and answers