Table of Contents
Advertisement
Advertisement
Table of Contents

Related Manuals for Yamaha RCX340


Summary of Contents for Yamaha RCX340
- Page 1 YAMAHA NETWORK BOARD EtherCAT User’s Manual RCX340 EUSH18A101 Ver. 1.01 E138...
-
Page 3: Table Of Contents
CONTENTS EtherCAT User’s Manual Important information before reading this manual Introduction Safety Precautions (Always read before starting use) Warranty 1. Overview of functions 2. Controller status transitions 3. Input/output assignments 4. Part names and functions 5. Flow until operation begins 6. - Page 4 CONTENTS EtherCAT User’s Manual 11. Actions to take if communication is not established 11.1 Reconsider the startup steps 11.2 Viewing the alarm codes in the 7-segment LED 11.3 Diagnostics by alarm message 11.3.1 Alarms related to network unit connections and settings 11.3.2 Alarms related to I/O on/off status 11.3.3 Alarms that the customer cannot resolve 11.3.4 Checking alarm codes in the programming box...
-
Page 5: Important Information Before Reading This Manual
Impor tant information before reading this manual Introduction The Yamaha network interface unit documentation consists of a User's Manual that is specific to each network unit that describes the specifications and communication settings of that unit, and a Remote I/O Manual describing the remote I/O specifications that are common to all network units. -
Page 6: Safety Precautions (Always Read Before Starting Use)
Safety Precautions (Always read before starting use) Before using this product, be sure to read this manual carefully as well as the robot controller user's manual and programming manual. Take sufficient precautions to ensure safety and handle the product correctly. The cautions given in this manual are related to this product. - Page 7 Precautions for installation ■ WARNING • Always crimp, press-fit or solder the connector wiring with the maker-designated tool, and securely fix the connector to the module. • Always shut off all phases of the power supply externally before starting installation or wiring work. Failure to shut off all phases could lead to electric shocks or product damage.
-
Page 8: Warranty
10. Fires or natural disasters such as earthquakes, tsunamis, lightning strikes, wind and flood damage, etc; 11. Breakdown due to causes other than the above that are not the fault or responsibility of YAMAHA; The following cases are not covered under the warranty: ■... -
Page 9: Overview Of Functions
Example) WAIT SI(20)=1, 1000 ; Wait until SI(20) turns on; stop command if it does not turn on after 1 second. OUT SO2(), 200 ; SO(27--20) turns on, and turns off after 200 ms. * For details on remote I/O and remote commands, refer to the Remote I/O Manual. For details on robot programs, refer to the RCX340 Programming Manual. -
Page 10: Controller Status Transitions
Controller status transitions Here we explain the status transitions of a robot controller equipped with a network interface unit. A controller equipped with a network interface unit will initially start up in the emergency stop state. In order for robot operation to be possible, communication must be established with the host control device, and a sign that cancels the emergency stop state must be input. -
Page 11: Input/Output Assignments
Input/output assignments Here we show the correspondence between the robot controller's serial input/output data and the input/ output data on the network. Output from the controller, input to the host control device ■ Host control device Controller Address (READ) Address (WRITE) Input/output type SOW(0) Command status area... - Page 12 Output from the host control device, input to the controller ■ Host control device Controller Address (WRITE) Address (READ) Input/output type SIW(0) Remote command area n + 1 Word input n + 2 SIW(1) Command data area n + 3 n + 4 SIW(2) n + 5...
-
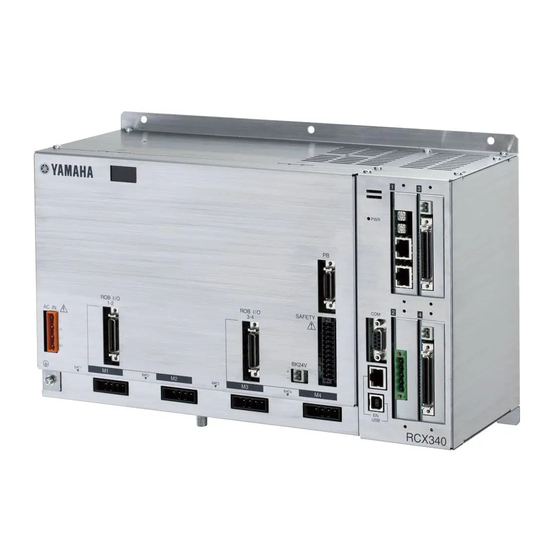
Page 13: Part Names And Functions
Par t names and functions Here we explain the part names and functions of the network interface unit. Part names • Pin configuration and connector specifications Number Name TXD+ ERROR LED TXD- Port 1 RXD+ Link/activity LED Port 1 RJ45 modular jack Link/activity LED RXD- Port 2... -
Page 14: Flow Until Operation Begins
Communication settings Host control device • Register the network settings file (ESI) • Set the communication parameters RCX340 User’s Manual • Begin cyclic communication Remote I/O Manual Trial operation • Check remote I/O and remote command input/output • Debug the program RCX340 User’s Manual... -
Page 15: Connection
Daisy-chained connection among them. Host control device Max. 100m (EtherCAT Master) RCX340 RCX340 CAUTION Network equipment such as switches can be used if it satisfies the requirements of the EtherCAT network. However if the equipment is to be used in an environment where noise is a concern, such as a factory,... -
Page 16: Cabling
Cabling WARNING SHUT off the power supply input to the robot controller before performing this work. Insert the LAN cable's modular plug into the controller's modular jack until you hear it click into place. Cable specifications ■ Use LAN cables that meet the following specifications. Category 5e (CAT 5e) or higher Shielded Twisted Pair (STP: Shielded Twist Pair) Double-shielded... -
Page 17: Esi Files
The steps for loading the file will depend on the host control device to use, and on the tool that supports it. Refer to the manuals for the devices and tools. These files are included on the robot product manual DVD, and can also be downloaded from the Yamaha product website. -
Page 18: Parameter Settings
Parameter Settings Here we explain the parameters that must be set and the settings files that are required in order to begin communication between the host control device and the robot controller. Parameters related to EtherCAT Name Setting Range Initial Value Description Option board enable 0: INVALID... -
Page 19: Monitoring Communication Data
Monitoring communication data On/off data for the host controller device and controller I/O can be monitored via the programming box or the RCX-Studio PC support software. This can be used to check the input/output addresses during setup or for debugging. CAUTION Since the display update interval of the programming box and of RCX-Studio is longer than the data update interval of I/O information, there may be cases in which accurate information is not shown if the on/off interval of... -
Page 20: Switching The Port Number
9.1.1 Switching the port number Monitor screen ■ By switching the monitor number the displayed port number can be changed. The following table shows the correspondence between monitor number and port number. Port name Monitor number Display range Display format 00-77 : ON SI,SO... -
Page 21: Input/Output List Display
9.1.2 Input/output list display At the initial screen, select "SI MONITOR 1" screen [MONITOR] → [I/O]. The "DI Monitor 1" screen then displays. Select the input/output monitor to be displayed. Pressing the F2 key (DI)--F10 key (SOW) displays the input/output monitor corresponding to the key. -
Page 22: Switching The Output Status
9.1.4 Switching the output status In the "Input/output detail view" screen, DO, MO, LO, TO, and SO output can be switched on/off by individual bits. CAUTION • In order to switch the output on/off, the programming box must have control authority. •... -
Page 23: Using Rcx-Studio Pc Support Software
Using RCX-Studio PC support software From the window tree, choose [Monitor] and then double-click a port name DI through SOW to monitor, then the monitor screen appears. The monitor screen contains a list screen and a detail screen. When starting RCX-Studio, the monitor screen that appears first will always be the "Detail screen."... - Page 24 SI monitor ■ If the name is hidden Name on/off Save name Reload name I/O name entry field Name on/off Check name Function Name on/off Shows/hides the name. Save name Sends the name that is entered in the name entry field to the controller. Reload name Loads the name from the controller, updating the indication of the name entry field.
- Page 25 SO monitor ■ If the name is hidden Name on/off ON/OFF button Save name Reload name Name on/off ON/OFF button I/O name entry field Check name Function Name on/off Shows/hides the name. Save name Sends the name that is entered in the name entry field to the controller. Reload name Loads the name from the controller, updating the indication of the name entry field.
-
Page 26: Disabling An Option Unit
10. Disabling an option unit If the controller is equipped with a field network option unit, it normally communicates with the host control device and controls the robot in accordance with the communicated content, so a ladder program is required for the host control device. -
Page 27: Making Settings
10.1 Making settings An option board can be disabled either from the programming box or from RCX-Studio PC support software. 10.1.1 Using the programming box Open the Parameter Edit screen. At the initial screen, select [Edit], press [Enter], and then select [Parameter]. Press the [F6] (OPTION) key to display the Option Parameters screen. -
Page 28: Using Rcx-Studio Pc Support Software
Edit the parameter. Change the setting for the target slot, and press the enter key. NOTE The values of the option board enable parameter correspond to slots 1 through 4 starting from the left. Verify the slot in which the network unit is installed, and change the value only for the target slot number. Press the [ESC] key to end the editing operation. - Page 29 Select the option slot "Value" column, and choose either "VALID" or "INVALID." C101 through C104 in the chart correspond to option slots 1 through 4 of controller 1. If controllers are linked to each other in a YC-Link/E network, the option slots of controller 2 and following are shown in C201 through C204.
-
Page 30: Actions To Take If Communication Is Not Established
11. Actions to take if communication is not established If communication is not established, diagnose the situation by referring to the alarm codes or alarm messages of the controller unit and to the network unit's LED illumination pattern, and take the appropriate actions. 7-segment LED Network unit 11.1 Reconsider the startup steps... -
Page 31: Viewing The Alarm Codes In The 7-Segment Led
* In the example above, alarm code "17.403" is indicated. * For details on the alarm messages and content corresponding to each alarm code, refer to "11.3 Diagnostics by alarm message," or the troubleshooting section of the RCX340 controller user's manual. 11.3 Diagnostics by alarm message Alarm messages related to the network unit are shown below. -
Page 32: Alarms Related To I/O On/Off Status
11.3.2 Alarms related to I/O on/off status These errors occur depending on the state of the dedicated input/output. If the robot controller is equipped with a network unit, the robot cannot be operated unless an emergency stop or STOP signal is input from the host control device, even if the robot is being controlled from somewhere other than the host control device. -
Page 33: Checking Alarm Codes In The Programming Box
11.3.4 Checking alarm codes in the programming box Open the Parameter Edit screen. At the initial screen, select [Edit], press [Enter], then select [Parameter]. Check the alarm code that is occurring. Press the F1 key (RELOAD) to update the display to the current state. In the illustration, alarm code 10.900 is occurring. - Page 34 : V1.62 or later Supported software versions PBX/PBX-E : V1.08 or later RCX-Studio Pro : V2.1.9 or later ESI file name YAMAHA RCX340 EtherCAT 1_00.xml Transmission speed 100Mbps (Auto-negotiation) Connector specifications RJ-45 connector (8-pole modular connector) 2 ports Conforming cable specifications CAT 5e or higher STP cable (double shield) Max.
-
Page 35: Input/Output Specifications
12.2 Input/output specifications Controller ⇒ Host control device Host control device ⇒ Controller Address (WRITE) I/O function Address (READ) I/O function SOW(0) Command status area SIW(0) Remote command area SOW(1) Command response area SIW(1) Command data area SOW(2) SIW(2) SOD(2) SID(2) SOW(3) SIW(3) -
Page 36: Reserved Word List
13. Reser ved word list Because the following names are reserved for the robot language, they cannot be used as I/O names. IDIST DEGRAD NAME ABSADJ DELAY NEXT ABSRPOS INCH INCHT ACCEL INCHXY ACCESS DIST INIT OFFLINE INPUT ONLINE DRIVE OPEN ALMRST DRIVEI... - Page 37 RESET SYNCHK RESTART SHARED RESUME SHIFT WAIT RETURN WEIGHT RIGHT TASKS WEND RIGHTY TCHXY WHERE RSHIFT TCOUNTER WHILE SKIP TEACH WHRXY RUNTO SKIPTO THEN WHRXYEX WRITE TIME TIMER SELECT SPEED SEND TOLE XYTOJ SEQCMPL START TORQUE SEQUENCE STEP TSKECD SERVO STOP TSKMON STOPON...
- Page 38 YAMAHA MOTOR CO., LTD. The contents of this manual are subject to change without prior notice. Information furnished by YAMAHA in this manual is believed to be reliable. However, no responsibility is assumed for possible inaccuracies or omissions.
- Page 40 127 Toyooka, Kitaku, Hamamatsu, Shizuoka, 433-8103, Japan Tel. 81-53-525 - 8250 Fax. 81 - 53 - 525 - 8378 Robot manuals can be downloaded from our company website. Please use the following for more detailed information. https://global.yamaha-motor.com/business/robot/ YAMAHA MOTOR CO., LTD.
Need help?
Do you have a question about the RCX340 and is the answer not in the manual?
Questions and answers