Advertisement
Advertisement
Table of Contents

Subscribe to Our Youtube Channel
Related Manuals for HOMCOM A90-116


Summary of Contents for HOMCOM A90-116
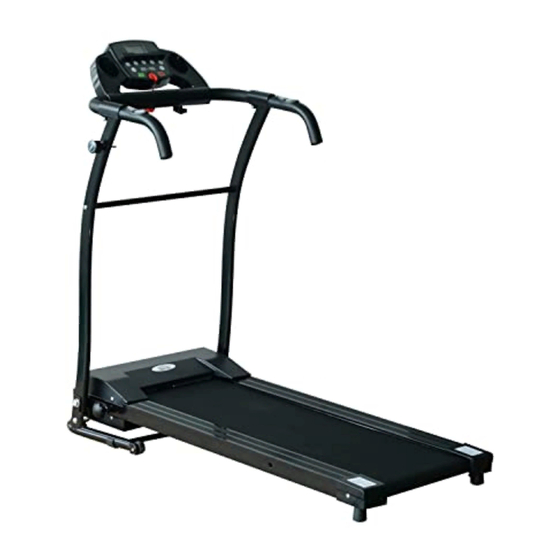
- Page 2 ASSEMBLED TREADMILL Control Panel Emergency Stop Switch Handrail Motor Cover Running Belt Fixed knob...
-
Page 3: Important Safety Information
IMPORTANT SAFETY INFORMATION Please keep this manual in a safe place for easy reference 1.It is important to read this entire manual before assembling and using the equipment. Safe and effective use can only be achieved if the equipment is assembled, maintained and used properly. -
Page 4: Hardware And Tools
HARDWARE AND TOOLS Name Specification Main Frame Arc Washer Φ8 Flat Washer Φ8 Screw Μ8*20 Screw Μ8*50 (T)Hex Wrench handle cover Safety Key Silicone Oil Tensile knob Fix knob... - Page 5 ASSEMBLY INSTRUCTIONS screw(NO.5) flat washer (ΝΟ.2) S c r e w ( N O . 5 ) screw(NO.4) arc washer (ΝΟ.3) Arc Washer (ΝΟ.2)
- Page 6 ASSEMBLE/SPREAD METHOD ASSEMBLE STEP1:Turn on the fixed knob then lift the running board to assemble the machine,then r elease the knob to fix the machine. SPREAD STEP2:Pull out the fixed knob then fall down the running board and fix the machine with the fixed knob then use the machine after electrify.
-
Page 7: Exercise Instructions
EXERCISE INSTRUCTIONS Using your TREADMILL will provide you with several benefits,It will improve your physical fitness,tone your muscles,and,in conjunction with a calorie-controlled diet, help you to lose weight 1.The Warm Up Phase This stage helps get the blood flowing around the body and the muscles working properly, It will also reduce the risk of cramp and muscle injury, It is advisable to do a few stretching exercises as shown below, Each stretch should be held for approximately 30 seconds, Do not force or jerk your muscles into a stretch - if it hurts,STOP... -
Page 8: Weight Loss
3.The Cool-Down Phase This stage is to let your cardio-vascular system and muscles wind down, This is a repeat of the warm-up phase,First, reduce your tempo and continue at this slower pace for approximately 5 minutes, The stretching exercises should now be repeated, again remembering not to force or jerk your muscles into the stretch, As you get fitter, you may need to train longer and harder, It is advisable to train at least three times a week, and if possible to space your... -
Page 9: Belt Adjustment
BELT ADJUSTMENT Your treadmill belt has been adjusted at the factory but each user has a tendency to be “Right” or “Left” footed. If the belt moves to either side, it needs to be adjusted. There are two adjustment bolts at the rear of the unit (see Fig 3), Tighten by half a turn the bolt on the side towards which the belt has shifted and correspondingly loosen the bolt on the other side. -
Page 10: Control Panel
CONTROL PANEL QUICK START First plug in the power, then place the safety key on the computer & turn on the power switch that is located at the front of the Treadmill. The display screen display “P0”, press “start”key on the computer and the running belt starts moving after the LCD showing “5-4-3-2-1”.
Need help?
Do you have a question about the A90-116 and is the answer not in the manual?
Questions and answers