Table of Contents
Advertisement
Quick Links
Advertisement
Table of Contents

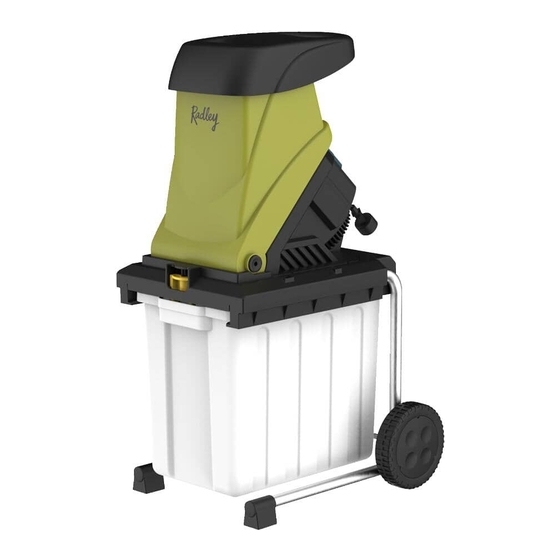
Summary of Contents for RADLEY 5131-001
- Page 2 15 Amp Chipper/Shredder - Owner's Manual SPECIFICATIONS 15 AMP CHIPPER/SHREDDER Type Corded Voltage 120 V ~ 60 Hz 15 A No-load Speed 3700 RPM Cutting Capacity 1 ½” (39 mm) Discharge Collection box Weight 30 lb (13.7 kg) Need Assistance? Call us on our toll free customer support line: 1-833-818-4111 (Monday through Friday, 9am –...
-
Page 3: Table Of Contents
5131-001 TABLE OF CONTENTS Specifications ……....…….……………………………………………………………1 Table of Contents ………….………..……………………………………………………2 Symbols ….........……...………………………………………………………3 Electrical Information …………..…………………………………………………………4 General Safety Information ……....……………………………………………5-6 Know Your Chipper/Shredder ………...……..…………………………………………7 Assembly ….…..….…………..……..……...………………………...…………………8-9 Operation ………..…....……………………………………………………………10-13 Maintenance ……...….……....……………………………………………………14-15 Troubleshooting …..….……....……………………………………………………16 Recycling and Disposal ……........……………………………………16 Parts Schematic ............……………………………………17 ..............……………………………………18-19 Parts List Warranty ..............……………………………………20... -
Page 4: Symbols
15 Amp Chipper/Shredder - Owner's Manual SYMBOLS Some of the following symbols may be used on this product. Please study them and learn their meaning. Proper interpretation of these symbols will allow you to operate the product effectively and safely. Volts - Voltage Watts - Power Amperes - Current... -
Page 5: Electrical Information
5131-001 ELECTRICAL INFORMATION GUIDELINES FOR USING EXTENSION CORDS USE THE PROPER EXTENSION CORD. Make sure your extension cord is in good condition. When using on extension cord, be sure to use one heavy enough to carry the current your product will draw. An undersized cord will cause overheating. -
Page 6: General Safety Information
15 Amp Chipper/Shredder - Owner's Manual GENERAL SAFETY INFORMATION FOR ALL DOUBLE-INSULATED APPLIANCES. 1. Replacement Parts: when servicing use only identical replacement parts. 2. Polarized Appliance Connections: to reduce the risk of electric shock, this appliance has a polarized plug (one blade is wider than the other) and will require the use of a polarized extension cord. - Page 7 5131-001 Extension cord Shredder cord (A) Tie cord as shown (B) Connect plug and receptacle i) Make a knot as shown above. ii) Use one of the plug-receptacle retaining straps or connectors described in this manual. 10. Avoid unintentional starting. Do not carry plugged-in appliance with finger on switch.
-
Page 8: Know Your Chipper/Shredder
15 Amp Chipper/Shredder - Owner's Manual KNOW YOUR CHIPPER/SHREDDER 7. Locking knob 13. Axle tube 1. Feed hopper 8. Overload protector 14. On/Off switch 2. Body cover 9. Power cable 15. Socket wrench 3. Locking button 10. Plunger 16. Wheel bushing 4. -
Page 9: Assembly
5131-001 ASSEMBLY FITTING THE TRANSPORTATION WHEELS WARNING! You may need assistance to lift the machine out of the box and assemble it. NOTE: Before using the chipper/shredder, read the instruction book carefully. Before using the chipper/shredder, some assembly is required. - Page 10 15 Amp Chipper/Shredder - Owner's Manual WARNING! Before assembly, make sure that the machine is switched off and unplugged. WARNING! Take care when tilting the unit onto its wheels as the unit has an uneven weight distribution when tilted and during wheeled transportation. locking button locking knob Fig.
-
Page 11: Operation
5131-001 OPERATION For best results when shredding, follow the guidelines shown in the table below. Material Shredding Method Twigs and pruning up to Feed into the feeding chute at a rate which the 1/4" (6 mm) diameter. shredder will accept without overloading. Use the plunger to push the material into the chute if required. - Page 12 15 Amp Chipper/Shredder - Owner's Manual START/STOP THE SHREDDER 1. Connect to the electric power supply. 2. To switch on the shredder, press the power On/Off switch to the ON position (Fig. 5). 3. To switch off, simply press the On/Off switch to the OFF position (Fig. 6). NOTE: Ensure power On/Off...
- Page 13 5131-001 overload locking knob protector body cover feeding chute Fig. 7 Fig. 8 NOTE: If body cover is not correctly fitted, and locking knob is not securely tightened, the shredder can not be operated. OPERATION OF OVERLOAD PROTECTOR If the machine is overloaded, the overload protector incorporated in the motor will cut off...
- Page 14 15 Amp Chipper/Shredder - Owner's Manual Fig. 9 NOTE: After prolonged use, the chipper/shredder may lose performance. If the blades become worn or damaged, they can be reversed to provide a new cutting edge. NOTE: 1. Do not allow garden waste to accumulate before shredding as it will begin to compost and become too damp and clog the cutting assembly.
-
Page 15: Maintenance
5131-001 MAINTENANCE BLADE MAINTENANCE The shredder has two blades that are attached to a rotating support. When one side of a blade becomes dull, it can be turned over in order to use the other side. Dull blades can be replaced or properly sharpened. - Page 16 15 Amp Chipper/Shredder - Owner's Manual NOTE: If body cover is not correctly fitted, and locking knob is not securely tightened, the shredder can not be operated. GENERAL MAINTENANCE 1. For maximum performance and longevity, keep the shredder clean and in good working condition.
-
Page 17: Troubleshooting
5131-001 TROUBLESHOOTING If your device is not operating properly, follow the instructions below. If this does not solve the problem, please contact your local repair agent. PROBLEM PROBABLE CAUSE CORRECTIVE ACTION Motor not running. 1. No main voltage. 1. Check cable, plug, socket and fuse. -
Page 18: Parts Schematic
15 Amp Chipper/Shredder - Owner's Manual PARTS SCHEMATIC READ ALL INSTRUCTIONS BEFORE USING THIS CHIPPER/SHREDDER... -
Page 19: Parts List
5131-001 PARTS LIST WARNING: When servicing, use only original equipment replacement parts. The use of any other parts may create a safety hazard or cause damage to the 15 Amp Chipper/Shredder. Any attempt to repair or replace electrical parts on this 15 Amp Chipper/Shredder may create a safety hazard unless repairs are performed by a qualified technician. - Page 20 15 Amp Chipper/Shredder - Owner's Manual Key # Part # Part Name Quantity ACAJ011031 Switch pin ACAJ011032 H type screw ACAJ011033 Fixup nut ACAJ011034 Switch box ACAJ011035 Electonmagnetic switch ACAJ011036 Overcurrent protection ACAJ011037 Connecting wire ACAJ011038 Cord sheath ACAJ011039 Cord clamp plate ACAJ011040 Supply cord ACAJ011041...
-
Page 21: Warranty
WARRANTY RADLEY 15 AMP CHIPPER/SHREDDER WARRANTY If this Radley tool fails due to a defect in material or workmanship within three years from the date of purchase, return it to any Home Hardware store with the original bill of sale for exchange. - Page 22 15 Amp Chipper/Shredder - Owner's Manual READ ALL INSTRUCTIONS BEFORE USING THIS CHIPPER/SHREDDER...
- Page 23 5131-001 SAVE THESE INSTRUCTIONS FOR REFERENCE...
Need help?
Do you have a question about the 5131-001 and is the answer not in the manual?
Questions and answers