
Summary of Contents for Ariston NIMBUS 40 M EXT
- Page 1 NIMBUS HYBRID MODULE NET ISTRUZIONI TECNICHE PER L’INSTALLAZIONE E LA MANUTENZIONE TECHNICAL INSTRUCTIONS FOR INSTALLATION AND MAINTENANCE 3301136 420000448003...
-
Page 2: Table Of Contents
INDICE MESSA IN FUNZIONE GENERALITÀ Installazione dell’interfaccia di sistema ..........31 Norme di sicurezza ...................3 Interfaccia di sistema simboli display: ..........32 Garanzia .......................6 Procedura di accensione..............33 Descrizione del sistema ................7 Accesso Area Tecnica ................33 Principio di funzionamento ..............7 Termoregolazione ...................37 Schemi ......................8 Dimensioni e pesi Unità... -
Page 3: Norme Di Sicurezza
NORME DI SICUREZZA Rumorosità durante il funzionamento. Non danneggiare, nel forare la parete, ATTENZIONE cavi elettrici o tubazioni preesistenti. seguente manuale costituisce parte Folgorazione per contatto con conduttori integrante ed essenziale del prodotto. Deve sotto tensione. essere conservato con cura e deve sempre essere allegato al prodotto, anche in caso Danneggiamento impianti preesistenti. - Page 4 utilizzarle correttamente, non intralciare Movimentare l’apparecchio con le dovute i passaggi con il cavo di alimentazione, protezioni e con la dovuta cautela. assicurarle da eventuale caduta dall’alto, Danneggiamento dell’apparecchio o di scollegare e riporle dopo l’uso. oggetti circostanti per urti, colpi, incisioni, Lesioni personali per proiezione di scheg- schiacciamento.
- Page 5 Danneggiamento dell’apparecchio o di og- ATTENZIONE! getti circostanti per corrosione da sostanze L’apparecchio può essere utilizzato da bambinni acide. di età non inferiore a 8 anni e da persone con ridotte capacità fisiche, sensoriali o mentali, o Nel caso si avverta odore di bruciato o si prive di esperienza o della necessaria conos- veda del fumo fuoriuscire dall’...
-
Page 6: Garanzia
GARANZIA La garanzia non si applica nei casi di manutenzione in- sufficiente: • Incrostazioni anormali dei corpi riscaldanti e degli orga- La garanzia è valida esclusivamente se l’installazione del ni di sicurezza sistema viene effettuata da un tecnico autorizzato. • Assenza di manutenzione del gruppo di sicurezza fina- I danni dovuti alle seguenti cause fanno decadere la ga- lizzato alla riduzione di pressione ranzia:... -
Page 7: Descrizione Del Sistema
DESCRIZIONE DEL SISTEMA In relazione ai parametri impostati inizialmente, l’ENERGY MANAGER decide qual è il generatore più adatto a riscal- dare l’ambiente. Composizione del sistema Il sistema ibrido offre la possibilità di definire anche i limiti IL sistema ibrido è composto da: di funzionamento della caldaia e della pompa di calore. -
Page 8: Schemi
SCHEMI SCHEMA CON CALDAIA MISTA Legenda: Modulo Ibrido 2. Unità esterna 3. Sonda esterna 4. Zona riscaldamento alta temperatura 5. Zona riscaldamento bassa temperatura 6. Controllo Remoto Sensys e Sensys NET Filtro 8. Cartuccia antigelo 9. Caldaia mista 10. By pass 11. - Page 9 SCHEMA CON CALDAIA MISTA CON UNICO IMPIANTO PER RISCALDAMENTO E RAFFRESCAMENTO (FUNZIONAMENTO IN RISCALDAMENTO) Legenda: Modulo Ibrido 2. Unità esterna 3. Sonda esterna 4. Valvola deviatrice 5. Zona riscaldamento bassa temperatura 6. Controllo Remoto Sensys e Sensys NET Filtro 8. Cartuccia antigelo 9.
- Page 10 SCHEMA CON CALDAIA MISTA RISCALDAMENTO E RAFFRESCAMENTO CON IMPIANTI SEPARATI (FUNZIONAMENTO IN RISCALDAMENTO) Legenda: Modulo Ibrido 2. Unità esterna 3. Sonda esterna 4. Valvola deviatrice 5. Zona riscaldamento alta temperatura 6. Controllo Remoto Sensys e Sensys NET Filtro 8. Cartuccia antigelo 9.
- Page 11 SCHEMA CON CALDAIA SYSTEM RISCALDAMENTO E RAFFRESCAMENTO CON IMPIANTI SEPARATI E BOLLIOTRE PER LA PRO- DUZIONE DI ACQUA CALDA SANITARIA - (FUNZIONAMENTO IN RISCALDAMENTO) Legenda: Modulo Ibrido 2. Unità esterna 3. Sonda esterna 4. Valvola deviatrice 5. Zona riscaldamento alta temperatura 6.
-
Page 12: Dimensioni E Pesi Unità Esterna
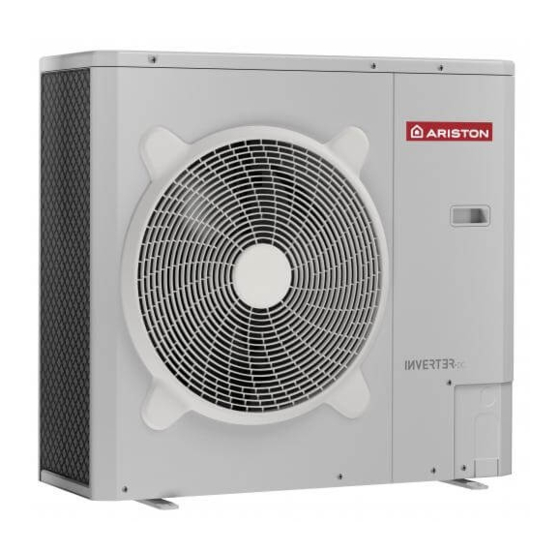
Dimensioni e pesi Unità Esterna L’unità esterna fornita è uno dei modelli seguenti: • NIMBUS 40 M EXT • NIMBUS 90 M-T EXT • NIMBUS 50 M EXT • NIMBUS 110 M-T EXT • NIMBUS 70 M EXT • NIMBUS 90 M EXT •... - Page 13 90 - 110 M-T EXT 1016 ø 10 / 13...
-
Page 14: Hybrid Module Dimensioni E Pesi
HYBRID MODULE ATTENZIONE: Dimensioni e Pesi Alcune funzioni/configurazioni della caldaia potrebbero essere sovrascritte dalla regolazione del modulo ibrido Vista dal basso Vista frontale A. Mandata riscaldamento G 1” M B. Mandata acqua calda sanitaria G ½” M C. Ingresso GAS G ¾” M D. -
Page 15: Vista Globale
Vista globale 1. Tubo mandata caldaia 2. Tubo acqua calda sanitaria 3. Tubo gas 4. Tubo acqua fredda sanitaria 5. Tubo ritorno caldaia 6. Rubinetto ingresso acqua calda dall’unità esterna G 1” M 7. Rubinetto rete idrica 8. Rubinetto gas 9. -
Page 16: Prestazioni Termodinamiche Dell'unità Esterna
TAGLIA MODELLI Soglia di OFF flussimetro [l/h] Soglia di ON flussimetro [l/h] Flusso nominale [l/h] 40 M 50 M 70 M 1120 70 M-T 1120 90 M-T 1440 110 M-T 1755 90 M 1440 110 M 1755 Pressione disponibile Le curve indicate tengono conto delle perdite di carico attribuibili all’unità interna. In questo modo è... -
Page 17: Dispositivi Di Controllo Remoto
Sonda esterna Classe del controllo di temperatura Contributo all'efficienza energetica % per il riscaldamento degli ambienti In un sistema a 3 zone con 2 Sensori Ambiente Ariston: Classe del controllo di temperatura VIII Contributo all'efficienza energetica % per il riscaldamento degli ambienti... -
Page 18: Guida All'installazione
GUIDA ALL’INSTALLAZIONE Scelta del posizionamento • Evitare il posizionamento dell’unità esterna in luoghi di difficile accesso per le successive operazioni di installazione e manu- Attenzione tenzione. • Evitare il posizionamento in prossimità di fonti di calore. L’installazione delle unità esterne ed interna deve •... -
Page 19: Procedimento Di Apertura Passaggi Per Colegamenti
2. Rimozione pannello frontale Attenzione Rimuovere le viti che bloccano il pannello frontale, tirarlo Prima dell’installazione verificare la resistenza e l’orizzontalità in avanti e verso il basso. della base di appoggio. Basandosi sulle immagini sotto ripor- tate, fissare solidamente la base dell’unità esterna al suolo, servendosi di opportuni bulloni d’ancoraggio (M10 X 2 paia). -
Page 20: Hybrid Module Installazione Preliminare
HYBRID MODULE 2. Collegamento alla caldaia Collegare i tubi di mandata e ritorno impianto, acqua fred- Installazione preliminare da e acqua calda sanitaria e gas dell’Hybrid Module alle Il Modulo Ibrido deve essere posizionato presso un vano corrispondenti connessioni della caldaia, come mostrato con funzione abitativa al fine di garantire le migliori pres- in figura. -
Page 21: Montaggio Tubo Scarico Condensa
3. Montaggio tubo scarico condensa Riposizionare il mantello frontale del Modulo Ibrido, come precedentemente descritto, inserire il tubo di scarico conden- sa in corrispondenza del sifone della caldaia come mostrato in figura. 4. Montaggio copriraccordi Per il posizionamento del copriraccordi seguire le istruzioni riportate all’interno del kit. ATTENZIONE: montare il copriraccordi senza il tappo in modo da permettere l’accesso al rubinetto di riempimento caldaia e garantire la visibilità... -
Page 22: Verifiche
VERIFICHE Prima di effettuare i collegamenti idraulici veirifcare che: • la pulizia dell’impianto sia stata effettuata • non siano presenti impurità nell’acqua di impianto • vengano utilizzati componenti compatibili tra loro (evitare connesioni in ferro e rame insieme) • l’allaccio dell’impianto sia stato effettuato tramite la rete idrica •... -
Page 23: Collegamenti Elettrici
COLLEGAMENTI ELETTRICI Attenzione I collegamenti elettrici vanno effettuati dopo aver completato tutti i collegamenti idraulici. Attenzione Dopo il Power OFF dell'unità esterna, sarà necessario attendere almeno 5 minuti prima di eseguire il Power ON. Attenzione corredo, In caso di utilizzo di caldaie della serie Alteas o Genus è necessario installare lo schedino disaccopiatore BUS fornito a seguendo scrupolosamente le istruzioni contenute nel kit. - Page 24 Le alimentazioni elettriche del HYBRID MODULE e di quella esterna devono essere rispettivamente collegate ad un interruttore diffe- renziale (RCCB) con soglia di intervento di 30mA. Per l’unità dotata di inverter (unità esterna), si consiglia l’utilizzo di differenziali di tipo B per alimentazioni 3ph e di tipo F o B (in base all’impianto elettrico a cui viene collegata), per quelle 1ph.
-
Page 25: Connessioni Elettriche Dell'unità Esterna
ATTENZIONE: Eseguire il collegamento a terra prima di tutti gli altri collegamenti elettrici. Le unità interne ed esterne devono essere alimentate separatamente. Per evitare qualsiasi rischio, il cavo di alimentazione dell’unità esterna ed interna deve essere sostituito solo da tec- nici specializzati . - Page 26 Attenzione Le scariche elettriche possono provocare lesioni gravi finanche la morte. I collegamenti elettrici devono essere effet- tuati esclusivamente da personale tecnico qualificato. Effettuare la messa a terra prima di procedere con gli altri collegamenti elettrici. Connessioni elettriche dell’unità esterna Il quadro elettrico dell’unità...
-
Page 27: Connessioni Elettriche Dell'hybrid Module
Connessioni elettriche dell’HYBRID MODULE 4) Selezionare il parametro 2.2.8 Versione caldaia ed impos- tare il valore «Accumulo Ext con Termostato». Prima di ogni intervento sul sistema, interrompere l’alimenta- zione dall’interruttore generale. Rispettare le connessioni di neutro e fase. Per accedere al quadro elettrico dell’HYBRID MO- DULE, rimuovere le quattro viti indicate in figura (A) ed estrarre il coperchio del quadro elettrico (B). -
Page 28: Schemi Elettrici
SCHEMA ELETTRICO BK = Nero YE = Giallo BN = Marrone GN = Verde BU = Blu GY = Grigio RD = Rosso WH = Bianco OR = Arancio PI = Rosa ENERGY MANAGER CN14 YE/GN CN13 OUTDOOR UNIT SYSTEM INTERFACE BOILER P.C.B. - Page 29 1ph (XS-S-M) Magnetic ring 3 tours FLOW METER INVERTER 1 PH PUMP Program ARM EPROM white Program CN10 white CN25 FLOW Magnetic ring CN11 CN13 CN10 3 tours Valv 4 HEAT P8-1 P8-2 FAN1 Magnetic ring CN409 CN11 blue P10-1/W 3 tours E-Bus CNX1...
- Page 30 3 ph (L-XL) Capacitor Board R1250RJA FLOW METER 5 mH/12A PUMP KLIXON Magnetic ring Magnetic ring CN622 DC+IN 3 tours Protection Board 3 tours CN602 U-IN U-OUT FLOW CN13 CN10 CN11 V-OUT V-IN blue W-IN W-OUT DC-IN CN709 DRIVE BOARD Compressor DC-OUT E-Bus...
-
Page 31: Installazione Dell'interfaccia Di Sistema
INSTALLAZIONE DELL’INTERFACCIA DI SISTEMA Posizionamento L’interfaccia di sistema riconosce la temperatura ambiente, per cui si deve tener conto di questo fattore nello sce- gliere il posizionamento della stessa. Si consiglia un posizionamento lontano da fonti di calore (radiatori, esposizione diretta alla luce solare, camini etc.) cosi come si consiglia di evitare un posizionamento in prossimità... -
Page 32: Interfaccia Di Sistema Simboli Display
è necessario assi- curarsi che essi non prevedano una logica di controllo a banda * Verificare la disponibilità del servizio Ariston NET nel vostro paese proporzionale. Tale logica potrebbe infatti causare inefficienza con il vostro rivenditore di fiducia. -
Page 33: Procedura Di Accensione
Premere il tasto OK. ATTENZIONE Definisce il tempo di intervento della caldaia partendo dal massimo ri- Per garantire la sicurezza e il corretto funzionamento dell’in- sparmio energetico (ECO PLUS) al più confortevole (COMFORT PLUS) terfaccia di sistema, la messa in funzione deve essere eseguita Premere il tasto OK. - Page 34 12.1.3 Ingresso AUX 1 12.3.2 Post Circolazione Riscaldameto - Nessuna funzione Tempo di post circolazione - Ingresso umidostato: quando il contatto è chiuso la pompa di calore 12.3.3 Funzionamento Circolatore è spenta durante il ciclo raffrescamento. impostare il livello di velocità del circolatore: Premere il tasto OK.
- Page 35 Permette l’attivazione manuale della pompa di calore. Ruotare la manopola e selezionare: 12.7.0 Attivazione modo manuale Ruotare la manopola e selezionare: 12.7.1 Modalità rating riscaldamento Attiva la pompa di calore in riscaldamento. La frequenza del compresso- re è impostabile dal parametro 12.7.3 12.7.2 Modalità...
- Page 36 Premere il tasto OK. Ruotare la manopola e selezionare: calore. 12.9.6 Efficienza fonte di calore esterna risc. Definisce il rendimento medio stimato della caldaia AUX 1/2 in riscalda- Ruotare la manopola e selezionare: mento 12.15 DIAGNOSTICA POMPA CALORE - 4 Premere il tasto OK.
-
Page 37: Termoregolazione
Termoregolazione - impianto a bassa temperatura (pannelli a pavimento) curva da 0,2 a 0,8 Per impostare i parametri di termoregolazione premere contem- - impianto ad alta temperatura (radiatori) poraneamente i tasti indietro “ “ e “OK” fino alla visualizzazio- curva da 1,0 a 3,5 ne sul display “Inserimento codice “. - Page 38 Termoregolazione raffrescamento La verifica dell’idoneità della curva scelta richiede un tempo lun- Per impostare i parametri di raffrescamento premere contempo- go nel quale potrebbero essere necessari alcuni aggiustamenti. All’aumentare della temperatura esterna (estate) si possono ve- raneamente i tasti indietro “ “...
-
Page 39: Tabella Menu
IMPOSTAZIONE DESCRIZIONE RANGE DI FABBRICA RETE Rete BUS Interfaccia di sistema Energy Manager Rete BUS attuale Pompa di calore Sensore ambiente Controllo multi zona Interfaccia di sistema Nessuna zona selezionata Numero zona Zona selezionata Correzione temperatura ambiente Versione SW interfaccia PARAMETRI CALDAIA Impostaz Generali Indicazione dispositivi... - Page 40 IMPOSTAZIONE DESCRIZIONE RANGE DI FABBRICA Impostaz Ritardo Accensione Risc Funzionamento Circolatore Postcircolazione Riscaldamento Funzionamento Circolatore DeltaT Modulazione Circolatore Riscaldamento-2 Press Minima Press Allerta Press Riempimento Post vent Risc ON -OFF Tempo Incremento Temp Risc Max PWM pompa Min PWM pompa Solo Sonde T Dispositivo Rilevaz Pressione Risc Pressostato di Minima...
- Page 41 IMPOSTAZIONE DESCRIZIONE RANGE DI FABBRICA Temperatura Giorno 10°C - 30°C 19°C Temperatura Notte 10°C - 30°C 13°C Temperatura set Z1 par. 4.2.5 - 4.2.6 20°C (LT) - 40°C (HT) Temperatura antigelo zona 2°C -15°C 5°C Funzione estate/inverno automatico Attivazione estate/inverno auto OFF - ON Limite temp.
- Page 42 IMPOSTAZIONE DESCRIZIONE RANGE DI FABBRICA DeltaT obbiettivo x modulaz [-5; -20°C] -5°C PARAMETRI ZONA 2 Imposta Temperature Temperatura Giorno 10 - 30 °C 19°C Heat - 24°C Cool Temperatura Notte 10 - 30 °C 13°C Temperatura Zona 2 par. 5.2.5 - 5.2.6 20 (LT) - 40 (HT) Temperatura Antigelo zona 2 - 15 °C...
- Page 43 IMPOSTAZIONE DESCRIZIONE RANGE DI FABBRICA Termostati ON/OFF TSelezione Tipologia Termoregolaz T Fissa di Mandata ON/OFF Solo Sonda Esterna Curva Termoregolazione [18;33] FC; [0-30] Pavimento 25 FC; 10 Pavimento Spost Parallelo [-2,5°C; +2,5°C] 0°C MinT -12°C [FC]; 12°C [FC]; Max T 23°C [Pavimento] MinT - 23°C [Pavimento] 7°C [FC];...
- Page 44 IMPOSTAZIONE DESCRIZIONE RANGE DI FABBRICA Circolatore Ausiliario Impostazioni circ. AUX P2 Circolatore raffrescamento Circolatore Ausiliario Circolatore buffer Impostazioni 1 Nessuno Schema Idraulico Caldaia istantanea Nessuno Caldaia + bollitore Comp Temp mandata PC 2°C - 10°C 2°C Temp Est. x Disabilitazione Caldaia Temp Est.
- Page 45 IMPOSTAZIONE DESCRIZIONE RANGE DI FABBRICA Sanitario Forzamento valvola deviatrice Sanitario Riscaldamento Riscaldamento Test valvola 3 vie COOLING Riscaldamento Raffrescamento Circolatore Ausiliario OFF - ON Contatti uscita AUX 1/2 OFF - ON Forza la pompa in riscaldamento OFF - ON Forza la pompa in raffreddamento OFF - ON Attivazione funzione spazzacamino caldaia OFF - ON...
- Page 46 IMPOSTAZIONE DESCRIZIONE RANGE DI FABBRICA Ore di sbrinamento (h/10) solo lettura Ore funzionamento in raffr. (h/10) solo lettura Ore funzionamento in risc. (h/10) solo lettura Ore funz. in sanitario (h/10) solo lettura Info Energy Manager solo lettura Costo attuale kWh da PdC solo lettura (Euro, cent.) Costo attuale kWh da Caldaia solo lettura (Euro, cent.)
- Page 47 IMPOSTAZIONE DESCRIZIONE RANGE DI FABBRICA Diagnostica Pompa Calore - 4 stato compressore OFF - ON Sola lettura stato preriscaldatore compressore OFF - ON Sola lettura stato ventilatore 1 OFF - ON Sola lettura stato ventilatore 2 OFF - ON Sola lettura Heat Stato valvola 4 vie Sola lettura...
- Page 48 IMPOSTAZIONE DESCRIZIONE RANGE DI FABBRICA Connettività Configurazione connettività ON/OFF della rete Wi-Fi Configurazione rete Orario Internet Info Connettività Inizializzazione Idle Inizializzazione Acess Point Modalità Acess Point Stato connettività Connessione WiFI in corso WiFi connessa Connessione cloud in corso Cloud connesso Errore WiFi Livello del segnale Non collegato...
-
Page 49: Manutenzione
MANUTENZIONE impianto • Riportare in pressione il sistema, disareandolo quando necessario ATTENZIONE • Regolare i parametri di settaggio e i dispositivi di regola- Per garantire la sicurezza e il corretto funzionamento la ma- zione al fine dell’ottenimento di un miglior funzionamen- nutenzione deve essere eseguita da un tecnico qualificato in to e di una gestione più... -
Page 50: Tabella Codici Errori Ibrido
TABELLA CODICI ERRORI IBRIDO In caso di blocco sul display dell’interfaccia di sistema viene visualizzato un codice errore che si riferisce al tipo di arresto ed alla causa che lo ha generato. Per ripristinare il normale funzionamento seguire le istruzioni riportate sul display o se l’errore persiste si consiglia l’inter- vento del Centro di Assistenza Tecnico autorizzato. - Page 51 LISTA ERRORI UNITÀ ESTERNA LISTA ERRORI INVERTER RESET ERRORE DESCRIZIONE 1ph 3ph INVERTER Sovratemperatura Dissipatore Sovracorrente IPM Compressore Start-up Compressore Fallito Sovracorrente Compressore Mancanza di fase AC Ingresso DESCRIZIONE Errore Misura Corrente IPM Compressore Errore pilotaggio compressore Tensione DC bus troppo bassa Errore pilotaggio ventilatore all’avviamento Errore pilotaggio valvola 4 vie...
- Page 52 NUOVA TABELLA INVERTER ODU 9-11 1-PHASE ERRORI DESCRIZIONE INVERTER ERRORE SENSORE CORRENTE U DEL COMP ERRORE SENSORE CORRENTE V DEL COMP ERRORE SENSORE CORRENTE W DEL COMP ERRORE SENSORE CORRENTE PFC ERRORE SENSORE TEMPERATURA IPM ERRORE SENSORE TEMPERATURA PFC ERRORE SENSORE DLT ERRORE PERDITA DI COMUNICAZIONE ERRORE EEPROM ERRORE SOVRACORRENTE AC...
-
Page 53: Targa Dati
L’unità esterna facente parte del prodotto acquistato è fornita con l’etichetta energetica relativa ad una specifica configurazione, in ot- temperanza a quanto previsto dal Regolamento 811/2013; qualora la configurazione da voi scelta non corrisponda a quella in etichetta, è possibile recuperare l’etichetta corretta sul sito www.ariston.com o telefonando al numero clienti +39 0732 633528. / 53... - Page 54 CONTENTS PREPARING THE BOILER FOR OPERATION OVERVIEW Installing the system interface firmware ......... 83 Safety regulations .................. 55 Display symbols: ..................84 Guarantee ....................58 Ignition procedure ................. 85 System description ................59 Display symbols: ..................85 Operating principle ................59 Technical Area Access .................
-
Page 55: Safety Regulations
SAFETY REGULATIONS res which have a suitable section.he electri- cal connection of the product must be done CAUTION following the instruction manual in the relati- This manual constitutes an integral and ve paragraph. essential part of the product. It must be kept Fire caused by overheating due to electrical with care and accompany the product at all current passing through undersized cables. - Page 56 ned securely, that they are suitably strong Personal injury caused by electrocution, fal- and that the steps are intact and not slippery ling splinters or fragments, inhalation of dust, and do not wobble when someone climbs shocks, cuts, puncture wounds, abrasions, them.
- Page 57 Don’t step upon the external and internal WARNING! unit. This appliance can be used by children aged from 8 years and above and person with reduced Personal injury or damages to the ap- physical, sensory or mental capabilities or lack pliance.
-
Page 58: Guarantee
GUARANTEE CE mark - 2014/30/EU - relating to Electromagnetic Compatibility The warranty is only valid if the appliance is installed by a - 2014/35/EU - related to electrical safety (LVD) qualified technician. - RoHS2 2011/65/EU related to the restriction of the use Damage as a result of the following causes void the of certain dangerous substances in electrical and elec- guarantee:... -
Page 59: System Description
SYSTEM DESCRIPTION In relation to the parameters initially set, the ENERGY MANAGER decides which generator is the most suitable to heat the room. System composition The hybrid system also offers the ability to define the limits THE hybrid system is made up of: of operation of the boiler and the heat pump. -
Page 60: Diagrams
DIAGRAMS DIAGRAM WITH COMBI BOILER Legend: Hybrid module 2. External unit 3. Outdoor sensor 4. High temperature heating zone 5. Low temperature heating zone 6. Sensys remote control and Sensys Net Filter 8. Anti-freeze cartridge 9. Combi boiler 10. By pass 11. - Page 61 SCHEME WITH HYBRID BOILER AND A SINGLE SYSTEM FOR HEATING AND COOLING (HEATING-MODE OPERATION) Legend: Hybrid module 2. External unit 3. Outdoor sensor 4. Diverter valve 5. Low temperature heating zone 6. Sensys remote control and Sensys Net Filter 8. Anti-freeze cartridge 9.
- Page 62 SCHEME WITH HYBRID HEATING AND COOLING BOILER WITH SEPARATE SYSTEMS (HEATING-MODE OPERATION) Legend: Hybrid module 2. External unit 3. Outdoor sensor 4. Diverter valve 5. High temperature heating zone 6. Sensys remote control and Sensys Net Filter 8. Anti-freeze cartridge 9.
- Page 63 SCHEME WITH SYSTEM HEATING AND COOLING BOILER WITH SEPARATE SYSTEMS AND CYLINDER FOR DOMESTIC HOT WATER PRODUCTION (HEATING-MODE OPERATION) Legend: Hybrid module 2. External unit 3. Outdoor sensor 4. Diverter valve 5. High temperature heating zone 6. Sensys remote control and Sensys Net Filter 8.
-
Page 64: External Unit Dimensions And Weights
EXTERNAL UNIT Dimensions and Weights The external unit supplied is one of the following models: • NIMBUS 40 M EXT • NIMBUS 90 M-T EXT • NIMBUS 50 M EXT • NIMBUS 110 M-T EXT • NIMBUS 70 M EXT •... - Page 65 90 - 110 M-T EXT 1016 ø 10 / 65...
-
Page 66: Hybrid Module Dimensions And Weights
HYBRID MODULE ATTENTION : some boyler storage cylinder functions/configurations, could Dimensions and Weights be overwritten by hybrid module adjustment system. Bottom view Front View A. Heating delivery G 1” M B. Domestic hot water delivery G ½” M C. GAS inlet G ¾” M D. -
Page 67: Global View
Global view 1. Boiler delivery pipe 2. Domestic hot water pipe 3. Gas pipe 4. Domestic cold water pipe 5. Boiler return pipe 6. Hot water inlet from external unit G 1” M 7. Cold water tap 8. Gas tap 9. -
Page 68: Thermodynamic Performance Of External Unit
Flowmeter OFF Flowmeter ON System Size Nominal flow rate [l/h] Threshold [l/h] Threshold [l/h] 40 M 50 M 70 M 1120 70 M-T 1120 90 M-T 1440 110 M-T 1755 COMPRESSOR FREQUENCY TABLE Heat Pump Frequency min [Hz] Frequency max (heat) [Hz] Frequency max (cool) [Hz] 4 kW 5 kW... -
Page 69: Remote Control Devices
OUTDOOR SEN- Class of the temperature control Contribution to seasonal space heating energy efficiency in % In a 3-zones system with 2 Ariston Room Sensors Class of the temperature control VIII Contribution to seasonal space heating energy efficiency in %... -
Page 70: Installation Guide
INSTALLATION GUIDE Choice of placement • Avoid a mounting where the ODU is surrounded by walls • Avoid a mounting in sinks. Cold air sinks down and by that Warning air short circuit could occur. The appliance must be installed by a qualified technician in •... -
Page 71: Opening Procedure For Lateral Passages
2. Removal of frontal panel Attention Remove the screws that block the frontal panel and pull it Before installation, check strength and horizontality of forward and down. the base. Based on the pictures, connect the base of the external unit firmly to the ground, using suitable anchor bolts (M10 x 2 pairs). -
Page 72: Hybrid Module Preliminary Installation
HYBRID MODULE 2. Connection to the boiler Connect the system delivery and return, cold water and Preliminary installation domestic hot water, and gas, pipes of the Hybrid Module The HYBRID MODULE HYBRID MODULE must be posi- to the corresponding boiler connections, as shown in the tioned close to a residential space to ensure best perfor- figure. -
Page 73: Assembling The Condensate Drain Pipe
3. Assembling the condensate drain pipe Put the front shell of the hybrid module back in place, as described above, then attach the condensate drain pipe to the boiler siphon as shown in the picture. 4. Assembling the fitting covers Follow the instruction contained inside the kit to position the fitting covers. -
Page 74: Checks
CHECKS Before making the water circuit connections, check that: • the system has been cleaned • there are no impurities in the circuit water • compatible components are used (do not connect copper and steel to each other) • the system has been hooked up via the water circuit •... -
Page 75: Electrical Connections
ELECTRICAL CONNECTIONS Attention Carry out the electrical connections after having completed all the hydraulic connections. Attention After the Power OFF of the external unit, is needed to wait at least 5 minutes before turn it ON again. Attention If Alteas or Genus range boilers are used, the BUS decoupling board (supplied with the product) must be installed, by rigorously ob- serving the instructions contained in the kit. - Page 76 Power supplies of the HYBRID MODULE and the outdoor units are to be respectively connected to a Residual Current operated Circuit- Breaker (RCCB) with threshold of 30mA. For inverter driven units (outdoor unit), It is advisable the use of type B residual current device for 3Ph power supplies and type B or F for 1Ph power supplies (depending on the electrical system to which it is connected).
-
Page 77: External Unit Electrical Connection
WARNING: Make ground connection prior to any other electrical connections. The internal and external units must be powered separately. To prevent any risk, the power supply cable of the outdoor and indoor unit must only be replaced by the technicians of the after-sales service. - Page 78 Warning Electric shocks can cause serious injuries and even death. The electrical connections must be made by qualified technical personnel. Carry out grounding before proceeding with other electrical connections. External unit electrical connections The electrical panel of the outdoor unit is located at the front of the form, after removing the front panel. The power cable can be connected to the terminal block shown in the figure, using a core hitch.
-
Page 79: Electrical Connections Hybrid Module
4) Select parameter 2.2.8 Boiler version and set the “Ext. sto- Electrical connections HYBRID MODULE rage tank with thermostat” value. Before carrying out any work on the system, shut off the power supply at the main switch. Comply with the neutral and phase connections. -
Page 80: Wiring Diagram
WIRING DIAGRAM BK = Black YE = Yellow BN = Brown GN = Green BU = Blue GY = Grey RD = Red WH = White OR - Orange PI = Pink ENERGY MANAGER CN14 YE/GN CN13 OUTDOOR UNIT SYSTEM INTERFACE BOILER P.C.B. - Page 81 1ph (XS-S-M) Magnetic ring 3 tours FLOW METER INVERTER 1 PH PUMP Program ARM EPROM white Program CN10 white CN25 FLOW Magnetic ring CN10 CN11 CN13 3 tours Valv 4 HEAT P8-1 P8-2 FAN1 Magnetic ring CN409 CN11 blue P10-1/W 3 tours CNX1 white...
- Page 82 3 ph (L-XL) Capacitor Board R1250RJA FLOW METER 5 mH/12A PUMP KLIXON Magnetic ring Magnetic ring CN622 DC+IN 3 tours Protection Board 3 tours CN602 U-IN U-OUT FLOW CN13 CN10 CN11 V-OUT V-IN blue W-IN W-OUT DC-IN CN709 DRIVE BOARD Compressor DC-OUT E-Bus...
-
Page 83: Installing The System Interface Firmware
INSTALLING THE SYSTEM INTERFACE FIRMWARE Positioning The system interface recognises the ambient temperature. This factor must be taken into account when choosing its position. We recommend positioning away from heat sources (radiators, direct exposure to sunlight, fireplaces, etc.). You are also recom- mended to avoid positioning near draughts or external openings that could affect the operation of the system interface. -
Page 84: Display Symbols
Thank you for choosing Heat Pump compatible with Ariston Net*, the service designed and manufactured by Configurable device Ariston, to provide a whole new experience in using a do- Heat pump mestic heating or cooling and water system. Silent operation mode... -
Page 85: Ignition Procedure
12.0.3 AUTO function WARNING Press the OK button. To guarantee safety and correct operation of the system in- Activate/deactivate the thermoregulation function. terface, it must be commissioned by a qualified technician in 12.0 4 Silent operation mode activation possession of the skills as required by law. Press the OK button. - Page 86 Press the OK button. Turn the knob and select: - 2. Modulating 12.1.4 AUX Output 1 (AFR) 12.3.4 Delta T Pump Setpoint - None Adjust the circulator’s modulation to between 5°C and 20°C - Fault alarm: the contact is closed in case of a system error 12.3.7 Max PWM Pump - Humidistat alarm: the contact is closed when the AUX1 input is set as...
- Page 87 parameter 12.7.3 12.7.2 Rating Cooling Mode Activate the heat pump in cooling mode at fixed frequency set by the parameter 12.7.3. 12.7.3 Compressor frequency setting Define the compressor frequency during the working mode of the heat pump selected by the parameters 12.7.1 or 12.7.2. In manual mode the heat pump keeps the protection logics active, therefore the compressor frequency might be different from the set one.
- Page 88 12.9.7 External Boiler Efficiency DHW Displays the values of the main features of the heat pump. Defines the estimated average yield of the AUX 1/2 boiler in DHW pro- Turn the knob and select: duction mode. 12.16 EM DIAGNOSTICS - 1 INPUT Premere il tasto OK.
-
Page 89: 4.2.1 Thermoregulation
THERMOREGULATION The checking process for the suitability of the curve re- To set the temperature adjustment parameters, simultane- quires a long period of time during which several adjust- ously press and hold the back “ “ and “OK” buttons until ments may be necessary. - Page 90 To set the temperature adjustment parameters, simultane- When the outdoor temperature rises (summer), three con- ously press and hold back “ “ and “OK” buttons until ditions may arise: “Enter code” appears on the display. Turn the knob to en- 1.
-
Page 91: Menu Table
DESCRIPTION RANGE FACTORY SETTINGS NETWORK BUS network System interface Energy Manager Current BUS network Heat pump Room sensor Multizone control System interface No zone selected Zone number Zone selected Room temperature correction Interface SW version BOILER PARAMETERS General indication devices DHW Setpoint Temperature BUS connected Free parameters... - Page 92 DESCRIPTION RANGE FACTORY SETTINGS Delta T Pump Set Central Heating-2 Min Pressure Warning Pressure Filling Pressure Post Ventilation CH ON -OFF Boost Time Max PWM Pump Min PWM Pump T Probes Only CH Press Detection Device Pressure Switch Pressure Sensor Semi-auto Filling External temperature correction Domestic Hot Water...
- Page 93 DESCRIPTION RANGE FACTORY SETTINGS T set Z1 par. 4.2.5 - 4.2.6 20°C (LT) - 40°C (HT) Zone frost temperature 2°C -15°C 5°C Summer/Winter Changeover S/W function activation Z1 OFF - ON S/W temperature threshold 10 - 30 °C 20°C S/W delay time [0-600] 300 min Z1 Settings...
- Page 94 DESCRIPTION RANGE FACTORY SETTINGS T Day 10 - 30 °C 19°C Heat - 24°C Cool T Night 10 - 30 °C 13°C T set Z2 par. 5.2.5 - 5.2.6 20 (LT) - 40 (HT) Zone frost temperature 2 - 15 °C 5°C Summer/Winter Changeover S/W function activation Z1...
- Page 95 DESCRIPTION RANGE FACTORY SETTINGS Target deltaT for pump modulation cooling [-5; -20°C] -5°C HYBRID EVO 2 Param User Parameters Auto Hybrid Mode Only Boiler Auto Only HP Max Saving Energy Manager Logic Max Ecology Max Ecology ECO PLUS ECO / COMFORT MEDIO MEDIO COMFORT...
- Page 96 DESCRIPTION RANGE FACTORY SETTINGS Pro-Tech anode active OFF - ON EM Antiblocking Function Enable OFF - ON Central Heating CH pump prerun time 30 - 255 sec. 30 sec. Time for prerun new attempt 0 - 100 sec. 90 sec. CH Pump Overrun 0 - 15 min.
- Page 97 DESCRIPTION RANGE FACTORY SETTINGS Manual mode activation OFF - ON Rating Heating Mode OFF - ON Rating Cooling Mode OFF - ON Compressor frequency setting 18 ÷ 120 Hz 120 Hz Fan 1 rpm setting 0 ÷ 1000 rpm 500 rpm Fan 2 rpm setting 0 ÷...
- Page 98 DESCRIPTION RANGE FACTORY SETTINGS HP Discharge temp only reading (°C) HP condenser outlet temp only reading (°C) Flow Switch only reading (°C) only reading (Hz) HP Diagnostics - 2 Stand by Cooling Heating Booster Heating Booster Cooling Rating Heating Mode Rating Cooling Mode Heat Pump Mode only reading...
- Page 99 DESCRIPTION RANGE FACTORY SETTINGS EM Diagnostics - 1 Input Stand-by Antifreeze Cycle Heating Cycle Heating Temp. Reached DHW Cycle Thermal Cleanse Function Air Purge Function Chimney Function Floor drying cycle No Heat Generation Manual Mode Energy Manager Status only reading Error Initialization Cool Mode...
- Page 100 DESCRIPTION RANGE FACTORY SETTINGS Initialization Idle Acess Point initializing Acess Point mode on Connectivity Status Station Mode - Connecting Station Mode - Connected Station Mode - Provisioning Station Mode - Server Connected Wifi error Signal Level Not provisioned Active Status Provisioned - Not active Active Serial Number...
-
Page 101: Maintenance
INSTALLATION WITHOUT BOILER. Anti-freeze function of the external unit In case of installation without auxilary heat generator, connect The primary circulator of the external unit starts at the hydraulically the module to the outdoor unit and to the heating minimum speed when the water return temperature (EWT) system and plug the connections not used. -
Page 102: Table Of Error Codes
TABLE HYBRID ERROR CODES If the system shuts down, a code will appear on the system interface display signalling the type of shutdown and the reason behind it. To restore normal operation, follow the instructions provided on the display or, if the error persists, contact an authorised Technical Service Centre for assistance. - Page 103 EXTERNAL UNIT ERROR LIST INVERTER ERROR LIST RESET ERROR DESCRIPTION 1ph 3ph INVERTER Heat Sink-Overheat Compressor Ipm Over-Current Compressor Fail To Drive Compressor Over-Current DESCRIPTION Input Voltage Lack Of Phase Compressor control error Compressor Ipm Current Sampling Failure HP FAN Mismatch Error Compressor Drive Capacitors Precharge Errore pilotaggio valvola 4 vie Failure...
- Page 104 NEW INVERTER ERROR TABLE FOR ODU 9-11 1-PHASE ERRORI DESCRIZIONE INVERTER ERRORE SENSORE CORRENTE U DEL COMP ERRORE SENSORE CORRENTE V DEL COMP ERRORE SENSORE CORRENTE W DEL COMP ERRORE SENSORE CORRENTE PFC ERRORE SENSORE TEMPERATURA IPM ERRORE SENSORE TEMPERATURA PFC ERRORE SENSORE DLT ERRORE PERDITA DI COMUNICAZIONE ERRORE EEPROM...
-
Page 105: Data Plate
Regulation (EU) No. 811/2013; if your chosen configuration does not match the one on the label, you can find the correct label on the website ariston.com or by contacting the customer service at +39 0732 633528. - Page 106 106 /...
- Page 107 / 107...
- Page 108 Viale Aristide Merloni, 45 60044 Fabriano (AN) Italy Telefono 0732 6011 Fax 0732 602331 info.it@aristonthermo.com www.aristonthermo.com Ariston Thermo UK Ltd Artisan Building - Hillbottom Road High Wycombe - HP12 4HJ http://www.ariston.co.uk/ info.uk@aristonthermo.com Technical Helpline: 0333 240 7777 Customer Service: 0333 240 8777...
Need help?
Do you have a question about the NIMBUS 40 M EXT and is the answer not in the manual?
Questions and answers