Hikmicro G Series User Manual
Handheld thermography camera
Hide thumbs
Also See for G Series:
- User manual (96 pages) ,
- Quick start manual (87 pages) ,
- Quick start manual (78 pages)
Table of Contents
Advertisement
Quick Links
Advertisement
Table of Contents

Subscribe to Our Youtube Channel
Related Manuals for Hikmicro G Series


Summary of Contents for Hikmicro G Series
- Page 1 Handheld Thermography Camera User Manual...
- Page 2 INTERRUPTION, OR LOSS OF DATA, CORRUPTION OF SYSTEMS, OR LOSS OF DOCUMENTATION, WHETHER BASED ON BREACH OF CONTRACT, TORT (INCLUDING NEGLIGENCE), PRODUCT LIABILITY, OR OTHERWISE, IN CONNECTION WITH THE USE OF THE PRODUCT, EVEN IF HIKMICRO HAS BEEN ADVISED OF THE POSSIBILITY OF SUCH DAMAGES OR LOSS.
- Page 3 Handheld Thermography Camera User Manual DEVELOPMENT OR PRODUCTION OF WEAPONS OF MASS DESTRUCTION, THE DEVELOPMENT OR PRODUCTION OF CHEMICAL OR BIOLOGICAL WEAPONS, ANY ACTIVITIES IN THE CONTEXT RELATED TO ANY NUCLEAR EXPLOSIVE OR UNSAFE NUCLEAR FUEL-CYCLE, OR IN SUPPORT OF HUMAN RIGHTS ABUSES.
- Page 4 Handheld Thermography Camera User Manual Regulatory Information FCC Information Please take attention that changes or modification not expressly approved by the party responsible for compliance could void the user’s authority to operate the equipment. FCC compliance: This equipment has been tested and found to comply with the limits for a Class B digital device, pursuant to part 15 of the FCC Rules.
- Page 5 Handheld Thermography Camera User Manual 2006/66/EC (battery directive): This product contains a battery that cannot be disposed of as unsorted municipal waste in the European Union. See the product documentation for specific battery information. The battery is marked with this symbol, which may include lettering to indicate cadmium (Cd), lead (Pb), or mercury (Hg).
- Page 6 Handheld Thermography Camera User Manual Symbol Conventions The symbols that may be found in this document are defined as follows. Symbol Description Indicates a hazardous situation which, if not avoided, will or could Danger result in death or serious injury. Indicates a potentially hazardous situation which, if not avoided, Caution could result in equipment damage, data loss, performance...
- Page 7 Handheld Thermography Camera User Manual Safety Instruction These instructions are intended to ensure that user can use the product correctly to avoid danger or property loss. Laws and Regulations ● Use of the product must be in strict compliance with the local electrical safety regulations. Transportation ●...
- Page 8 Handheld Thermography Camera User Manual lifespan varies, so periodic checking is recommended. Contact your dealer for details. ● Wipe the device gently with a clean cloth and a small quantity of ethanol, if necessary. ● If the equipment is used in a manner not specified by the manufacturer, the protection provided by the device may be impaired.
-
Page 9: Table Of Contents
Handheld Thermography Camera User Manual Contents Chapter 1 Overview........................1 1.1 Device Description ......................... 1 1.2 Main Function ........................1 1.3 Appearance ..........................2 Chapter 2 Preparation ........................ 5 2.1 Charge Device ........................5 2.1.1 Charge Device via Charging Base ................5 2.1.2 Charge Device via Cable Interface ................ - Page 10 Handheld Thermography Camera User Manual 4.2 Set Temperature Range ...................... 17 4.3 Set Thermography Rule ....................... 17 4.3.1 Set Point Rule ......................18 4.3.2 Set Line Rule ......................18 4.3.3 Set Frame Rule......................19 4.3.4 Delete Rules ......................19 4.4 Set Temperature Alarm ....................... 19 Chapter 5 Picture and Video .....................
-
Page 11: Chapter 1 Overview
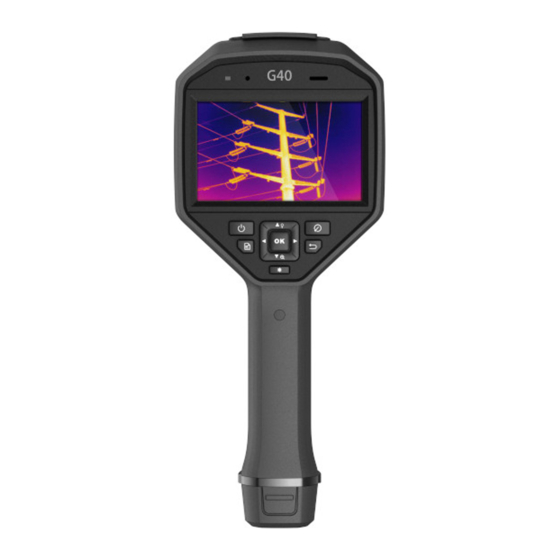
Handheld Thermography Camera User Manual Chapter 1 Overview 1.1 Device Description The handheld thermography camera is a device with both optical images and thermal images. It can do thermography, distance measurement, video recording, snapshot capturing, alarm, and it can connect to Wi-Fi, hotspot and Bluetooth. The built-in high-sensitivity IR detector and high- performance sensor detects the variation of temperature and measure the real-time temperature. -
Page 12: Appearance
Handheld Thermography Camera User Manual 1.3 Appearance Figure 1-1 Appearance... - Page 13 Handheld Thermography Camera User Manual Table 1-1 Interface Description Component Function Laser Button Hold the button to turn on laser, and release the button to turn off laser. Menu Mode: ● Press to select parameters. ● Press to confirm. Navigation Button Non-Menu Mode: ●...
- Page 14 Handheld Thermography Camera User Manual Component Function Autofocus Pull the trigger to turn on/off autofocus function. Caution The laser radiation emitted from the device can cause eye injuries, burning of skin or inflammable substances. Prevent eyes from direct laser. Before enabling the Light Supplement function, make sure no human or inflammable substances are in front of the laser lens.
-
Page 15: Chapter 2 Preparation
Handheld Thermography Camera User Manual Chapter 2 Preparation 2.1 Charge Device 2.1.1 Charge Device via Charging Base Steps Note Please charge the device with the cable and power adapter supplied by the manufacturer (or according to the input voltage from the specifications). 1. -
Page 16: Charge Device Via Cable Interface
Handheld Thermography Camera User Manual 2.1.2 Charge Device via Cable Interface Before You Start Please make sure the battery is installed before charging. Steps 1. Open the top cover of the device. 2. Connect the interface and the power adaptor with Type-C or USB cable. 2.2 Mount Hand Strap The upper part of the hand strap is attached to the camera by a buckle. -
Page 17: Mount Protective Cover
Handheld Thermography Camera User Manual Figure 2-4 Secure Lower Part of Hand Strap 2.3 Mount Protective Cover Attach the protective cover when the device is not in use. Steps 1. Align the threaded hole of the device with the mounting hole of the lens cover. 2. -
Page 18: Mount Teleconverter
Handheld Thermography Camera User Manual 2.4 Mount Teleconverter Before You Start Purchase the teleconverter separately by yourself. Steps 1. Turn the decorative ring 38 degree anticlockwise. Figure 2-6 Rotate the Decorative Ring 2. Remove the decorative ring. - Page 19 Handheld Thermography Camera User Manual Figure 2-7 Remove the Decorative Ring 3. Align the two red spots on the teleconverter and the device, then rotate the teleconverter clockwise to finish mounting. Figure 2-8 Align the Red Spots 4. Rotate the teleconverter clockwise to fix it. Figure 2-9 Mount the Teleconverter 5.
-
Page 20: Power On/Off
Handheld Thermography Camera User Manual Figure 2-10 Dismount the Teleconverter 2.5 Power On/Off Power On Remove the lens cover, and hold for over three seconds to turn on the device. You can observe the target when the interface of the device is stable. Note It may take at least 30 s until the device is ready for using when you power on it. -
Page 21: Menu Description
Handheld Thermography Camera User Manual Figure 2-11 Touch-screen Control Button control Press the navigation buttons to set parameters and configurations. Figure 2-12 Button Control ● Press , and to move the cursor up/down/left/right. ● Press to confirm. 2.7 Menu Description In the observation interface, tap the screen or press to show the menu bar. -
Page 22: Chapter 3 Display Settings
Handheld Thermography Camera User Manual Chapter 3 Display Settings 3.1 Focus Adjust the lens focal length properly before you set any other configurations, or it may affect the image display and temperature accuracy. 3.1.1 Focus Lens Steps 1. Power on the device. 2. -
Page 23: Semi-Auto Focus
Handheld Thermography Camera User Manual Steps 1. Press in live view. 2. Select , and go to Capture Settings → Laser Auxiliary Focus. 3. In the live view interface, aim the cursor at the target and hold the autofocus trigger. Release the trigger to finish focus. -
Page 24: Set Display Mode
Handheld Thermography Camera User Manual 3.3 Set Display Mode You can set the thermal/optical view of the device. Thermal, Fusion, PIP, and Optical are selectable. Steps 1. Select from the main menu. 2. Tap on the icons to select a view mode. In thermal mode, the device displays the thermal view. -
Page 25: Adjust Digital Zoom
Handheld Thermography Camera User Manual difference. Ironbow The target is colored as heated iron. Red Hot The hot part is red-colored in view. Fusion The hot part is yellow-colored and the cold part is purple-colored in view. Rain The hot part in the image are colored, and the else is blue. 3. -
Page 26: Chapter 4 Temperature Measurement
Handheld Thermography Camera User Manual Chapter 4 Temperature Measurement The thermography (temperature measurement) function provides the real-time temperature of the scene and display it on the left of your screen. The thermography function is turned on by default. 4.1 Set Thermography Parameters You can set thermography parameters to improve the accuracy of temperature measurement. -
Page 27: Set Unit
Handheld Thermography Camera User Manual Note You can go to Local Settings → Device Settings → Device Initialization → Measurement Tool Initialization to initialize the temperature measurement parameters. 4.1.1 Set Unit Go to Local Settings → Device Settings → Unit to set the temperature unit and distance unit. Note You can go to Local Settings →... -
Page 28: Set Point Rule
Handheld Thermography Camera User Manual 2. Set the point, line, or frame rules. See figure below. 4.3.1 Set Point Rule You can set four types of point thermography rules. Table 4-1 Icon Description Icon Description Center Point Thermography High-temperature Point Thermography Low-temperature Point Thermography Custom Point Thermography The setting method of center point, high-temperature, and low-temperature point thermography... -
Page 29: Set Frame Rule
Handheld Thermography Camera User Manual 4. Drag points of the line on the touch-screen to extend or shorten the line. 5. Press Note Only one line is supported. The max. temperature, low temperature, and average temperature of line (e.g. L1) displays L1 Max: XX Min: XX Avg: XX. - Page 30 Handheld Thermography Camera User Manual Table 4-2 Icon Description Icon Alarm Mode Description Set the alarm temperature, and the device alarms Above Alarm when target temperature is higher than rule temperature. Set the alarm temperature, and the device alarms Below Alarm when target temperature is lower than rule temperature.
-
Page 31: Chapter 5 Picture And Video
Handheld Thermography Camera User Manual Chapter 5 Picture and Video Insert memory card into the device, then you can record videos, capture snapshots, and mark and save important data. Note ● Device does not support capturing or recording when the menu is shown. ●... -
Page 32: Scan Qr Code
Handheld Thermography Camera User Manual 1) Tap to add text remarks. Tap the screen to show the keypad interface, enter the comment and confirm. 2) Tap to add voice remarks. Hold to start recording and release the button to stop recording. -
Page 33: View Recorded Files
Handheld Thermography Camera User Manual Figure 5-1 Record Video 2. When you finish, pull the trigger again to stop recording. The recording video will be saved automatically and exit. Note You can also press to stop recording. 3. Refer to Export Files to export the snapshots. 5.4 View Recorded Files Steps 1. -
Page 34: Export Files
Handheld Thermography Camera User Manual Bluetooth to set the bluetooth. ● For more information contained in capture snapshots or videos, you can install the thermography client to analyze them. You can get the thermography client software from the disk packed in box. 5.5 Export Files Connect the device to your PC with supplied cable, you can export the recorded videos and captured snapshots. -
Page 35: Chapter 6 Distance Detection
Handheld Thermography Camera User Manual Chapter 6 Distance Detection The laser range finder consists of a laser transmitter and a laser receiver. The device detects the distance to a target by measuring the time it takes for a laser pulse to reach the target and return to the laser receiver. -
Page 36: Chapter 7 Connect Bluetooth
Handheld Thermography Camera User Manual Chapter 7 Connect Bluetooth You can record and hear the sound contained in the videos or images via bluetooth headsets after pairing the device with bluetooth headsets successfully. Steps 1. Select from the main menu. 2. -
Page 37: Chapter 8 Set Led Light
Handheld Thermography Camera User Manual Chapter 8 Set LED Light Go to Local Settings → Device Settings → Light Supplement. Tap to enable LED light, or press in the live view to enable/disable the LED light. -
Page 38: Chapter 9 Thermal View App Connection
Handheld Thermography Camera User Manual Chapter 9 Thermal View APP Connection The device supports both Wi-Fi connection and WLAN hot spot. Connect the device to Thermal View client software, and you can control the device via mobile client. 9.1 Connect via Wi-Fi Before You Start Download and install client software on your phone. -
Page 39: Connect Via Hot Spot
Handheld Thermography Camera User Manual 9.2 Connect via Hot Spot Before You Start Download and install client software on your phone. Steps 1. Go to Local Settings → Device Settings → Wi-Fi Hotspot Settings. 2. Tap to enable WLAN hot spot function. 3. -
Page 40: Chapter 10 Maintenance
Handheld Thermography Camera User Manual Chapter 10 Maintenance 10.1 View Device Information Go to Local Settings → Device Information to view the device information. 10.2 Set Date and Time Steps 1. Go to Local Settings → Device Settings → Time and Date. 2. -
Page 41: Chapter 11 Appendix
Handheld Thermography Camera User Manual Chapter 11 Appendix 11.1 Common Material Emissivity Reference Material Emissivity Human Skin 0.98 Printed Curcuit Board 0.91 Concrete 0.95 Ceramic 0.92 Rubber 0.95 Paint 0.93 Wood 0.85 Pitch 0.96 Brick 0.95 Sand 0.90 Soil 0.92 Cloth 0.98 Hard Paperboard... - Page 42 UD22235B...
Need help?
Do you have a question about the G Series and is the answer not in the manual?
Questions and answers