Advertisement
Quick Links
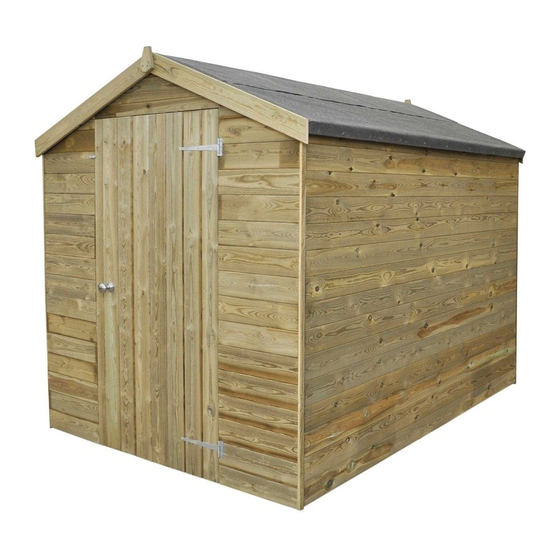
PREMIUM 4X6 SINGLE DOOR APEX SHED - ASSEMBLY INSTRUCTIONS
SHOULD YOU REQUIRE ANY ADDITIONAL GUIDANCE WITH THE ASSEMBLY OF YOUR SHED PLEASE CONTACT OUR
TECHNICAL HELP LINE ON 0844 248 9853.
RETAIN FOR FUTURE REFERENCE :READ CAREFULLY
Thank you for choosing this garden building manufactured by the UK's largest manufacturer of timber garden products. In order to gain the most benefit from it, please note the following:
- Exercise particular care and follow instructions whilst cutting the roofing felt. If it is cut incorrectly, additional roofing felt can be purchased from most good DIY retailers or garden centres.
- Most buildings are pre-treated with a factory base coat for protection during storage and transit. We recommend that you treat your new building as soon as possible after assembly, using a wood
preservative treatment. Apply in accordance with the manufacturers instructions.
- If there are any technical queries with the product, please contact our customer help line on 0844 248 9853 between the hours of 8.30 am and 5.00 pm Monday to Friday.
- In line with your statutory rights, please check all parts prior to assembly, as assembly of damaged parts may be deemed to be acceptance and this may affect the remedies you are entitled to. If the
product is not constructed in accordance with the instructions, or is altered in anyway (eg painted), the manufacturer cannot be held liable for any resulting damage.
- Timber is a natural material. It will shrink and swell as a result of varying moisture content.
- Please keep all plastic bags and small parts away from children in order to reduce the risk of suffocation.
- This product must be placed on a solid base.
- The roof of this product is not a load bearing structure.
REQUIRED TOOLS : (NOT SUPPLIED)
DRILL
POZI DRIVE SCREWDRIVER
SHARP KNIFE TO
CUT ROOF FELT
SPIRIT LEVEL
TAPE MEASURE
HAMMER
PARTS INCLUDED LIST
ABQ46PSV2
ABQ46PEV2
(PLAIN SIDE)
(PLAIN END)
ABQ46DEV2
(DOOR END)
1
A) FASTEN EACH OF THE TWO HINGES TO THE LEFT HAND SIDE OF PTGVDR1672 (DOOR) USING 30mm SCREWS. SCREWS MUST SECURE INTO THE
TWO HORIZONTAL BRACES ON THE BACK OF PTGVDR1672.
B) LAY ABQ46DEV2 (DOOR END) FACE UP ON GROUND. POSITION PTGVDR1672 (DOOR) ON ABQ46DEV2 (DOOR END) OF SHED ENSURING THAT
THE PTGVDR1672 (DOOR) IS SQUARE WITH EQUAL GAPS TO LEFT AND RIGHT AND SECURE EACH HINGE TO ABQ46DEV2 (DOOR END) WITH 30mm
SCREWS.
Forest Garden Ltd, Units 291 & 296 Hartlebury Trading Estate, Hartlebury, Worcestershire, DY10 4JB
FIXING PACK CONTENTS :
M6x30mm SCREW
M8x50mm SCREW
30mm NAIL
100
FELT NAIL
ABQ46WSV2
(WINDOW SIDE)
18206958
(OSB ROOF) Qty 2
85008
FPPOLGS
PLEASE NOTE: ALL SCREWS AND NAILS
SHOWN BELOW AND IN INSTRUCTIONS
20
ARE TO SCALE TO ASSIST IN
IDENTIFICATION OF REQUIRED FIXINGS.
24
70
12
PANEL PIN
6X4SHEDBRDFL
(BOARDED FLOOR)
PTGVDR1672
(DOOR)
F PPOLGS
IMPORTANT :
ASSEMBLY OF THIS
SHED REQUIRES TWO
PEOPLE
PAD BOLT RECEIVER
PAD BOLT x 1
x 1
T-HINGE x 2
LOOSE ITEMS (ABQ46V2L)
15120585DTR
(GLAZING STRIP 15x12x585DTREAT QTY 3)
70080730A1DTR
(BARGE BOARD 70x8x730 A1 DTREAT QTY 4)
45151660DTR
(CORNER STRIP QTY 4)
85009
(PVC TRIM QTY 1)
45281784
(BATTEN 45x28x1784 QTY 1)
28281820
(BATTEN 28x28x1820 QTY 2)
Pw610610
(PVC WINDOW QTY 1)
7 PER HINGE
FPPOLGS
ISSUE 0113
X 14
Advertisement

Related Manuals for Forest garden APEX PREMIUM


Summary of Contents for Forest garden APEX PREMIUM
- Page 1 B) LAY ABQ46DEV2 (DOOR END) FACE UP ON GROUND. POSITION PTGVDR1672 (DOOR) ON ABQ46DEV2 (DOOR END) OF SHED ENSURING THAT THE PTGVDR1672 (DOOR) IS SQUARE WITH EQUAL GAPS TO LEFT AND RIGHT AND SECURE EACH HINGE TO ABQ46DEV2 (DOOR END) WITH 30mm SCREWS. Forest Garden Ltd, Units 291 & 296 Hartlebury Trading Estate, Hartlebury, Worcestershire, DY10 4JB...
- Page 2 ISSUE 0113 ABQ46PEV2 POSITION (PLAIN END) OF SHED ONTO FLOOR SO THAT THE LEFT AND RIGHT HAND EDGES OF THE PANEL ARE FLUSH WITH THE EDGES OF THE ABQ46PSV2 FLOOR. PLACE THE (PLAIN SIDE) ONTO THE FLOOR AND PLACE UP ABQ46PEV2V ABQ46PSV2 AGAINST...
- Page 3 ISSUE 0113 45281784 50mm SCREW 45281784 PLACE (BEARER) INTO OPENING AT THE TOP OF EACH END. PRE-DRILL A PILOT HOLE IN POSITION SHOWN 45281784 ABOVE AND SECURE (BEARER) IN PLACE AT BOTH ENDS WITH 1 x 50mm SCREW. PLACED AT 300mm INTERVALS 18206958 PLACE ONE OF THE ASSEMBLED (ROOF) SECTIONS ON TOP OF THE SHED.
- Page 4 ISSUE 0113 X 3 PER CORNER STRIP X 3 PER BARGE BOARD 70080730A1DTR 45151660DTR SECURE A (CORNER STRIP) TO EACH OF THE FOUR CORNERS WITH 3 x 30mm NAILS PER STRIP. NAILS SHOULD BE PLACED APPROXIMATELY AS SHOWN TO LEFT. THE BOTTOM OF 45151660DTR (CORNER STRIP) SHOULD BE IN LINE WITH BOTTOM...
Need help?
Do you have a question about the APEX PREMIUM and is the answer not in the manual?
Questions and answers