Table of Contents
Advertisement
Advertisement
Table of Contents

Subscribe to Our Youtube Channel
Related Manuals for iRay Technology InfiRay Jerry-F


Summary of Contents for iRay Technology InfiRay Jerry-F
- Page 1 Jerry-F Enhanced Night Vision Goggle User Manual V1.3 IRay Technology Co., Ltd.
- Page 3 Copyright© IRay Technology Co., Ltd. All rights reserved. Without the prior written consent of the Company, part or all of this manual shall not be excerpted, reproduced, or spread in any form by any organization or individual. Before the terminal product is sold to the end user, any third party shall not modify, crack, decompile or delete the files, systems, software, programs, etc.
-
Page 5: Table Of Contents
Contents Chapter 1 Equipment Information and Description 1.1 Equipment Information 1.2 Equipment Specifications Chapter 2 Assembly and Power-up for Use 2.1 Assembly/Disassembly 2.2 Power-up and Use Chapter 3 Operation Guide 3.1 I Night Vision 3.1.1 Enabling I Night Vision 3.1.2 Protection Against High Light 3.1.3 Power-off... -
Page 6: Chapter 1 Equipment Information And Description
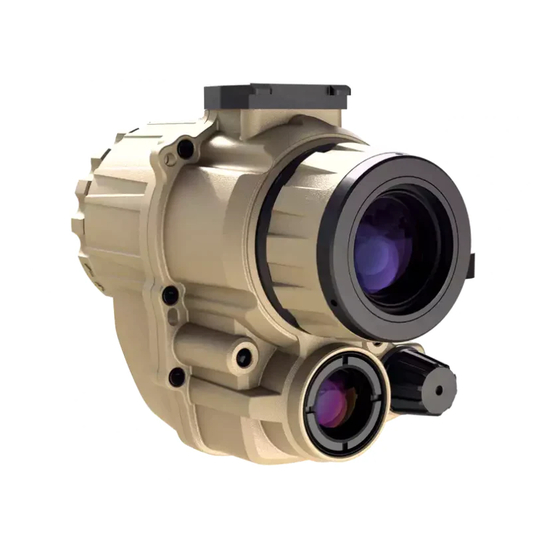
Chapter 1 Equipment Information and Description 1.1 Equipment Information Equipment model and name: Jerry-F Enhanced Night Vision Goggle Equipment use: Jerry-F Enhanced Night Vision Goggle is a device that can observe and search targets at night, in dim environments, darkness, harsh weather, or complex scenes. With a Tyke series thermal scope, the video of the scope can be precisely matched to the view of Jerry-F, so as to capture the target quickly and shoot the target covertly. - Page 7 Components of the main body and their functions: Component Function Description Protects the lens when the goggle is not used and protects the image Objective lens hood intensifier from high light. Collects visible light and focuses it on the focal plane of the I image objective lens intensifier.
- Page 8 Battery holder components and their functions Function Description Component Two 18650 rechargeable lithium-ion batteries. Battery Enables battery assembly and disassembly, and Battery compartment opening seals the compartment. Connects to the interfaces for installing the Quick removal interface hook-loop support. Disassembly pull Pull it out when disassembling the battery holder.
-
Page 9: Equipment Specifications
Figure 1.4 Components of the helmet support 1.2 Equipment Specifications Equipment specifications: Product Specifications Jerry-F Product Model 1.0x Visual Amplification 15 mm Exit Pupil Diameter 25 mm Exit Pupil Distance Diopter -3.5 ~ +2.5 ≤380 g Weight (Without Battery Pack) Operating Temperature -40°C ~ +60°C Battery Life (Enhanced Display) - Page 10 Recognition Distance Specifications: Target Type Operating Distance Identification 200m Human target Recognition 400m 1.7m×0.5m Detection 1500m 500m Identification Vehicle target Recognition 1000m 4.6m×2.3m Detection 3000m Jerry-F User Manual V1.3...
-
Page 11: Chapter 2 Assembly And Power-Up For Use
Chapter 2 Assembly and Power-up for Use 2.1 Assembly/Disassembly You can use Jerry-F in two modes: handheld or mounted on a helmet. Assemble the equipment as instructed after you decide how to use it. Before use, install the batteries. Jerry-F uses two 18650 lithium-ion batteries. -
Page 12: Power-Up And Use
When using this equipment on a helmet, you need to fix the helmet support on the helmet. Jerry-F is compatible with various multi-functional shrouds and hook-loop helmets. The procedure for installing a helmet-based Jerry-F is as follows: Install the helmet support on the shroud. Attach the hook-loop support of the battery holder to the hook-loop fastener in the middle of the rear part of the... -
Page 13: Chapter 3 Operation Guide
Chapter 3 Operation Guide 3.1 I Night Vision 3.1.1 Enabling I Night Vision 3.1.3 Power-off by Upturning the Support After turning on the main power of the battery holder, turn the I knob from OFF When using Jerry-F by mounting it on a to MAX until you hear clicking. -
Page 14: Enhanced Night Vision
3.4.3 On/Off of Night Fill-in Light enable infrared night vision, you need to correct the shutter manually. In the totally dark scenario, the I night Long press the I knob for 2s to manually vision should be used with the fill-in light correct the shutter. -
Page 15: Menu And Settings
press and the arrow switch to the "Compass Icon Description calibration" option, and long press it to Inclination angle -90°~+90° turn on/off analog video). Pitch angle -90°~+90° When switching to the "Exit" option, long 0-4 levels: When the press the infrared adjusting knob to exit battery power reaches the menu. -
Page 16: Compass Calibration
3.6.5 Compass Calibration The digital magnetic compass can indicate the azimuth angle, pitch angle, and inclination angle of the equipment. In view of the differences in different regions and altitudes, you need to calibrate the compass after you move to another place to ensure the indication accuracy of the compass. -
Page 17: Wi-Fi And Video Access
3.7 Wi-Fi and Video Access Jerry-F can be connected to a Tyke series Caution: To reduce power consumption, thermal scope via Wi-Fi to provide video AV and Wireless image transmission are functions. Before connection, you need to disabled by default upon startup. After match Tyke thermal scope with Jerry-F. -
Page 18: Chapter 4 Faults And Troubleshooting
Chapter 4 Faults and Troubleshooting The following table shows the common faults of Jerry-F during use. Please check and fix the faults according to the steps shown in Table 4.1. You should confirm whether the faults are fixed after troubleshooting. Not all possible faults are listed in Table 4.1. If the unlisted faults occur in Jerry-F or the faults cannot be fixed upon troubleshooting, please perform the higher level maintenance.
Need help?
Do you have a question about the InfiRay Jerry-F and is the answer not in the manual?
Questions and answers