
Related Manuals for V-ZUG Combair V2000 45


Summary of Contents for V-ZUG Combair V2000 45
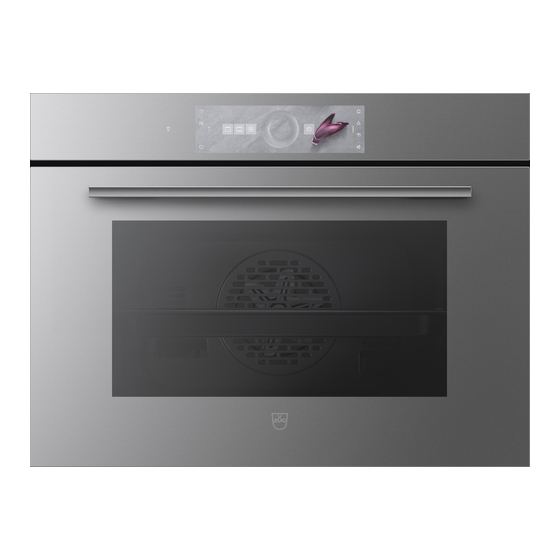
- Page 1 V-ZUG-Home Install the app, network your appliances and benefit from a wide range of useful functions. Operating instructions Combair V2000 Oven...
- Page 2 60-450 Variations depending on the model are noted in the text. Download updates to your appliance via V-ZUG-Home so that you are always up to date. The latest operating instructions with the new functions incorporated can be found here: vzug.com.
-
Page 3: Table Of Contents
4.11 Favourites.............. 21 Assistance functions .......... 38 4.12 Pinning .............. 22 Date and time............ 39 4.13 Timer .............. 23 V-ZUG Home ............ 39 4.14 Illumination ............ 24 7.10 Appliance information .......... 40 4.15 Display lock ............ 24 7.11 Factory settings............. 40 4.16... - Page 4 Replacing the door seal ........ 44 Replacing the halogen light bulb ..... 44 Cleaning the accessories and shelf guides ... 45 Trouble-shooting 46 Error messages............ 46 Other possible problems........ 46 After a power failure.......... 47 Accessories and spare parts 48 10.1 Accessories ............ 48 10.2 Special accessories .......... 48 10.3 Spare parts ............ 48 Technical data...
-
Page 5: Safety Precautions
Safety precautions Symbols used Cleaning and user mainten- ance shall not be undertaken Denotes important safety precau- tions. by children without supervi- Failure to observe said precautions sion. can result in injury or in damage to ▪ If an appliance is not the appliance or fittings! equipped with a mains cable Information and precautions that... -
Page 6: Instructions For Use
1 Safety precautions to touch the heating ele- ▪ Under no circumstances use ments. Children under 8 a steam cleaner to clean the years of age must be kept appliance. away from the appliance un- ▪ WARNING: Before replacing less they are constantly su- the light bulb, ensure the ap- pervised. - Page 7 1 Safety precautions ▪ The appliance should only be installed ▪ For appliances with a grill: Keep the ap- and operated at an ambient temperat- pliance door closed while grilling. The ure of 5 °C to 35 °C. heat could otherwise damage the oper- ▪...
- Page 8 1 Safety precautions ▪ Only leave the appliance door open in the airing position. An open appliance door poses a danger of tripping or in- jury! Do not sit or rest on the appliance door or use it as a storage surface. ▪...
-
Page 9: Using For The First Time
Using for the first time Before operating the newly installed appliance for the first time, the following steps should be taken: ▸ Remove packaging and transport materials as well as any protective blue film from out of the cooking space. ▸... -
Page 10: Appliance Description
3 Appliance description Appliance description Construction Operating and display elements Ventilation opening Door handle Appliance door Operating and display elements App view List view Favourite for bread Here is where you can make User settings all key settings and customize your appliance. Grill... - Page 11 Cooking space illumination List view Display lock App view Quiet mode Switch off Clock Ready to start Hot air 180°C Start – – – – Application Start operation Main value Setting options Options Operating time Application tips Favourite Symbol V-ZUG-Home...
-
Page 12: Cooking Space
3 Appliance description Cooking space Using protective inserts or aluminium foil can damage the appliance. Do not place any protective insert or aluminium foil on the floor of the cooking space. Appliance door Temperature sensor Door seal Grill / top heat Cooking space illumination Levels (labelled) Identification plate... - Page 13 3 Appliance description ▸ Ensure that the «sloped» side 1 of the baking tray is to the back of the cooking space. ▸ Only use the normal way round – not upside down. Wire shelf If you are using your oven in combination with a Steamer: Do not use the wire shelf from the oven in the steamer! Risk of rusting! The wire shelf from the Steamer is distinguished through a metal plate with a steam symbol.
-
Page 14: Operation
4 Operation Operation Operating the display Switching the appliance on The appliance is operated using the display. The clock is only visible in EcoStandby if enabled in the user settings. ▸ Long touch the display. – The start screen appears. Changing the start screen view The start screen can be displayed in one of two ways: as an app view (see page 10) or as a list view. -
Page 15: Selecting And Starting An Application
4 Operation Expanding the right function bar The right function bar can be expanded at any time. ▸ Drag the bar 3 to the left. – The function bar expands. – More functions appear in the display. Using the CircleSlider ▸... - Page 16 4 Operation ▸ If required, repeat the procedure and select the desired application until the ready to start screen appears in the display: Hot air 180°C 2h00 – – 13:21 – – Start Adjusting values ▸ If necessary, adjust the main value 1 using the CircleSlider (see page 19). ▸...
-
Page 17: Changing An Application
4 Operation Changing an application If an application has not started yet: ▸ Touch the «Start screen» function button. – The start screen appears (see page 15). – A new application can be selected. If an application is already running: ▸... -
Page 18: Delayed Start / End
4 Operation Hiding the clock during operation ▸ Either touch or press «OK». – The clock and operating time are hidden in the display. Delayed start / end The delayed start is activated when for the application selected both the operating time and end are set. -
Page 19: Options
4 Operation Options Overview Each application offers different options. Your appliance has the following «Options»: Preheat (see page 20) Start later (see page 20) Selecting and starting options ▸ Select an application from the desired application group and confirm with «OK», if re- quired (see page 15). -
Page 20: Preheating
4 Operation Preheating If the «Preheat» option has been turned on, do not put the food into the cooking space until the acoustic signal is emitted and the corresponding message ap- pears. With Preheat, the cooking space is quickly heated up to the desired temperature. Overview Preheating is only possible for the following applications: Top/bottom heat... -
Page 21: Application Tips
4 Operation Starting «Start later» ▸ Press «Start» to start the application. – The application starts and the time remaining is displayed. If both «End» and «Start later» have been set, the end time set is disregarded when starting «Start later». 4.10 Application tips The application tips provide helpful suggestions that range from the use of suitable ac-... -
Page 22: Pinning
4 Operation Changing favourites Once a favourite has been created, it can no longer be changed. ▸ To adjust individual values or settings compared to the old favourite, create a new fa- vourite and delete the old one if necessary. Changing favourite names The favourite name can only be changed in the app view. -
Page 23: Timer
4 Operation ▸ Press and hold the main value. – The colour of the pin changes to amber. – The main value for the desired application is fixed. – Whenever the application is called up, the pinned main value appears as a recom- mended value. -
Page 24: Illumination
4 Operation ▸ Press «OK» to confirm the shortening or extending of the duration of the timer. – The change to the duration of the timer is saved. – The start screen appears. – The countdown to the time remaining appears in the display. The next time the timer is called up, the last duration set automatically appears as the recommended value. -
Page 25: Time
4 Operation Turning on the quiet mode ▸ Expand the function bar. ▸ Touch the «Quiet mode» function button. – The quiet mode is shown in the display. ▸ Touch the «Quiet mode» switch. – «Quiet mode» is turned on. –... -
Page 26: End Of Operation
4 Operation ▪ Select one of the subsequent steps displayed to continue operation (see page 27). ▪ Select the function button to access the parent application menu. ▪ Select the function button to access the start screen (see page 15). ▪... -
Page 27: Subsequent Steps
4 Operation ▸ Wipe away traces of water or soiling with a soft cloth to prevent corrosion and un- pleasant odours. ▸ Leave the appliance door open in the airing position until the cooking space has cooled down and dried out. 4.20 Subsequent steps Subsequent steps are applications that can be used to continue operation after an ap-... -
Page 28: Switching The Appliance Off
5 Applications 4.21 Switching the appliance off ▸ Press and hold the function button. – Any running application is ended; if turned on, the timer will remain active. – If turned on, the display lock is deactivated. – The display goes dark. –... -
Page 29: Top/Bottom Heat Humid
5 Applications Top/Bottom heat humid Temperature range 30–250 °C Recommended value 200 °C Level The cooking space is heated by the top and bottom heating elements. The natural hu- midity produced is largely retained in the cooking space. The food retains its moisture. Uses ▪... -
Page 30: Pizzaplus
5 Applications Uses ▪ Finish off baking ▪ Preserving, bottling Use a dark enamelled tray or a black tray or tin for crispy results. PizzaPlus Temperature range 30–280 °C Recommended value 200 °C Level The cooking space is heated by hot air and bottom heat. The base of the food is baked particularly intensively. -
Page 31: Hot Air
5 Applications The cooking space is heated by the grill element. The hot air fan distributes the air evenly in the cooking space. Uses ▪ Whole chicken ▪ Large, bulky food for grilling ▸ Place the food to be grilled directly on the wire shelf or in porcelain or glass cook- ware. -
Page 32: Hot Air Eco
5 Applications 5.10 Hot air eco Temperature range 30–250 °C Recommended value 180 °C Level 2 or 1 + 3 This application is particularly energy-efficient. A heating element behind the back wall of the cooking space heats up the air inside the cooking space, which is circulated evenly. Any moisture that escapes from the food is retained in the cooking space, so the food dries out less. - Page 33 ▪ Only use pre-cooked food. ▪ Do not leave food in the appliance for too long before use. The timer cannot be used. The timer switches off when an application is started. V-ZUG-Home is not available during operation. Sabbath top/bottom heat Temperature range 30–140 °C...
-
Page 34: Keep Warm
5 Applications For crispy results, use a dark enamelled tray. Sabbath top/bottom heat humid Temperature range 30–140 °C Recommended value 85 °C Level The cooking space is heated by the top and bottom heating elements. The natural hu- midity produced is largely retained in the cooking space. The food retains its moisture. Uses ▪... - Page 35 5 Applications Starting a recipe For recipes that do not require preheating, place the food in the cold cooking space. ▸ Long touch the display. – The start screen appears. ▸ Select the «Recipes» application group and confirm with «OK», if required (see page 15).
-
Page 36: Zug-Home
▸ Search the Google Play Store or the App Store® for «V-ZUG». ▸ Install and open the V-ZUG App. Enabling the V-ZUG-Home mode on the appliance ▸ Set to the «Display» or «Operate and display» mode under «V-ZUG-Home» in the user settings. -
Page 37: User Settings
– A 6-digit PIN appears in the display of the household appliance. ▸ Enter the 6-digit PIN in the V-ZUG App and confirm the bluetooth pairing request. – The name of the active WLAN/Wi-Fi appears in the V-ZUG App and then you are prompted to enter the WLAN/Wi-Fi password. -
Page 38: Signals And Tones
7 User settings Background The background of the display can be changed. Choose whether to display a solid col- our, a texture or a texture featuring various ingredients in the background. When a tex- ture with ingredients is selected, images of different ingredients are displayed on every page in the app view. -
Page 39: Date And Time
If set to «On», a short preheat tone is emitted when it is time to put the food into the cooking space. Date and time Time synchronization The «Internet» setting is set automatically when connecting to V-ZUG-Home. The time, date and time zone are then synchronized directly from the app. Date The date can be called up and changed. -
Page 40: Appliance Information
Resets the start screen to the app view. Favourites remain unchanged. Favourites Entering «OK» clears all existing favourites. V-ZUG-Home Disconnects all connections to mobile devices. Factory settings Resets the settings to the factory default state. All customized data will be lost. -
Page 41: Care And Maintenance
8 Care and maintenance Care and maintenance Risk of burns from hot surfaces! Allow the appliance and the accessories to cool down before cleaning. Incorrect handling can result in damage to the appliance! Use soft cloths only. Do not use any abrasive, alkaline or highly acidic cleaning agents, metal scrapers that are sharp or scratch, steel wool, scouring pads, etc. - Page 42 8 Care and maintenance Removing the appliance door The appliance door is heavy. When removing and reinstalling the appliance door, hold it at the sides firmly with both hands. ▸ Open the appliance door as far as it will go. ▸...
- Page 43 8 Care and maintenance Cleaning the door glass ▸ Lay the appliance door on a clean, flat surface (covered e.g. with a tea towel) with the handle facing down. – Make sure the handle does not come into contact with the surface. ▸...
-
Page 44: Cleaning The Door Seal
8 Care and maintenance Cleaning the door seal ▸ Clean the door seal with a soft cloth dampened with water, but do not use any clean- ing agent. ▸ Dry with a soft cloth. Replacing the door seal We generally recommend the door seal be replaced by our service staff. However, you can also replace the door seal of your appliance yourself. - Page 45 8 Care and maintenance Overhead illumination ▸ Carefully unscrew the glass light cover 1 anti- clockwise and remove. ▸ Take out the faulty halogen light bulb. ▸ Carefully plug the new halogen light bulb into the socket – halogen type G9 / 25 W / 230 V. ▸...
- Page 46 9 Trouble-shooting Trouble-shooting You may be able to trouble-shoot the following malfunctions yourself. If not, note down the error message in full (message, F and E numbers) and call Customer Services. Error messages Message Possible cause Solution ▪ «FX/EXX» ▪ Various situations can ▸...
- Page 47 9 Trouble-shooting Problem Possible cause Solution ▪ Appliance door ▪ Power failure ▸ Appliance door can be opened does not open manually. automatically ▪ Appliance is faulty. ▸ Contact Customer Services. (depending on model) ▪ Illumination is ▪ Halogen light is de- ▸...
- Page 48 10 Accessories and spare parts Prolonged power failure The appliance goes through its initial set-up process after a prolonged power failure. However, only the time and date need to be reset in order to operate the appliance again. It is not necessary to make any other settings. Accessories and spare parts The accessories shown below as well as spare parts can be ordered in addition to the scope of delivery of the appliance.
- Page 49 Own measurements can be im- precise and are not suitable for checking the accuracy of the temperature. 11.4 Product fiche In accordance with EU Regulation No.: 66/2014 Brand – V-ZUG Ltd Type of appliance – Compact oven Model designation – Mass of the appliance Number of cavities –...
- Page 50 12 Tips and tricks Tips and tricks 12.1 Unsatisfactory cooking result... … for baking and roasting Result Solution ▪ The baking or roast ▸ Next time, set a lower temperature and lengthen the operat- looks good on the ing time. outside but is still doughy or raw on the inside.
- Page 51 13 Disposal Power consumption can be reduced to a minimum by selecting «Hide time» in the user settings. Despite EcoStandby, the safety functions remain active. Disposal 13.1 Packaging Never allow children to play with packaging material due to the danger of injury or suffocation.
- Page 52 One Pancras Square 6 Scotts Road Gridiron Building Scotts Square #03-11/12/13 N1C 4G London 228209 Singapore GREAT BRITAIN SINGAPORE V-ZUG Hong Kong Co. Ltd. GÜRELLER 12/F, 8 Russell Street Anchor Sit.3A/1-2 Çayyolu Causeway Bay 06690 ÇANKAYA/ANKARA HONG KONG TURKEY Frigo 2000 S.p.A Private enterprise "Stirion"...
- Page 53 Index Door glass............. 43 Door seal............ 44 Accessories ..........12, 48 Shelf guides .......... 45 Addresses of the importers ......52 Cleaning the exterior ........41 Clock ..............25 Moving ............ 14 Hiding............. 25 App view ............10 Hiding during operation...... 18 Appliance Showing............
- Page 54 Operating time..........17 Favourites............ 40 Setting............ 17 Pinned values .......... 40 Operation............14 Start screen........... 40 Options .............. 19 V-ZUG-Home.......... 40 Selecting............ 19 Favourites ............21 Starting............ 19 Changing............ 22 Other possible problems........ 46 Creating ............ 21 Overhead illumination ........45 Deleting ............
- Page 55 Values Quiet mode ........... 38 Adjusting............ 16 Sound worlds .......... 38 Saving ............ 16 Smartphone V-ZUG App ............36 System requirements ........ 36 V-ZUG-Home............. 36 Spare parts ............48 Displaying information ........ 39 Special accessories ......... 13, 48 Mode .............. 39 Start later ............
- Page 56 Notes...
- Page 59 V‑ZUG service centre. Technical questions, accessories, warranty extensions V-ZUG is happy to help you with any general administrative or technical queries, to take your orders for accessories and spare parts and to inform you about our progressive service agreements.
- Page 60 Place your finger on the CircleSlider Move app and move it in a circle. Page change Adjustable value Favourite Temperature The temperature can be set using the CircleSlider. 1094164-06 V-ZUG Ltd, Industriestrasse 66, CH-6302 Zug info@vzug.com, www.vzug.com...
Need help?
Do you have a question about the Combair V2000 45 and is the answer not in the manual?
Questions and answers