V-ZUG Combair XSL Operating Instructions Manual
Hide thumbs
Also See for Combair XSL:
- Operating instructions manual (56 pages) ,
- Operating instructions manual (52 pages)
Table of Contents
Advertisement
Advertisement
Table of Contents

Subscribe to Our Youtube Channel
Related Manuals for V-ZUG Combair XSL


Summary of Contents for V-ZUG Combair XSL
- Page 1 V-ZUG Ltd Oven Combair XSL Operating instructions...
- Page 2 Denotes useful tips for the user. Validity The model number corresponds to the first three digits on the identification plate. These operating instructions apply to the model: Type Model no. Size system BC-XSLZ/60 60-450 © V-ZUG Ltd, CH-6301 Zug, 2011...
-
Page 3: Table Of Contents
Contents 1 Safety precautions 1.1 Before using for the first time ........5 1.2 Correct use . - Page 4 9 BakeOmatic 9.1 Degree of browning ........45 9.2 Cooking/Baking duration .
-
Page 5: Safety Precautions
Safety precautions The appliance corresponds to recognised technology standards and the relevant safety regulations. Proper use of the appliance is however essential to avoid damage and accidents. Please therefore follow the precautions given in these operating instructions. In accordance with the requirements of IEC 60335-1: •... -
Page 6: Correct Use
1 Safety precautions Correct use • The appliance is designed for use in the home for preparing food. Under no circumstances flambé or cook food using a lot of fat in the cooking space! No liability is assumed for any damage caused by improper or incorrect use. -
Page 7: Note On Use
1 Safety precautions Note on use • If the appliance is visibly damaged, do not use it. Contact our Customer Services. • If the appliance is not operating property, disconnect it from the power supply immediately. • Ensure the mains cables of other electrical appliances do not get caught in the door of the appliance as the electrical cable insulation could get damaged. - Page 8 1 Safety precautions Caution: Burns hazard! • The appliance gets very hot when in use. • Heat is produced during cooking and baking. The appliance door, especially the glass, can get hot. Burns hazard – do not touch. Keep children away! •...
- Page 9 1 Safety precautions Caution: Danger of injury! • Be careful not to put fingers in the door hinges, there is otherwise a risk of injury if the appliance door is moved. Particular care should be taken when children are around. •...
-
Page 10: Appliance Description
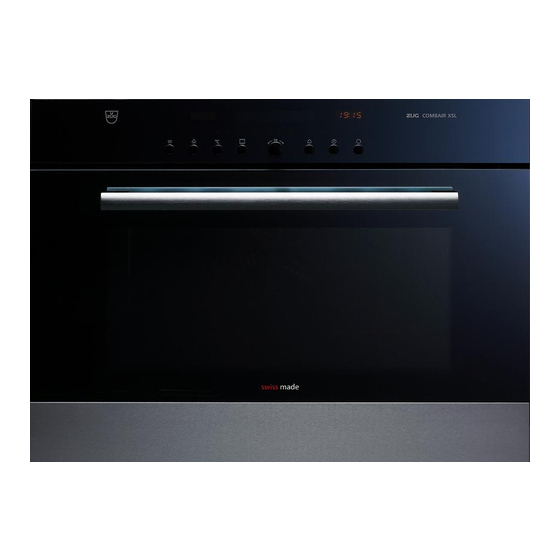
Appliance description Construction Operating and display elements Ventilation opening Door handle Appliance door... -
Page 11: Operating And Display Elements
2 Appliance description Operating and display elements PizzaPlus ˚C ˚C Buttons Plate warmer Adjusting knob Illumination Timer Cooking space/food probe Time, operating time, temperature switch-off time Operating mode Displays PizzaPlus Temperature Plain text display Time, operating time, switch-off time, timer Symbols Plate warmer Operating time... -
Page 12: Cooking Space
2 Appliance description Cooking space Do not place any protective insert or aluminium foil on the floor of the cooking space. Appliance door Cooking space ventilation Door seal Grill/Top heat Illumination Cooking space temperature sensor Hot air blower Levels (labelled) Climate sensor 10 Socket for food probe The bottom heating element is beneath the cooking space floor. -
Page 13: Accessories
2 Appliance description Accessories The baking trays and wire shelves are inserted into the oven between the two rails of a shelf runner. The wire shelves have non-tip safety notches which prevent them being pulled right out when they only need to be partially pulled out. The wire shelves can then only be taken out of the oven by raising them upwards and then pulling them out. - Page 14 2 Appliance description Wire shelf • For standing roasting and baking tins on. • For standing meat, frozen pizza, etc. on. Push the wire shelf in with the shorter side b to the ➤ back as far as it will go. For preparing frozen bread rolls and quiche.
- Page 15 2 Appliance description The following accessories are not included in the scope of delivery: Round TopClean baking tray • Baking tin for flans and quiches. Available in 3 different sizes. Porcelain dish • For preparing various dishes such as lasagne, potato gratin, etc.
-
Page 16: Operating The Appliance
Operating the appliance Using the buttons The operating mode, the cooking space temperature, the food probe temper- ature, the operating time, the switch-off time and various other functions can be selected by pressing the appropriate button once or more. • The symbol for the function selected illuminates or flashes. •... - Page 17 3 Operating the appliance Operating using the plain text display When the appliance is switched off, the adjusting knob is used to display text, to view the different selection options and to confirm. • Press the adjusting knob to activate the plain text display. •...
-
Page 18: Using For The First Time
3 Operating the appliance Using for the first time Before using the newly installed appliance for the first time the following measures should be taken: Remove all packaging and transport materials from the cooking space. ➤ flashes in the right digital display, turn the adjusting knob ➤... -
Page 19: Selecting An Operating Mode
3 Operating the appliance Selecting an operating mode Select the operating mode. ➤ Top/bottom heat – In the plain text display appears: Level 1 or 2 – flashes in the left digital display. – The symbols flash. Changing the operating mode Press the button repeatedly until the desired operating mode appears. -
Page 20: Checking And Changing The Cooking Space Temperature
3 Operating the appliance Checking and changing the cooking space temperature Press the button. ➤ Cooking space temperature – In the plain text display appears: – The set cooking space temperature flashes in the left digital display. – The symbol flashes. Turn the adjusting knob to change the cooking space temperature. -
Page 21: User Settings
User settings You can adjust the settings. Press the adjusting knob to activate ➤ the plain text display. Select and press OK – In the plain text display appears: BakeOmatic Turn the adjusting knob until ➤ Select and press OK –... - Page 22 4 User settings Select and press OK User settings ▪ Text in Deutsch ▪ Texte en français User settings ▪ Testo in italiano Language ▪ ... ▪ off * User settings ▪ on Childproof lock ▪ visible * User settings ▪...
-
Page 23: Language
4 User settings Language Different languages are available for selection. The language in the plain text display can be changed. Press the button and the adjusting ➤ knob simultaneously for 10 seconds. Language – In the plain text display appears, e.g.: English Turn the adjusting knob until the... -
Page 24: Time Display
4 User settings Time display If «invisible» is selected, the time display is not illuminated when the appliance is off, minimizing power consumption. When the appliance is on, the time is displayed. To reduce power consumption to an absolute minimum, select «Time display»... -
Page 25: Contrast
4 User settings Contrast With this function, the readability of the display can be adjusted based on how the appliance is installed. Time format Select the «24 h» setting to activate the European time format and the «12 h» setting for the US time format (a.m./p.m.). Factory settings If one or more user settings have been changed, these can be reset to the factory settings. -
Page 26: Time Functions
Time functions The following time functions are available: • Time • Timer – the timer can be used at any time and independently of all other functions • Operating time – time-controlled switch-off of the appliance • Delayed start – time-controlled switch-on and switch-off of the appliance. When the appliance is switched off, the display is dimmed between 24:00 and 6:00. -
Page 27: Timer
5 Time functions Timer The timer functions like an egg timer. It can be used at any time and independently of all other functions. Setting Press the button. ➤ Timer: set mins./secs. – In the plain text display appears: – flashes in the right digital display. - Page 28 5 Time functions Timer finished When the set duration is up: – A sequence of 5 short acoustic signals is repeated for 1 minute. Timer – In the plain text display appears: finished – The symbol flashes. Press the button to switch off the acoustic signal. Checking and changing Press the button.
-
Page 29: Operating Time
5 Time functions Operating time The operating mode selected automatically switches off when the operating time is up. Setting Select the desired operating mode and ➤ cooking space temperature. Preheat the cooking space if necessary. ➤ Place the food in the cooking space. ➤... - Page 30 5 Time functions End of the operating time When the operating time is up, – the operating mode selected switches off automatically. – A long, intermittent acoustic signal is emitted for 1 minute. Operating time finished – In the plain text display appears: Continue: select duration –...
-
Page 31: Delayed Start
5 Time functions Delayed start The delayed start is activated when for the operating mode selected both an operating time and a switch-off time are set. The appliance switches automat- ically on and off again at the desired times. If you use the food probe, you will need to estimate the duration. You will find a guide on times in . - Page 32 5 Time functions Delayed switch-off The switch-off time can be delayed by a maximum of 23 hours and 59 minutes. If the «12 h» time format has been selected, the switch-off time can be delayed by a maximum of 11 hours and 59 minutes. Press the adjusting knob to confirm.
- Page 33 5 Time functions Switching off before time Press the button. ➤ End of the operating time When the operating time is up, – the operating mode selected switches off automatically. – A long, intermittent acoustic signal is emitted for 1 minute. Operating time finished –...
-
Page 34: Operating Modes
Operating modes Follow the advice in and in ➤ IPS ON SETTINGS IPS AND TRICKS Press the button once or more to select the desired operating mode. ➤ Temperature Recommended Operating mode Symbol Levels range temperature Top/bottom heat 30–280 °C 200 °C 1 or 2 Top/bottom heat humid... - Page 35 6 Operating modes Place tins, moulds, etc. on the wire shelf. ➤ Always push the «sloped» side of the original baking tray back as far as it ➤ will go. Heating method For cakes, biscuits, bread and roasts. The cooking space is heated by the Use a dark enamelled tray or a top and bottom heating elements.
- Page 36 6 Operating modes Temperature Recommended Operating mode Symbol Levels range temperature Hot air humid 30–250 °C 180 °C 1 + 3 PizzaPlus 30–250 °C 200 °C (or 1) Grill 30–280 °C 250 °C Grill-forced convection 30–250 °C 200 °C 2 or 3...
- Page 37 6 Operating modes Heating method A heating element behind the back wall of the cooking space heats up For gratinated and baked dishes, the air inside the cooking space bread and yeast pastries and which is circulated evenly. on 1 or 2 levels. The steam produced is largely retained in the cooking space.
-
Page 38: Fast Heating
6 Operating modes Fast heating Fast heating can be used to shorten the preheating time. Fast heating can be used with the operating modes. Select the desired operating mode and ➤ cooking space temperature. Hold the adjusting knob depressed for ➤... -
Page 39: Food Probe
Food probe Only use the food probe supplied. Do not clean the food probe in the dishwasher. Always keep the plug clean. Positioning the food probe Insert the food probe 1 into the meat so ➤ that the tip is in the centre of the thickest part. -
Page 40: Food Probe Temperature
7 Food probe Food probe temperature The food probe has to be plugged in order to set the food probe temperature. The food probe temperature depends on the cut of meat and the desired level of doneness. Follow the advice given in IPS ON SETTINGS Setting... - Page 41 7 Food probe End of cooking When the food probe temperature is reached – the appliance switches off automatically. – An acoustic signal is emitted for 1 minute. Food probe temperature reached – In the plain text display appears: – The actual food probe temperature, e.g. , appears in the left digital display.
-
Page 42: Soft Roasting
Soft roasting The «soft roasting» setting enables you to carefully roast quality cuts of meat. The end of cooking can be set precisely, dependent on the weight and thickness of the meat. The cooking duration can be set between 2½ to 4½ hours. - Page 43 8 Soft roasting Select and start soft roasting Selecting and starting the programme is explained using «Soft roasting» «Leg of lamb» as an example. The longer the meat is roasted the more tender and succulent it becomes. This is especially so for thicker pieces of meat. Once «Soft roasting»...
- Page 44 8 Soft roasting Press the adjusting knob to confirm. ➤ – The soft roasting mode starts. – The actual food probe temperature appears in the left digital display. – The actual operating time appears in the right digital display. – The symbols illuminate.
-
Page 45: Bakeomatic
BakeOmatic BakeOmatic comprises programmes for 15 different food groups (A1–A15). BakeOmatic detects the amount, shape and consistency of the food. The duration and cooking space climate are automatically adapted to the particular food. BakeOmatic is suitable for any recipes. Degree of browning The degree of browning can be adjusted to by selecting the «lightly browned», «medium browned»... - Page 46 9 BakeOmatic Recipes requiring preheating Example: «A15 Torte» Select and press OK BakeOmatic BakeOmatic A15 Torte A15 Torte medium browned A15 Torte Start preheating A15 Torte Appliance is preheating Put food into cooking space press OK to continue A15 Torte medium browned...
-
Page 47: Selecting And Starting Bakeomatic
9 BakeOmatic Selecting and starting BakeOmatic Preparing for, selecting and starting BakeOmatic is explained using «A15 Torte» as an example. Before starting, the cooking space must have cooled down in order to determine the optimum baking time. For programmes that do not require preheating, place the food in the cold cooking space. - Page 48 9 BakeOmatic Press the adjusting knob to confirm. ➤ A15 Torte – In the plain text display appears: Appliance is preheating – The cooking space is being preheated. – A single acoustic signal is emitted as soon as the set cooking space temper- ature is reached.
-
Page 49: Recipes
Recipes Press the adjusting knob to access and start stored recipes. A recipe can consist of several steps that once started run automatically. The recipes are detailed in the recipe book. After being selected, a stored recipe can be changed if required. Recipes requiring preheating Example: «R33 Cake»... -
Page 50: Selecting And Starting A Recipe
10 Recipes 10.1 Selecting and starting a recipe Preparing, selecting and starting a recipe is demonstrated using «R33 Cake» as an example. For recipes that do not require the cooking space to be preheated, place the food in the cold, unheated cooking space. Prepare the cake following the recipe book. - Page 51 10 Recipes Put the wire shelf at level 1 in the cooking ➤ space. Place the cake tin on the wire shelf. ➤ Press the adjusting knob to confirm. ➤ R33 Cake – In the plain text display appears: – The appliance starts with the corresponding settings.
- Page 52 10 Recipes Inadvertently interrupting the programme If the button is pressed, operation is interrupted. R33 Cake – In the plain text display appears: continue Press the adjusting knob to continue operation. Switching off before time Press the button 2×. ➤...
-
Page 53: Own Recipes
Own recipes 10 of your own favourite recipes can be stored. A recipe can consist of several steps, operating modes and operating times that once started run automatically. Press the adjusting knob to access and start stored recipes. 11.1 Creating own recipes If using the food probe, please observe the following: Enter an estimated duration. - Page 54 11 Own recipes Press the adjusting knob to confirm. ➤ Recipe 1 (empty) – In the plain text display appears: change Press the adjusting knob to confirm. ➤ Recipe 1 (empty) – In the plain text display appears: Step 1 Set the desired operating mode, cooking ➤...
- Page 55 11 Own recipes Copying a recipe Each recipe that is stored – from the recipe book with a R number as well as your own recipes – can be copied and changed. Press and turn the adjusting knob to ➤ select the recipe that is to be copied.
-
Page 56: Keeping Food Warm
Keeping food warm Press the adjusting knob to access and start the «Keep warm» function. It can be used to keep cooked food warm. If the cooking space is already hot, open the appliance door and allow the cooking space to cool down for 3 to 4 minutes before starting the «Keep warm»... -
Page 57: Tips And Tricks
Tips and tricks Hot air Baking and roast Result Solution • The baking or roast looks Next time, set a lower cooking space ➤ good on the outside but is temperature and lengthen the operating still doughy or raw on the time. -
Page 58: Saving Energy
13 Tips and tricks Uneven browning Result Solution • The baking has browned Next time, set a lower cooking space ➤ unevenly. temperature and adjust the operating time. If using , check that the ➤ levels used correspond to those recommended in IPS ON SETTINGS Select... -
Page 59: Optional
Optional 14.1 Plate warmer Put the wire shelf at level 1 and place the tableware on it. ➤ Press the button to switch «Plate warmer» on and off. ➤ Preheat tableware for about 1 hour. ➤ «Plate warmer» switches off automatically after 12 hours. -
Page 60: Care And Maintenance
Care and maintenance Allow the appliance and accessories to cool down before cleaning. Do not use abrasive, caustic cleaning agents or stainless steel cleaner. Do not use abrasive scouring pads, steel wool, etc. as such products can damage the surfaces. 15.1 Cleaning the exterior Remove any soiling or excess cleaning solution immediately. -
Page 61: Cleaning The Appliance Door
15 Care and maintenance 15.2 Cleaning the appliance door Clean the appliance door with a soft cloth dampened with water and a little ➤ washing-up liquid. Dry with a soft cloth. Removing the appliance door Risk of injury! Exercise caution when removing and reassembling the appliance door. -
Page 62: Removing The Shelf Guides
15 Care and maintenance 15.3 Removing the shelf guides Swing the shelf guide 1 at the front into the middle ➤ of the cooking space. Pull the shelf guide at the back out of the opening. ➤ Reassemble in reverse order. 15.4 Cleaning the accessories Do not clean the food probe in the dishwasher. -
Page 63: Replacing The Halogen Light Bulb
15 Care and maintenance 15.6 Replacing the halogen light bulb Disconnect the appliance from the mains and unscrew the fuse or switch off the automatic circuit breaker. The light bulb and the appliance get hot when in use! Allow to cool down first. -
Page 64: Trouble-Shooting
Trouble-shooting This section lists faults that can be solved simply by following the instructions given. If another fault is displayed or the fault cannot be remedied, please call Customer Services. Before calling Customer Services, please note down the error message in full ➤... - Page 65 16 Trouble-shooting … the illumination is not working Possible cause Solution • The fuse or circuit breaker Change the fuse. ➤ for electrical installations Reset the automatic circuit breaker. ➤ in the home is defective. • An interruption in the Check the power supply.
- Page 66 16 Trouble-shooting FX/EXX see instructions … appears FN XXX XXXXXX Possible cause Solution • Various situations can Cancel the error message by pressing the ➤ lead to an error message. button. Disconnect the power supply for about ➤ 1 minute. Reconnect the power supply.
-
Page 67: After A Power Failure
16 Trouble-shooting 16.2 After a power failure After a power failure, Power failure – this appears in the plain text display: Set time – flashes in the right digital display – the symbol flashes. Turn the adjusting knob to set the hour. ➤... -
Page 68: Accessories And Spare Parts
Accessories and spare parts Please give model number and exact description when ordering parts. Accessories Original TopClean baking tray * Wire shelf * Food probe * Roller runner Round TopClean baking tray ø 24 cm/ø 29 cm/ø 31 cm * Included in the scope of delivery... - Page 69 17 Accessories and spare parts Width × Depth × Length [mm] Porcelain dish 325 × 65 × 177 Porcelain dish 325 × 65 × 265 Porcelain dish 325 × 65 × 354 Recipe book * Tips on settings * * Included in the scope of delivery Spare parts Shelf guides left/right...
-
Page 70: Technical Data
Technical data External dimensions See Installation Instructions ➤ Electrical connection See identification plate 1. ➤ Note for testing institutes The energy efficiency class according to EN 50304/EN 60350 is determined using the operating modes. The usable volume within the meaning of EN 50304/EN 60350 is obtained with the shelf guides disassembled. -
Page 71: Disposal
Disposal Packaging • All packaging materials (cardboard, plastic film (PE) and polystyrene (EPS)) are marked and should, if possible, be collected for recycling and disposed of in an environmentally friendly way. Disconnection • Disconnect the appliance from the mains. With a fixed appliance, this is to be carried out by a qualified electrician! Safety •... -
Page 72: Index
Index Accessories ....13, 68 Delayed start....31 Cleaning ....62 Disconnection . - Page 73 20 Index Keeping food warm ... . 56 Recipe book ....69 Recipes ..... 49 Changing.
- Page 74 20 Index Technical data....70 U/E messages ....66 Temperature sensor ... 12 User settings.
-
Page 75: Repair Service
Repair service The T section will help you to carry out small repairs ROUBLE SHOOTING yourself, saving you the time and trouble of calling out a service technician and the cost that goes along with it. Whether you contact us about a malfunction or an order, please always state the serial number (FN) and the model type of your appliance. - Page 76 ➤ To switch off the appliance Press the button. ➤ To set the timer Press the button. ➤ Turn the adjusting knob to set the timer duration. ➤ V-ZUG Ltd Industriestrasse 66, CH-6301 Zug vzug@vzug.ch, www.vzug.com J044.360-1...
Need help?
Do you have a question about the Combair XSL and is the answer not in the manual?
Questions and answers