Table of Contents
Advertisement
Quick Links
Advertisement
Table of Contents

Related Manuals for ADJ ENCORE Z7LP


Summary of Contents for ADJ ENCORE Z7LP
- Page 1 ENCORE Z7LP User Manual...
- Page 2 ©2022 ADJ Products, LLC all rights reserved. Information, specifications, diagrams, images, and instructions herein are subject to change without notice. ADJ Products, LLC logo and identifying product names and numbers herein are trademarks of ADJ Products, LLC. Copyright protection claimed includes all forms and matters of copyrightable materials and information now allowed by statutory or judicial law or hereinafter granted.
-
Page 3: Table Of Contents
C O N T E N T S Introduction Limited Warranty (USA Only) Warranty Registration | Features Safety Guidelines Overview Installation Remote Device Management (RDM) Wifly Control System Menu DMX Setup DMX Traits Color Macros Chart Dimmer Speeds Dim Modes Daisy Chain Power Linking | Cleaning &... -
Page 4: Introduction
Please do not discard the shipping carton in the trash. Please recycle whenever possible. CUSTOMER SUPPORT Contact ADJ Service for any product related service and support needs. Also visit forums.adj.com with questions, comments or suggestions. -
Page 5: Limited Warranty (Usa Only)
All shipping charges must be pre-paid. If the requested repairs or service (including parts replacement) are within the terms of this warranty, ADJ Products, LLC will pay return shipping charges only to a designated point within the United States. If the entire instrument is sent, it must be shipped in its original package. No accessories should be shipped with the product. -
Page 6: Warranty Registration | Features
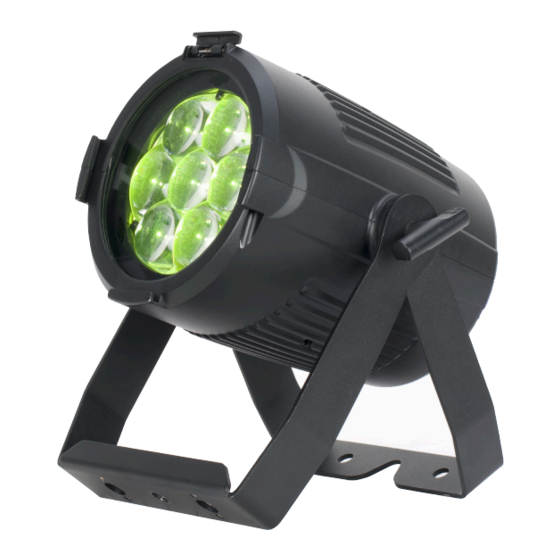
F E AT U R E S The ADJ Encore Z7LP is a versatile LED par with seven (7) 20W Quad LEDs (4-in-1: Red, Green, Blue & Lime). Intended for dry, indoor usage only, it offers 16-bit fine RGBL color control and 64 built-in color macros, as well as 6 DMX channel mode options, RDM, and flicker-free operation. -
Page 7: Safety Guidelines
THIS FIXTURE IS COMPOSED OF SOPHISTICATED ELECTRONIC COMPONENTS. TO GUARANTEE SMOOTH OPERATION, IT IS IMPORTANT TO FOLLOW ALL INSTRUCTIONS AND GUIDELINES IN THIS MANUAL. ADJ PRODUCTS, LLC IS NOT RESPONSIBLE FOR INJURY AND/OR DAMAGES RESULTING FROM THE MISUSE OF THIS FIXTURE DUE TO THE DISREGARD OF THE INFORMATION PRINTED IN THIS MANUAL. -
Page 8: Overview
O V E R V I E W Display Screen Fuse Power Power Mode Enter Button Button Down Button Button Safety Lens Frame Cable Loop Latch Mounting Bracket Adjustment Knob Gel Filter Slot Mounting Bracket... -
Page 9: Installation
I N S TA L L AT I O N FLAMMABLE MATERIAL WARNING Keep fixture minimum 5.0 feet (1.5m) away from flammable materials and/or pyrotechnics. ELECTRICAL CONNECTIONS A qualified electrician should be used for all electrical connections and/or installations. MINIMUM DISTANCE TO OBJECTS/SURFACES IS 6.6 FEET (2 METERS). MINIMUM DISTANCE OF FLAMMABLE MATERIALS FROM THE SURFACE IS 1.6 FEET (0.5 METER) DEVICE IS INTENDED FOR USE IN DRY, INDOOR LOCATIONS ONLY! USE OF THIS... - Page 10 I N S TA L L AT I O N CLAMP INSTALLATION This fixture features a mounting point on top of the bracket for the attachment of a mounting clamp. There is also a loop for the attachment of a safety cable located on the rear panel of the fixture, near the display screen (see the illustration below).
- Page 11 I N S TA L L AT I O N STAND MOUNTING This unit can also be installed atop a tripod stand. Simply insert the threaded bolt on the top of the tripod stand through the hole in the top of the mounting yoke. Tighten the nut onto the threaded bolt to secure the mounted device in place.
- Page 12 LEDs. This issue is not unique to ADJ lighting fixtures, but rather it is a common issue with lighting fixtures from all manufacturers. Although there is no true way to completely prevent this issue from happening, the guidelines below can reduce the risk of any potential damage if followed.
- Page 13 I N S TA L L AT I O N ACCESSORY INSTALLATION: GEL FRAME In order to install the included gel frame, find the latch located at the top of the lens frame. Open the latch by flipping it upwards, as shown in the below left image, then slide the gel frame into the slot in front of the lens, as shown in the below right image.
-
Page 14: Remote Device Management (Rdm)
R E M O T E D E V I C E M A N A G E M E N T ( R D M ) NOTE: In order for RDM to work properly, RDM enabled equipment must be used throughout the entire system, including DMX data splitters and wireless systems. -
Page 15: Wifly Control
W I F LY C O N T R O L WIRELESS SETUP There are many factors that can affect and/or interrupt a wireless signal, including walls, glass, met-al, objects, and people. Therefore, the following guidelines are recommended in order to maximize the chances of having a clear path for the wireless signal to reach the device: •... -
Page 16: System Menu
S Y S T E M M E N U The fixture includes an easy to navigate system menu control panel display where all necessary settings and adjustments are made. (See image below) • MODE: Cycles through the main menu options and/or return to previous menu without making changes. - Page 17 S Y S T E M M E N U Default setting shown in bold MAIN MENU OPTIONS / VALUES (Default Settings in BOLD) DESCRIPTION 001 - 512 Address Sets starting DMX address DMX Set 9ch, 10ch, 12ch, 15ch, 15ch, 18ch Sets DMX Channel Mode Ch.
- Page 18 S Y S T E M M E N U Default setting shown in bold MAIN MENU OPTIONS / VALUES (Default Settings in BOLD) DESCRIPTION Speed 000-255 Prog 0 Fade 000-255 Speed 000-255 Prog 1 Fade 000-255 Runs set program based on Speed setting or Fade setting from 000 (slowest) to 255 (fastest) unless Speed 000-255...
-
Page 19: Dmx Setup
DMX address of 1, the DMX controller knows to send DATA assigned to address 1 to that unit, no matter where it is located in the DMX chain. Data Cable (DMX Cable) Requirements (For DMX Operation):The Encore Z7LP can be controlled via DMX-512 protocol, and features multiple DMX channel modes. Your unit and your DMX controller require a 3-pin XLR connector for data input and data output. - Page 20 D M X S E T U P 5-Pin XLR DMX Connectors. Some manufacturers use 5-pin DMX-512 data cables for DATA transmission in place of 3-pin. 5-pin DMX fixtures may be implemented in a 3-pin line by using a cable adaptor. These adapters are readily available at most electronics stores. The chart below details a proper cable conversion.
-
Page 21: Dmx Traits
D M X T R A I T S CHANNEL DMX VALUE FUNCTION 10CH 12CH 15CH 18CH Red 0~100% 000-255 000-255 Red Fine 16-bit Green 0~100% 000-255 000-255 Green Fine 16-bit Blue 0~100% 000-255 Blue Fine 16-bit 000-255 000-255 Lime 0~100% Lime Fine 16-bit 000-255 Color Macros... - Page 22 D M X T R A I T S CHANNEL DMX VALUE FUNCTION 10CH 12CH 15CH 18CH Dim Mode 0-20 Default to Unit Setting 21-40 Standard 41-60 Stage 61-80 81-100 Architectural 101-120 Theatre 121-140 Stage 2 141-160 Dim Speed from Fast to Slow (0.1-10s) 161-255 Default to Unit Setting Dim Curves...
-
Page 23: Color Macros Chart
C O L O R M A C R O S C H A R T RGBW COLOR INTENSITY RGBW COLOR INTENSITY Color DMX Value Color DMX Value RED GREEN BLUE RED GREEN BLUE WHITE Color Macro 33 129-132 Color Macro 1 Color Macro 34 133-136 Color Macro 2 Color Macro 35 137-140... -
Page 24: Dimmer Speeds
D I M M E R S P E E D S DMX VALUE DELAY TIME 0.1 s 0.2 s 0.3 s 0.4 s 0.5 s 0.6 s 0.7 s 0.8 s 0.9 s 1.0 s 1.5 s 2.0 s 3.0 s 4.0 s 5.0 s... -
Page 25: Dim Modes
D I M M E R M O D E S... -
Page 26: Daisy Chain Power Linking | Cleaning & Maintenance
Regular inspections are recommended to ensure proper function and extended life. There are no user serviceable parts inside this fixture. Please refer all other service issues to an authorized ADJ service technician. Should you need any spare parts, please order genuine parts from your local ADJ dealer. -
Page 27: Specifications
S P E C I F I C AT I O N S SOURCE: • Light Source: 7 x 20-Watt Quad RGBL LEDs (4-IN-1: Red, Green, Blue & Lime) PHOTMETRIC DATA: • CRI: 84 • CRI R9: 76.6 • Lumens: 2500 EFFECTS: •... - Page 28 D I M E N S I O N D R AW I N G S 11.1in (281.0mm) 11.5in (292.5mm) ø 6.3in (ø 160.5mm) 14.8in (376.0mm) ø 7.9in (ø 201.7mm) 9.2in (233.0mm)
- Page 29 FCC STATEMENT This device complies with Part 15 of the FCC Rules. Operation is subject to the following two conditions: (1) this device may not cause harmful interference, and (2) this device must accept any interference received, including interference that may cause undesired operation. FCC RADIO FREQUENCY INTERFERENCE WARNINGS &...
Need help?
Do you have a question about the ENCORE Z7LP and is the answer not in the manual?
Questions and answers