Table of Contents
Advertisement
Advertisement
Table of Contents

Related Manuals for Grace Cutie


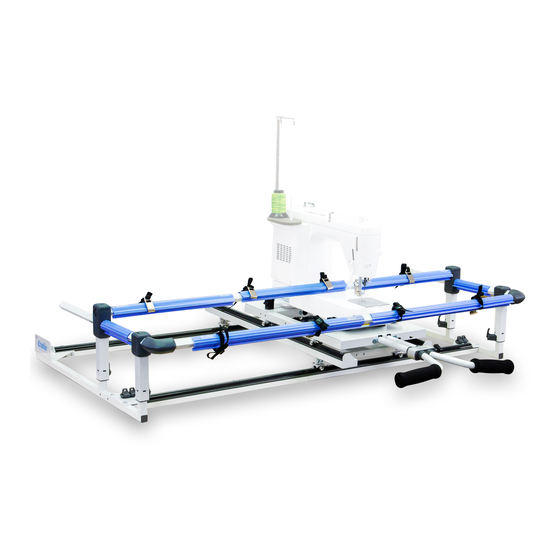
Summary of Contents for Grace Cutie
- Page 1 Assembly & Use Grace Company April 7, 2022 V1.5...
-
Page 2: Table Of Contents
Table of Contents My Frame Details ........................3 Included Parts & Tools ......................4 Welcome to Your Cutie Table-Top Frame ..................7 Part One ..................9 Task 1 - Assembling the Tracks ....................10 Task 2 - Installing the Sides ....................12 Task 3 - Aligning the Tracks ..................... -
Page 3: My Frame Details
Cutie Frame My Frame Details Use this page to write down some information about your frame. This will be helpful if you ever need to call a Grace Company support technician. Cutie Frame Frame Type: ________________________________________ Date of Purchase: ____________________________________... -
Page 4: Included Parts & Tools
Cutie Frame Included Parts & Tools Please make sure all pieces are included in your kit. Long Cross Short Cross Corner Brace Corner Brace Support (x2) Support (x2) Front Right Front Left QTT-09-14845 QTT-09-14844 QT-09-14840 QTT-09-14842 (See page 10) (See page 10) - Page 5 Cutie Frame Included Parts & Tools (Continued) Front Fabric Clamp Fabric Side Fabric Hoop with Clip (x2) Clamp (x3) Clamp (x2) Side Rail (X2) QTT-05-14723 QTT-05-14730 QTT-09-15032 QTT-05-14724 (See page 44) (See page 44) (See page 26) (See page 44)
- Page 6 Cutie Frame Included Parts & Tools (Continued) Zip Tie Mount MIS-08-10805 (See page 38) Foot Pedal Extension Cables Custom Barrel HD9 Foot Pedal Angled Barrel Jack Extension Cable Extension Cable Extension Cable Extension Cable QTT-02-15049 QTT-02-15051 QTT-02-15050 QTT-02-15048 (See page 38)
-
Page 7: Welcome To Your Cutie Table-Top Frame
Cutie Frame Welcome to Your Cutie Table-Top Frame We are pleased to introduce you to the newest part of your quilting setup. This frame has been especially designed to help quilters like you have the tools available to create quality projects. - Page 8 Cutie Frame Frame Manual: Part Two • Place the machine or top plate on the frame. • Prepare the top plate and home sewing machine. Quilting Machine Manual: Part Three • Install the wheel covers, display, handles, thread mast. • Install the upper encoder.
-
Page 9: Part One
Cutie Frame Part One Part One Instructions Complete Part One of these instructions before assembling your quilting machine or any accessories you will be using. At the end of each part, you will be instructed to switch to specific sections of your machine manual, QuiltMotion manual, or other accessories. -
Page 10: Task 1 - Assembling The Tracks
Cutie Frame Task 1 - Assembling the Tracks Parts & Tools Needed: Plastic Track (x4) Long Cross Short Cross Plastic Track Support (x2) Support (x2) Support (x4) ULPSHS Allen Wrench M4 x 20 mm (x12) 2.5 mm Instructions The frame tracks allow the bottom carriage to move horizontally across the frame. Please take the... - Page 11 Cutie Frame Task 1 - Assembling the Tracks (Continued) On both cross supports: Use six M4 x 20 mm ULPSHS screws to attach two of the plastic track supports. Do not tighten at this time. ULPSHS M4 x 20 mm...
-
Page 12: Task 2 - Installing The Sides
Cutie Frame Task 2 - Installing the Sides Parts & Tools Needed: Right Rear Bungee Slide (x4) Front Right Front Left Corner Brace Corner Brace Corner Brace Right Side Assembly Left Rear Left Side Assembly Corner Brace SBHCS Allen Wrench... - Page 13 Cutie Frame Task 2 - Installing the Sides (Continued) Use two M5 x 8 mm SBHCS and the 3 mm Allen wrench to loosely attach each of the corner braces. Do not tighten. Front Left Corner Brace Right Rear Corner Brace...
-
Page 14: Task 3 - Aligning The Tracks
Cutie Frame Task 3 - Aligning the Tracks Parts & Tools Needed: SBHCS Allen Wrench Bottom Carriage Encoder Bracket M5 x 8 mm (x2) 3 mm Instructions The bottom carriage shuttles the machine from side to side across the frame. To prepare and install... - Page 15 Cutie Frame Task 3 - Aligning the Tracks (Continued) Place the bottom carriage onto the frame so the wheels ride the plastic track. Wheel Press down on the bottom carriage and push to one side of the frame. Tighten down the screws on the top of the front corner brace with the 3 mm Allen wrench.
- Page 16 Cutie Frame Task 3 - Aligning the Tracks (Continued) Carefully press down on the carriage and slide it across the frame. Tighten the two screws on the top of the corner brace. Tighten the two screws attaching the corner base to the track.
-
Page 17: Task 4 - Installing The Top Plate Clamps And Encoder Bracket
Cutie Frame Task 4 - Installing the Top Plate Clamps and Encoder Bracket Parts & Tools Needed: Top Plate Encoder Bracket SBHCS Sewing Machine M5 x 8 mm (x2) Clamps (x4) Allen Wrench 3 mm Instructions The top plate shuttles the machine from front to back on the bottom carriage. To prepare the top... -
Page 18: Task 4 - Installing The Top Plate Clamps And Encoder Bracket
If you do not have QuiltMotion automation, go to “Part Two” of this manual. Note: If you have purchased the Cutie Table and Legs accessory you can assemble it now. If you have purchased the Cutie channel locks, these can be installed now. -
Page 19: Part Two
Cutie Frame Part Two Part Two Before completing the tasks in part two, please ensure you’ve completed the applicable items listed below. Some items only apply if you have purchased the item they’re describing, and can be skipped otherwise. Progress Checkpoint Have you: •... -
Page 20: Task 5 - Installing The Top Plate Or Quilting Machine
Cutie Frame Task 5 - Installing the Top Plate or Quilting Machine Instructions The top plate shuttles your sewing machine from from front to back on the bottom carriage. A wheeled quilting machine does not need a top plate. To install the top plate or machine, please follow these steps: Place the top plate or machine so the wheels ride the bottom carriage track. - Page 21 Cutie Frame Task 5 - Installing your Top Plate or Quilting Machine (Continued) Task 5 Completed: Top Plate Quilting Machine...
-
Page 22: Task 6 - Installing Your Sewing Machine
Cutie Frame Task 6 - Installing your Sewing Machine Instructions Take the following steps to secure your home sewing machine to the top plate. If you’re using wheeled quilting machine, skip this task. Place your machine onto the top plate, centered between the top plate clamps. Ensure that all corners of the machine are placed solidly on the top plate metal. - Page 23 Cutie Frame Task 6 - Installing your Sewing Machine (Continued) Close the clamps to secure your sewing machine. Task 6 Completed:...
-
Page 24: Task 7 - Prepare Your Machine For Quilting
Cutie Frame Task 7 - Prepare Your Machine for Quilting Instructions Take the following steps to prepare your sewing machine for quilting. If you are using a wheeled quilting machine, skip to the instruction box at the end of this task. -
Page 25: Part Three
Cutie Frame Part Three Part Three Before completing the tasks in part three, complete the following applicable tasks: Progress Checkpoint Wheeled quilting machine users: Have you: • Completed Part Three of your machine instruction manual: • Installed wheel covers (applicable machines only)? •... -
Page 26: Task 8 - Installing The Rails
Cutie Frame Task 8 - Installing the Rails Parts & Tools Needed: Long Take-up Rail Short Take-up Rail Long Front Rail Short Front Rail Rail Corner Bottom (x2) Rail Corner Top (x2) Hoop Side Rail (X2) SBHCS Allen Wrench Allen Wrench... - Page 27 Cutie Frame Task 8 - Installing the Rails (Continued) Slide the long take-up rail over the connector on the short take-up rail so the screw holes align with the pre-installed set screws. Connector Long Take-up Rail Note: If you have trouble sliding the parts together, try loosening the two set screws in the connector with the 2 mm Allen wrench.
- Page 28 Cutie Frame Task 8 - Installing the Rails (Continued) Open the take-up rail caps by sliding them outward, following the direction of the embossed arrows. Rail Cap Pass the take-up rail through the throat of the machine. Make sure the long half of the take- up rail is on the right side.
- Page 29 Cutie Frame Task 8 - Installing the Rails (Continued) Close the rail caps to secure the take-up rail. Locate the long and short front rails. The front rail pieces have keyholes cut-outs on one end. Short Front Rail Long Front Rail Slide the long front rail over the connector on the short front rail so the screw holes align.
- Page 30 Cutie Frame Task 8 - Installing the Rails (Continued) With the 2 mm Allen wrench, tighten the pre-installed set screws in the front rail. Place the front rail onto the two top rail corners so the keyhole cutout faces away from the corners, and the long front rail is to the left.
- Page 31 Cutie Frame Task 8 - Installing the Rails (Continued) Attach the bottom rail corners using three M4 x 25 mm SBHCS screws and the 2.5 mm Allen wrench. SBHCS Bottom Rail M4 x 25 mm (x2) Corner (x2) Open the levers on the front of the frame sides.
- Page 32 Cutie Frame Task 8 - Installing the Rails (Continued) Close the levers to secure the front rail. Task 9 Completed:...
-
Page 33: Task 9 - Adjusting The Rails
Cutie Frame Task 9 - Adjusting the Rails Instructions The rails must be adjusted to accommodate the size of your quilting or sewing machine. Ensure the frame is fully assembled and the machine installed. Open the levers at the base of both side assemblies. - Page 34 Cutie Frame Task 9 - Adjusting the Rails (Continued) Slide the machine to the far right of the frame and repeat the previous step for this side of the frame. Finger’s Width of Space The front rail can be extended to accommodate machine throats of varying lengths. Loosen the knobs under the take-up rail.
-
Page 35: Task 10 - Adjusting The Carriage Stop Bracket
Cutie Frame Task 10 - Adjusting the Carriage Stop Bracket Instructions Follow these steps to adjust the carriage stop to prevent your machine from hitting the take-up rail. Loosen the knob on the carriage stop bracket by turning it counter clockwise and then slide the knob and stopper towards the rear of the bracket. -
Page 36: Task 11 - Adjusting The Top Plate Handles
Cutie Frame Task 11 - Adjusting the Top Plate Handles Instructions Comfort is critical when working at a frame, especially for long periods of time. Take the following steps to adjust the top plate handles to suit your needs. Loosen the handlebar knob. - Page 37 Cutie Frame Task 11 - Adjusting the Top Plate Handles (Continued) Note: When using tracing accessories, pull the handles out all the way and install them into the rear of the top plate. If you are using QuiltMotion automation, follow the steps in “Part 3” of your QuiltMotion...
-
Page 38: Task 12 - Extending Your Foot Pedal Cable
Cutie Frame Task 12 - Extending Your Foot Pedal Cable Parts & Tools Needed: Quilting Machine Users: Skip to the end of this task for instructions on which manual to Zip Tie refer to next. Mount Tie (x4) HD9 Foot... - Page 39 Cutie Frame Task 12 - Extending Your Foot Pedal Cable (Continued) If there is a match, plug your foot pedal into that extension cable. Foot Pedal Extension Cable It may also help to run the cable across to the front of the machine. Extend out the machine clamps on one side.
- Page 40 Cutie Frame Task 12 - Extending Your Foot Pedal Cable (Continued) Run the cable between the machine and the machine clamps. Zip-tie it to the Zip-tie mount. Congratulations! You have completed Part Three of the assembly instructions for your frame. Before continuing to Part Four of these instructions, complete any of the following that apply to you: •...
-
Page 41: Part Four
Cutie Frame Part Four Part Four Before completing the tasks in part four, please ensure you’ve completed the applicable items listed below. Some items only apply if you have purchased the item they’re describing, and can be skipped otherwise. Progress Checkpoint Have you: •... -
Page 42: Task 13 - Preparing Your Quilt
Cutie Frame Task 13 - Preparing your Quilt Parts & Tools Needed: Tip: For first-time assembly, follow these steps with spare pieces of fabric that you can use to Fabric Marking practice with before starting an actual quilt. Be Pencil or Chalk sure to use all three layers: quilt top, batting, and backing. - Page 43 Cutie Frame Task 13 - Preparing your Quilt (Continued) 1. Fold the batting in half and mark the 1. Lay the batting and quilt top over the backing and pin the layers together. center of the top edge with a pin or marker.
-
Page 44: Task 14 - Attaching Your Quilt
Cutie Frame Task 14 - Attaching your Quilt Parts & Tools Needed: Fabric Clamp (x3) Front Fabric Clamp Side Fabric Clamp (x2) with Clip (x2) Instructions Follow these instructions to attach your quilt to the frame: Pull a sufficient amount of fabric over the Carry your rolled up quilt to your frame. - Page 45 Cutie Frame Task 14 - Attaching your Quilt (Continued) Press the fabric clamps onto the back rail so that the lip of the clamp faces inward on the frame. Roll up the edge of your quilt in the throat of the machine. Wrap the roll with the adjustable fabric straps and clip the fabric straps to the lip on the clamps.
- Page 46 Cutie Frame Task 14 - Attaching your Quilt (Continued) Roll up the excess fabric at the front of the frame, and fasten in place with the fabric straps. After tensioning the straps, tuck the excess into the plastic clips on each strap. This prevents accidentally stitching them into the quilt.
-
Page 47: Task 15 - Marking The "Safe Area
Cutie Frame Task 15 - Marking the “Safe Area” Parts & Tools Needed: Tape Measure or Ruler (not included) Marking Tool such as Fabric Marker, Chalk, Masking tape, etc (not included). Instructions Different sewing machines will have different levels of reach over the quilt depending on arm length. - Page 48 Cutie Frame Task 15 - Marking the “Safe Area” (Continued) Mark 1.5 inches from the back rail at the center of the frame, and then again at the right corner 1.5 inches from the back rail and 1 inch from the right edge of the machine’s reach.
-
Page 49: Task 16 - Getting Started
Cutie Frame Task 16 - Getting Started Parts & Tools Needed: Scissors (not included) Instructions With the frame assembled and the fabric attached, you are ready to begin quilting. Practice on spare fabric to become familiar with the machine’s settings and movements so you can start your projects with confidence. - Page 50 Cutie Frame Task 16 - Getting Started (Continued) Pull on the top thread so that it is tight Use your finger to pull on the loop of and jog the needle up and down. This may bobbin thread until the loose end of the...
- Page 51 Cutie Frame Task 16 - Getting Started (Continued) Secure your stitches by making three Complete the design by making a stitches very close together right next to tie-off stitch. Use the up/down button the place where you pulled out the bobbin or the machine handwheel to lower and thread.
- Page 52 Cutie Frame Task 16 - Getting Started (Continued) You may now cut the thread tails from the Make a single stitch over the tie-off. beginning of the design. Cut your thread at the tie-off, and move on to your next design.
-
Page 53: Task 17 - Moving The Fabric
Cutie Frame Task 17 - Moving the Fabric Instructions Because many quilts are larger than the frame’s hoop, it helps to break up the quilt into sections, called “zones” that can be fully quilted before you have to move the quilt to a new zone. Once you’ve filled up a section of your quilt with stitching, it’s time to move to a new zone. - Page 54 Cutie Frame Task 17 - Moving the Fabric (Continued) Replace the fabric clamps and fasten down the quilt rolls with the fabric straps. Quilted Area New Quilt Zone Zone Overlap Tip: If your quilt has a large fabric roll at Tip: To access your machine’s bobbin case,...
-
Page 55: Accessories - Encoder Installation
Cutie Frame Accessories - Encoder Installation Instructions These instructions are optional. Encoders come with the purchase of a wheeled quilting machine or the SureStitch accessory stitch regulator. Lower Encoder Installation 1. Loosen the lock collar screw on the lower encoder with the 2.5 mm Allen wrench until the lock collar turns freely. - Page 56 • If you are using a quilting machine that your encoders came with, please see your machine manual for instructions on installing the upper encoder. • If you are using the Cutie frame top plate and a domestic sewing machine, the encoder is installed onto your top plate.
- Page 57 Cutie Frame Accessories - Encoder Installation Turn the lock collar to point up and tighten the lock collar screw with the 2.5 mm Allen wrench. Lock Collar Lock Collar Screw...
- Page 58 The Grace Company Phone: 1-800-264-0644 www.graceframe.com...
Need help?
Do you have a question about the Cutie and is the answer not in the manual?
Questions and answers