
Related Manuals for Grace Cutie


Summary of Contents for Grace Cutie
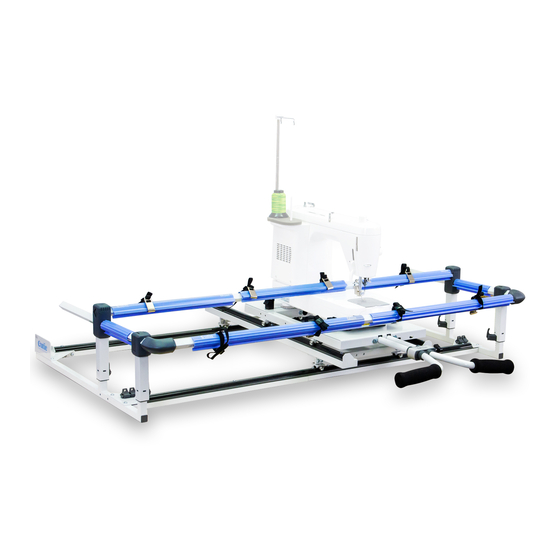
- Page 1 Assembly & Use Copyright March 10, 2021 Grace Company (Reproduction Prohibited) Version 1.2...
-
Page 2: Table Of Contents
Cutie Frame Contents Included Parts & Tools ......................... 3 Step 1 - Building the Tracks ......................6 Step 2 - Installing the Sides ......................8 Step 3 - Installing the Frame Carriages ..................10 Step 4 - Installing your Sewing Machine ..................15 Step 5 - Installing the Rails ......................17... -
Page 3: Included Parts & Tools
Cutie Frame Included Parts & Tools Please make sure all pieces are included in your kit. Long Cross Corner Brace Short Cross Corner Brace Support (x2) Support (x2) Front Right Front Left QTT-09-14845 QT-09-14840 QTT-09-14844 QTT-09-14842 See page 6 See page 6... - Page 4 Cutie Frame Included Parts & Tools (Continued) Front Fabric Clamp Hoop Side Rail (X2) Fabric Clamp (x3) Side Fabric with Clip (x2) Clamp (x2) QTT-05-14723 QTT-05-14730 QTT-09-15032 QTT-05-14724 See page 31 See page 31 See page 17 See page 31...
- Page 5 Cutie Frame Included Parts & Tools (Continued) Foot Pedal Extension Cables Custom Barrel HD9 Foot Pedal Angled Barrel Jack Extension Cable Extension Cable Extension Cable Extension Cable QTT-02-15049 QTT-02-15051 QTT-02-15050 QTT-02-15048 See page 27 See page 27 See page 27...
-
Page 6: Step 1 - Building The Tracks
Cutie Frame Step 1 - Building the Tracks Parts & Tools Needed: Long Cross Short Cross Plastic Track ULPSHS Support (x2) Support (x2) Support (x4) M4 x 20 mm (x12) Plastic Track (x4) Allen Wrench 2.5 mm Instructions The frame tracks allow the bottom carriage to move horizontally across the frame. Please take the... - Page 7 Cutie Frame Building the Tracks (Continued) On both cross supports: Use six M4 x 20 mm ULPSHS screws to attach two of the plastic track supports. Do not tighten at this time. ULPSHS M4 x 20 mm Plastic Track Support Insert a plastic track into each side of both plastic track supports.
-
Page 8: Step 2 - Installing The Sides
Cutie Frame Step 2 - Installing the Sides Parts & Tools Needed: Right Rear Corner Brace Bungee Slide (x4) Front Right Corner Front Left Corner Brace Brace Left Rear Corner Brace SBHCS Allen Wrench Right Side Assembly M5 x 8 mm (x16) - Page 9 Cutie Frame Installing the Sides (Continued) Use two M5 x 8 mm SBHCS and the 3 mm Allen wrench to loosely attach each of the corner braces. Do not tighten. Front Left Corner Brace Right Rear Corner Brace Left Rear...
-
Page 10: Step 3 - Installing The Frame Carriages
Cutie Frame Step 3 - Installing the Frame Carriages Parts & Tools Needed: SBHCS Allen Wrench Bottom Carriage Encoder Bracket (x2) M5 x 8 mm (x20) 3 mm Top Plate Sewing Machine Clamps (x4) Instructions The top and bottom carriages shuttle the machine across the frame. To prepare and install the bottom carriage, please follow these steps: Note that the back of the bottom carriage has stoppers at the end of the track. - Page 11 Cutie Frame Installing the Frame Carriages (Continued) On the rear of the bottom carriage, install the encoder bracket with two M5 x 8 mm SBHCS screws and the 3 mm Allen wrench. M5 x 8 mm Encoder Bracket SBHCS (x2) Place the bottom carriage onto the frame so the wheels ride the plastic track.
- Page 12 Cutie Frame Installing the Frame Carriages (Continued) Tighten the two screws attaching the corner brace to the track. Carefully press down on the carriage and slide it across the frame. Tighten the two screws on the top of the corner brace.
- Page 13 Cutie Frame Installing the Frame Carriages (Continued) Install the second encoder bracket onto the left side of the top plate with two M5 x 8 mm SBHCS screws and the 3 mm Allen wrench. M5 x 8 mm SBHCS (x2)
- Page 14 Cutie Frame Installing the Frame Carriages (Continued) Step 3 Completed:...
-
Page 15: Step 4 - Installing Your Sewing Machine
Cutie Frame Step 4 - Installing your Sewing Machine Instructions Take the following steps to secure your home sewing machine to the top plate. Place your machine onto the top plate, centered between the top plate clamps. Ensure that all corners of the machine are placed solidly on the top plate metal. - Page 16 Cutie Frame Installing your Sewing Machine (Continued) Close the clamps to secure your sewing machine. Step 4 Completed:...
-
Page 17: Step 5 - Installing The Rails
Cutie Frame Step 5 - Installing the Rails Parts & Tools Needed: Long Take-up Rail Short Take-up Rail Long Front Rail Short Front Rail Rail Corner Bottom (x2) Allen Wrench 2 mm Hoop Side Rail (X2) Rail Corner Top (x2) SBHCS Allen Wrench 2.5 mm... - Page 18 Cutie Frame Installing the Rails (Continued) Slide the long take-up rail over the connector on the short take-up rail so the screw holes align with the connector screws. Connector Long Take-up Rail Note: If you have trouble sliding the parts together, try loosening the set screws in the coupler with the 2 mm Allen wrench.
- Page 19 Cutie Frame Installing the Rails (Continued) Pass the take-up rail (the longer rail) through the throat of the machine. Make sure the long half of the take-up rail is on the right side. Short Take-up Rail Long Take-up Rail Place the rail into the grooves on each of the frame sides. The two rectangular notches in the rails must point down.
- Page 20 Cutie Frame Installing the Rails (Continued) Locate the long and short front rails. The front rail pieces have keyholes cut-outs on one end. Short Front Rail Long Front Rail Slide the long front rail over the connector on the short front rail so the screw holes align with the connector screws.
- Page 21 Cutie Frame Installing the Rails (Continued) Place the front rail onto the two top rail corners so the keyhole cutout faces away from the corners, and the long front rail is to the left. Long Front Rail Cutout Top Rail Corner (x2) Place each hoop side rail into a top rail corner so the end with the hole rests in the corner.
- Page 22 Cutie Frame Installing the Rails (Continued) Open the levers on the front of the frame sides. Side Lever (x2) Slide the assembled front rail into the frame sides so the screws in the corners face down. Close the levers to secure the front rail.
- Page 23 Cutie Frame Installing the Rails (Continued) Step 5 Completed:...
-
Page 24: Step 6 - Adjusting The Rails
Cutie Frame Step 6 - Adjusting the Rails Instructions The rails must be adjusted to accommodate the size of your quilting or sewing machine. Ensure the frame is fully assembled and the machine installed. Open the levers at the base of both side assemblies. - Page 25 Cutie Frame Adjusting the Rails (Continued) Slide the machine to the far right of the frame and repeat the previous step for this side of the frame. Finger’s Width of Space The distance of the front rail is determined by the length of your machine throat. Loosen the knobs under the take-up rail.
-
Page 26: Step 7 - Adjusting The Top Plate Handles
Cutie Frame Step 7 - Adjusting the Top Plate Handles Instructions Comfort is critical when working at a frame, especially for long periods of time. Take the following steps to adjust the top plate handles to suit your needs. Loosen the handlebar knob. -
Page 27: Step 8 - Extending Your Foot Pedal Cable
Cutie Frame Step 8 - Extending Your Foot Pedal Cable Parts & Tools Needed: Zip Tie Mount HD9 Foot Angled 3 Prong Custom Barrel Pedal Barrel Jack Extension Extension Extension Extension Extension Cable Cable Cable Cable Cable Note: Due to the diversity of sewing machine models in the market, we are not able to provide extension cables for every model available. - Page 28 Cutie Frame Extending Your Foot Pedal Cable (Continued) If there is a match, plug your foot pedal into that extension cable. Foot Pedal Extension Cable It may also help to run the cable across to the front of the machine. Extend out the machine clamps on one side.
- Page 29 Cutie Frame Extending Your Foot Pedal Cable (Continued) Run the cable between the machine and the machine clamps. Zip-tie it to the Zip-tie mount.
-
Page 30: Step 9 - Preparing Your Quilt
Cutie Frame Step 9 - Preparing your Quilt Parts & Tools Needed: Pins (not included) Fabric (not included) Tape Measure (not included) Instructions It’s just about time to get started quilting! Follow these instructions to prepare your quilt for attaching to the frame:... -
Page 31: Step 10 - Attaching Your Quilt
Cutie Frame Step 10 - Attaching your Quilt Parts & Tools Needed: Fabric Clamp (x3) Front Fabric Clamp Side Fabric Clamp (x2) with Clip (x2) Instructions Follow these instructions to attach your quilt to the frame: Roll your quilt up starting from the bottom While keeping the bottom edge of the quilt to carry it to the frame. - Page 32 Cutie Frame Attaching your Quilt (Continued) Fasten down the excess fabric on the take- After tensioning the straps, tuck the excess up rail by attaching fabric straps to the lip into the plastic clips on each strap. of each clamp.
- Page 33 Cutie Frame Attaching your Quilt (Continued) Carefully pull the edge of your quilt aside to Tip: If your quilt has a large fabric roll at access your sewing machine’s bobbin case. the front, you can pull the roll forward so it doesn’t block your view.
-
Page 34: Step 11 - Getting Used To Your Frame
Cutie Frame Step 11 - Getting Used to Your Frame Parts & Tools Needed: Tape Measure or Ruler (not included) Fabric Marker or Chalk, Masking tape, etc.) (not included) Instructions Learning to quilt on a frame can be tricky. Over time, you will become intuitively familiar with the reach of your machine across the frame. -
Page 35: Accessories - Bungee Installation
Cutie Frame Accessories - Bungee Installation Parts & Tools Needed: Bungee Cable Accessory Side Fabric Clamp (x2) Bungee Slide (x4) Accessory Instructions It’s just about time to get started quilting! Follow these instructions to prepare your quilt for attaching to the frame: Remove the bungee slides from the storage mounts on the front corner braces. - Page 36 Cutie Frame Bungee Installation (Continued) Squeeze the clamps slightly and press two of the bungee slides onto each one. Make sure the sloped part of each bungee slide faces toward the inside of the frame. Slide fabric into the mouth of the bungee.
-
Page 37: Accessories - Encoder Installation
Cutie Frame Accessories - Encoder Installation Parts & Tools Needed: Encoder Allen Wrench Allen Wrench 2.5 mm 4 mm Accessory Instructions The machine rides the bottom carriage across the frame. To prepare and install the bottom carriage, please follow these steps: With the 2.5 mm Allen wrench, loosen the lock collar screw so the lock collar twists freely. - Page 38 Cutie Frame Encoder Installation (Continued) Turn the lock collar up and tighten the lock Follow the encoder cable instructions in your machine or Sure Stitch accessory manual. collar screw with the 2.5 mm Allen wrench. With the 4 mm Allen wrench, screw the encoder with the silver spring to the bracket on the top plate.
- Page 39 Cutie Frame The Grace Company 2225 South 3200 West Salt Lake City, UT 84119 Phone: 1-800-264-0644 Fax: 801-908-8888 www.graceframe.com...
Need help?
Do you have a question about the Cutie and is the answer not in the manual?
Questions and answers