Table of Contents
Advertisement
Advertisement
Table of Contents
Troubleshooting

Related Manuals for Grace Little Rebel


Summary of Contents for Grace Little Rebel
- Page 1 Instruction Manual Copyright 9/14/2023 v1.0 LR130...
- Page 2 My Machine Details Use this page to write down some information about your machine. This will be helpful if you ever need to call a Grace Company support technician. Little Rebel Machine: ___________________________________________ Date of Purchase: ____________________________________ Serial Number: ______________________________________...
- Page 3 Important Safeguards When using an electrical appliance, basic safety precautions should always be followed, including the following. DANGER - To reduce the risk of electric shock, do not leave the machine unattended when plugged in. Always unplug this machine from the electric outlet immediately after using and before cleaning. WARNING - To reduce the risk of burns, fire, electric shock, or injury to persons: •...
- Page 4 Important Safeguards (continued) GROUNDING INSTRUCTIONS This product must be grounded. In the event of malfunction or breakdown, grounding provides a path of least resistance for electric current to reduce the risk of electric shock. This product is equipped with a cord that has an equipment-grounding conductor and a grounding plug. Plug the cord from the quilting machine into a surge protector.
-
Page 5: Warranty Information
Warranty Information The Little Rebel has a two-year limited warranty on all parts and a five-year limited warranty on its cast metal body. Under these warranties, Grace Company will at its discretion repair or replace any part(s) with material or manufacturing defect. The customer is required to return the product to Grace Company in its original box. -
Page 6: Welcome To Your Little Rebel
If you purchased any other Grace Company products with your Little Rebel, assemble those products first in the order shown in the flowchart below. Directions at the end of every section will tell you which section of which instruction manual to turn to next. - Page 7 • Lower the take-up rail. • Attach the stitch controller to the top plate. • Plug in the machine. Little Rebel: Preparing to Stitch • Wind a bobbin and load the bobbin case. • Thread the machine. • Balance the top thread tension with the...
-
Page 8: Table Of Contents
Accessories ......52 Important Safeguards ........i Warranty Information ........iii Using the Extension Table ......53 Welcome to Your Little Rebel ......iv Using the Needle Threader ......55 Machine Layout ..........vii Using the Thread Nets ........56 Buttons and Controls ........ix Service ........58... -
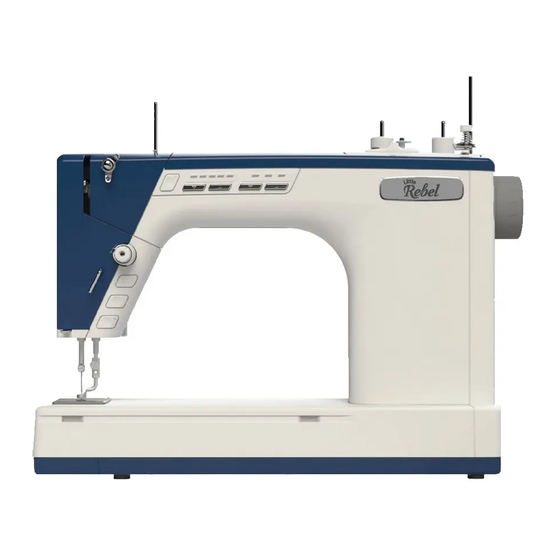
Page 9: Machine Layout
Machine Layout Main View Carrying Handle (page 40, page 45) For safely lifting the machine. Thread Guides and Tensioners (page 17) See page 17 for detailed layout. Thread Cutter (page 17) Cuts excess thread from the needle area. Bobbin Case (page 13) Holds the wound bobbin. - Page 10 Machine Layout (continued) Rear View Thread Mast (page 10, page 17) Guide for threading and bobbin winding. Thread Stand (page 10, page 17) Holds two thread cones or spools. Bobbin Winder (page 10, page 65) Winds bobbins. Stops automatically. Bobbin Thread Tensioner (page 10) Tensioner for bobbin winding.
-
Page 11: Buttons And Controls
Buttons and Controls Stitch Controller Attaches to your frame's top plate handles, enabling control of the machine while frame quilting. SLOWER Foot Pedal Starts machine and controls stitching speed. (Does not control speed if stitch regulation is turned on.) FASTER Start/Stop Button Q Button Press to start stitching at the current speed... -
Page 12: Included Parts And Tools
Included Parts and Tools Foot Pedal Thread Mast Extension Table SMP-09-17957 SMP-04-17686 SMP-09-17684 Installation Box Thread Mast Screw Power Cord (x2) (+ x1 spare) SMP-02-10845 HDW-03-17896 Tool Box Flat Head Timing Spacer Oil Bottle Alcohol Wipe Screwdriver SMP-03-10169 SMP-03-11320 SMP-08-17820 SMP-06-17977... - Page 13 Included Parts and Tools (continued) Tool Box (continued) T-handle Allen T-handle Allen T-handle Allen T-handle Allen Wrench 4 mm Wrench 3 mm Wrench 2 mm Wrench 2.5 mm HDW-03-13115 HDW-03-13114 HDW-03-13117 HDW-03-13116 Note: Some included tools are not needed for the assembly or use of your machine, but they may come in handy if you ever need to replace any parts.
- Page 14 Included Parts and Tools (continued) Misc. Container (continued) M-Class Bobbin Needle Magnet Lint Brush Thread Net 10 cm SMP-08-10070 SMP-09-13837 SMP-03-10170 SMP-08-17271 Spool Cap (medium) Spool Cap (large) Thread Net 14 cm Spool Cap (small) ACC-05-12413 ACC-05-17895 ACC-05-17894 SMP-08-17313 Needle Threader Velcro Cable Tie (x4) Zip Tie (x2) Zip Tie Mount (x2)
- Page 15 Included Parts and Tools (continued) Hopping Foot Thumb Screw M3 Foot Screw Height Tool (needle bar spare) (presser bar spare) HDW-03-11736 SMP-03-12171 HDW-03-17660 Foot Storage Container (inside Accessory Box) Presser Foot Holder Quilter Foot Quilter Foot w/ Seam Guide (pre-installed) (pre-installed) Edge Guide SMP-09-17661...
- Page 16 Included Parts and Tools (continued) Machine Training Panel Kit Sewing Machine Finesse M-Class Bobbin Training Panel Thread Cone (x3) (pre-wound, x2)
-
Page 17: First-Time Setup
First-Time Setup First-Time Setup Attaching the Thread Mast ..................2 Preparing Your Frame ..................... 3 Turning the Machine On/Off ..................7... -
Page 18: Attaching The Thread Mast
First-Time Setup Attaching the Thread Mast Parts & Tools Needed Thread Thumb Screw Flat Head WARNING Mast M3 x 12 mm (x2) Screwdriver Do not discard the product packaging. Main Packaging Installation Box Tool Box Instructions Take the following steps to attach the thread mast to the machine: Insert the thread mast into the hole in the Loosely install the other thumb screw in the back of the machine, behind the thread... -
Page 19: Preparing Your Frame
Little Rebel. Note: Before you can quilt on the frame, you will also need to switch the machine to Quilting Mode. For more information, see "Quilting Mode" on page 32. If you have not done so already, place the Little Rebel on the frame. See your frame or top plate instruction manual for details. - Page 20 Frame Rails Carriage Stop To successfully quilt with the Little Rebel, you must set the take-up rail height lower than usual. Adjust the rail height so that the take-up rail and the machine bed are as close as possible without touching.
- Page 21 First-Time Setup Preparing Your Frame (continued) Retrieve the stitch controller from the Little Rebel packaging. Turn the knob on the stitch controller to loosen the clamps. Knob Stitch Controller Clamps Warning: The pieces will come off if the knob is loosened too far.
- Page 22 First-Time Setup Preparing Your Frame (continued) Plug the stitch controller cable into the bottom port on the back of the machine. Note: The stitch controller and the foot pedal use the same port on the machine. Only one can be plugged in at a time. Stitch Controller Cable Secure the stitch controller cable to prevent it from being caught under the wheels.
-
Page 23: Turning The Machine On/Off
First-Time Setup Turning the Machine On/Off Parts & Tools Needed Power Cord Installation Box Instructions Take the following steps to plug in the power cord and turn on the machine for the first time: Open the power cord retainer on the back Close the retainer over the power cord. - Page 24 First-Time Setup Congratulations! You have completed first-time setup for the Little Rebel. All remaining tasks in this manual are designed to be completed multiple times as you use the machine and switch between its different modes. The following are some good places to start: •...
-
Page 25: Preparing To Stitch
Preparing to Stitch Preparing to Stitch Winding a Bobbin ....................10 Loading the Bobbin Case ..................13 Changing the Needle .................... 15 Threading the Machine ..................17 Adjusting Thread Tension ..................21 Note: The instructions in this section are intended for machines in both Sewing Mode and Quilting Mode, even though the images only show the machine in Sewing Mode. -
Page 26: Winding A Bobbin
Spool Caps Note: In addition to the empty bobbin in (M-class) (for spool thread only) the Misc. Container, the Little Rebel comes with four bobbins pre-wound with 50 wt. polyester Finesse thread: • x1 on the bobbin winder • x1 in the bobbin case •... - Page 27 Preparing to Stitch Winding a Bobbin (continued) Instructions Take the following steps to thread the bobbin winder and wind a bobbin: Place an empty M-class bobbin onto the Note: Your bobbin thread and your top thread bobbin winder shaft. should be similar in type and weight. For more information on choosing thread, see page 70.
- Page 28 Preparing to Stitch Winding a Bobbin (continued) Wrap the thread clockwise around the empty Winding stops automatically when the bobbin and press the start button on the bobbin is full. Afterward, pull the bobbin thread away and cut it with the thread winder.
-
Page 29: Loading The Bobbin Case
Preparing to Stitch Loading the Bobbin Case Instructions Take the following steps to place a wound bobbin in the bobbin case and insert the bobbin case into the machine: Rotate the hand wheel until the needle is Place a wound bobbin in the bobbin case in the highest position. - Page 30 Preparing to Stitch Loading the Bobbin Case (continued) Perform the bobbin thread tension test to set the correct tension: Place the bobbin case flat on its side, on your palm. Pull up on the thread. If the thread tension is correct, the thread will run freely and the bobbin case will rise into a vertical position without lifting off your hand.
-
Page 31: Changing The Needle
Preparing to Stitch Changing the Needle Parts & Tools Needed Needle Flat Head Needle Note: It is important Magnet Screwdriver to choose the right style and size of needle for your project. For more information, see page 68. Misc. Container Misc. - Page 32 Preparing to Stitch Changing the Needle (continued) Attach the needle magnet to the needle, opposite from the scarf. Needle Magnet The scarf is the indent on the back of the needle. Turn the needle so that the magnet points as straight as possible away from the presser bar. Note: Move the needle directly.
-
Page 33: Threading The Machine
Preparing to Stitch Threading the Machine Overview Thread takes the following path from the thread stand to the needle: Thread Stand Lower Thread Guide Thread Mast Needle Bar Eyelet Thread Guide Rod Eye of Needle Small Thread Tensioner Large Thread Tensioner Thread Guide Arm Rod Take-Up Lever... - Page 34 Preparing to Stitch Threading the Machine (continued) Parts & Tools Needed Note: Your top thread and your bobbin thread should be similar in type and weight. For more Spool Caps information on choosing thread, see page 70. (for spool thread only) If using cone thread: Place the thread on the front post of the thread stand.
- Page 35 Preparing to Stitch Threading the Machine (continued) Run the thread through the thread mast Run the thread through the large thread guide loop directly above the thread stand. tensioner—first between the two discs, then over the check spring. Thread Mast Check Spring Guide Loop Large Thread Tensioner...
- Page 36 Preparing to Stitch Threading the Machine (continued) Run the thread down and through the lower Cut any excess thread with the thread thread guide. cutter near the lower thread guide. Thread Cutter Lower Thread Guide Run the thread down and through the front Flip up the power switch to turn on the of the needle bar eyelet.
-
Page 37: Adjusting Thread Tension
Preparing to Stitch Adjusting Thread Tension Overview You must adjust the thread tension with the tension knob every time you change your needle, thread, bobbin, or fabric, as well as every time you switch between Sewing Mode and Quilting Mode. In addition to the tension knob, there are many factors that influence thread tension. - Page 38 Preparing to Stitch Adjusting Thread Tension (continued) Stitch into scrap material and check for unbalanced thread tension. Use material of the same type and thickness as the material that you will be sewing or quilting with next. Top Tension Low Balanced Tension Top Tension High Bottom thread pulling...
-
Page 39: Sewing Mode
Sewing Mode Sewing Mode Switching to Sewing Mode ..................24 Sewing Mode Settings ..................26 Swapping the Presser Foot ..................27 Using the Seam Guide ..................28 Sewing: Getting Started ..................29... -
Page 40: Switching To Sewing Mode
Sewing Mode Switching to Sewing Mode Parts & Tools Needed Presser Foot Foot Holder Pedal Foot Storage Container Instructions Take the following steps to prepare the machine for sewing: If the machine is currently on a quilting frame, remove it by following the steps on page 45. Rotate the hand wheel until the needle is in the highest position. - Page 41 Sewing Mode Switching to Sewing Mode (continued) Remove the magnetic quilting plate from Use the foot screw to attach the presser foot holder to the presser bar. the needle area. The machine will beep to show that it has switched to Sewing Mode. Presser Foot Holder Quilting Plate...
-
Page 42: Sewing Mode Settings
Sewing Mode Sewing Mode Settings Instructions Adjust the following settings before you begin stitching in Sewing Mode. If needed, continue to adjust these settings as you sew. Press the speed buttons to adjust the speed setting. Speed Setting Speed Buttons The speed setting functions differently depending on whether or not the foot pedal is plugged in: •... -
Page 43: Swapping The Presser Foot
Sewing Mode Swapping the Presser Foot Overview The Little Rebel is compatible with snap-on presser feet made for low-shank sewing machines. The following presser feet are included with your machine: Quilter Foot Quilter Foot w/ Edge Guide Ideal for quilt piecing. ¼" seam Identical to Quilter Foot, but with allowance on right, ⅛"... -
Page 44: Using The Seam Guide
Sewing Mode Using the Seam Guide Parts & Tools Needed Seam Guide Foot Storage Container Instructions The seam guide is an optional attachment that helps you stitch straight lines while in Sewing Mode. Take the following steps to attach the seam guide to the presser foot holder: Loosen the thumb screw on the back of Align the seam guide as desired, either with a needle plate marking or with a line you... -
Page 45: Sewing: Getting Started
• Sewing Mode Settings (page 26) • Adjusting Thread Tension (page 21) Follow the steps in this task to become familiar with sewing on the Little Rebel. Use scrap material so you can experiment, get comfortable, and start your projects with confidence. Making mistakes is... - Page 46 Sewing Mode Sewing: Getting Started (continued) Straighten out both threads under the Begin stitching, either by applying pressure presser foot and lay them behind the to the foot pedal or by pressing the start/ stop button on the machine. needle plate, pointing away from you. Presser Foot Start/Stop Button Press to start stitching.
- Page 47 Sewing Mode Sewing: Getting Started (continued) If you are piecing layers of fabric together, When you have completed a line of stitches, backstitch at the beginning and end of your stop the machine either by pressing the seam so that the stitches do not come loose. start/stop button or by releasing your foot To backstitch, press the backstitch button from the foot pedal.
-
Page 48: Quilting Mode
Quilting Mode Quilting Mode Switching to Quilting Mode ................... 33 Quilting Mode Settings ..................37 Choose Your Quilting Setup ................... 39 Frame Quilting: Machine Setup ................40 Frame Quilting: Getting Started ................44 Frame Quilting: Machine Takedown ............... 45 Off-Frame Quilting: Preparing Your Quilt ..............46 Off-Frame Quilting: Getting Started ............... -
Page 49: Switching To Quilting Mode
Quilting Mode Switching to Quilting Mode Parts & Tools Needed Quilting Hopping Hopping Foot Foot Pedal Plate Foot Height Tool (off-frame quilting only) Foot Storage Accessory Box Misc. Container Container Instructions Take the following steps to prepare the machine for quilting, whether on or off the frame: Rotate the hand wheel until the needle is Remove the foot screw holding the presser foot holder to the presser bar. - Page 50 Quilting Mode Switching to Quilting Mode (continued) If the bobbin thread is currently pulled up, retract it through the needle plate hole by removing and reinserting the bobbin case. Bobbin Thread Bobbin Case Slide the magnetic quilting plate over the Use the foot screw to loosely attach the hopping foot to the presser bar.
- Page 51 Quilting Mode Switching to Quilting Mode (continued) Frame Quilting Off-Frame Quilting Lift up the hopping foot and slide your quilt Slowly rotate the hand wheel until the needle and presser bar are in the lowest sandwich under it. position. Note: If you have not yet prepared a quilt sandwich, turn to page 46.
- Page 52 Quilting Mode Switching to Quilting Mode (continued) Frame Quilting Off-Frame Quilting Remove the height tool and rotate the hand Rotate the hand wheel until the needle is in wheel until the needle is in the highest the highest position and remove your quilt position.
-
Page 53: Quilting Mode Settings
Quilting Mode Quilting Mode Settings Instructions Adjust the following settings before you begin stitching in Quilting Mode. If needed, continue to adjust these settings as you quilt. Press the Q button to toggle stitch regulation on/off. Q Button Stitch regulation ON: Speed is determined by Stitch regulation OFF: Speed is determined the movement of fabric over the fabric sensor. - Page 54 Quilting Mode Quilting Mode Settings (continued) Stitch Regulation Tips When you quilt with stitch regulation turned on, the machine will skip stitches if your fabric does not make consistent contact with the fabric sensor. To ensure consistent contact, do the following: Cut your quilt batting and quilt backing at If you are frame quilting, do the following: least 10 inches longer than your quilt top.
-
Page 55: Choose Your Quilting Setup
Quilting Mode Choose Your Quilting Setup The remainder of this section is broken into two parts: one for frame quilting and one for off-frame quilting. Turn to the indicated page number and complete the tasks as presented for your setup. Frame Quilting Off-Frame Quilting page 40... -
Page 56: Frame Quilting: Machine Setup
Frame Quilting: Machine Setup Instructions If you have completed first-time setup for frame quilting with the Little Rebel (see page 3), take the following steps to reinstall the machine on the frame anytime after you have removed it: Verify that the quilting plate is attached Turn off the machine by flipping down the and the hopping foot installed. - Page 57 Quilting Mode Frame Quilting: Machine Setup (continued) Remove the take-up rail from the quilting frame. See your frame instruction manual for details. Take-Up Rail Unlock the four sewing machine clamps on the top plate and slide them to the outer edges. Sewing Machine Clamp (x4) Top Plate Use the carrying handle to lift the machine and place it squarely on the top plate.
- Page 58 Quilting Mode Frame Quilting: Machine Setup (continued) Slide the sewing machine clamps up against the machine and lock them in place. Guide the take-up rail through the machine throat and reinstall the rail on the frame. See your frame instruction manual for details. Plug in the power cord and close the power Flip up the power switch to turn on the cord retainer.
- Page 59 Quilting Mode Frame Quilting: Machine Setup (continued) Plug the stitch controller into the back of the machine, just below the power cord. Stitch Controller...
-
Page 60: Frame Quilting: Getting Started
Quilting Mode Frame Quilting: Getting Started Instructions If you have completed the following tasks, you are ready to quilt with the Little Rebel on your frame: • Preparing Your Frame (page 3) • Loading the Bobbin Case (page 13) • Threading the Machine (page 17) •... -
Page 61: Frame Quilting: Machine Takedown
Quilting Mode Frame Quilting: Machine Takedown Instructions Take the following steps to remove the machine from the frame: Turn off the machine by flipping down the Unlock the four sewing machine clamps power switch on the back. on the top plate and slide them to the outer edges. -
Page 62: Off-Frame Quilting: Preparing Your Quilt
The coarse and pimpled side is the "scrim side." Instructions Follow the steps in this task to prepare your quilt sandwich for off-frame quilting with the Little Rebel. To prepare a quilt sandwich for frame quilting, see your frame instruction manual instead. - Page 63 Quilting Mode Off-Frame Quilting: Preparing Your Quilt (continued) Fold your quilt top in half with the right side Lay your quilt backing down with the wrong facing outward. Mark the center of the side facing up. top edge with a pin or marker on the right side of the fabric.
-
Page 64: Off-Frame Quilting: Getting Started
Quilting Mode Off-Frame Quilting: Getting Started Instructions If you have completed the following tasks, you are ready to quilt without a frame in Quilting Mode: • Off-Frame Quilting: Preparing Your Quilt (page 46) • Loading the Bobbin Case (page 13) •... - Page 65 Quilting Mode Off-Frame Quilting: Getting Started (continued) Slide your quilt sandwich under the While still holding the top thread, pull hopping foot. Align the fabric so that the your fabric to the side until the top thread pulls up a loop of the bobbin needle is directly above your starting point, where you want to begin stitching.
- Page 66 Jane Doe quarter-inch from the edges of the quilt top. (Later, you will return to this step and stitch a normal design.) ¼” Grace ¼” Quilt Top Start/Stop Button Press to start stitching. Press again to stop stitching. (Disabled Batting and Backing while foot pedal is plugged in.)
- Page 67 Quilting Mode Off-Frame Quilting: Getting Started (continued) When you have completed your design, stop Keep holding the loop and pull your the machine either by pressing the start/stop fabric to the side again. Continue until button or by releasing your foot from the the top thread pulls up a loop of the foot pedal.
-
Page 68: Accessories
Accessories Accessories Using the Extension Table ..................53 Using the Needle Threader..................55 Using the Thread Nets ..................56... -
Page 69: Using The Extension Table
Accessories Using the Extension Table Parts & Tools Needed Extension Table Attaching the Table Whenever the machine is off the frame, you can attach the extension table. The extension table extends the flat surface area of the machine bed, making it easier to move fabric under the needle. Take the following steps to attach the extension table: Rotate the hand wheel until the needle is Slide the extension table onto the machine... - Page 70 Accessories Using the Extension Table (continued) Accessing the Bobbin Case To access the bobbin case while the extension table is installed, lift the front half of the table. Removing the Table Take the following steps to remove the extension table from the machine: Rotate the hand wheel until the needle is in Flip up the six feet on the underside of the the highest position.
-
Page 71: Using The Needle Threader
Accessories Using the Needle Threader Parts & Tools Needed Needle Threader Misc. Container Instructions Take the following steps to push thread through the eye of the needle with the needle threader: Turn the needle threader so that the Gently push the threader against the needle. triangle marks are on the top and bottom. -
Page 72: Using The Thread Nets
Accessories Using the Thread Nets Parts & Tools Needed Thread Net Thread Net Measuring 10 cm (x2) 14 cm (x2) Tape Misc. Container Misc. Container (not included) Instructions Thread nets help thread cones unwind evenly on the machine and prevent them from becoming tangled while in storage. - Page 73 Accessories Using the Thread Nets (continued) Use your fingers to widen the thread net and push it over the base of the thread cone. Cover at least half of the cone with the net, and leave the rest of the net inside the cone. If the machine is currently threaded, place the thread cone back onto the thread stand and make sure that the thread mast guide loop is still properly threaded.
-
Page 74: Service
Service Service Preparing the Oil Bottle ..................59 Oiling and Cleaning ....................60 General Troubleshooting ..................63 Bobbin Wind Troubleshooting ................65... -
Page 75: Preparing The Oil Bottle
Service Preparing the Oil Bottle Parts & Tools Needed: 2. Screw the cap back onto the bottle. Oil Bottle Alcohol Wipe Tool Box Tool Box Instructions Take the following steps to prepare the oil bottle for use in oiling the machine: 1. -
Page 76: Oiling And Cleaning
Service Oiling and Cleaning Parts & Tools Needed Lint Brush Oil Bottle Tool Box Tool Box Instructions Oil and Clean: • At the start of a new project Machine • After 20 hours of use • After machine sits unused for more than 30 days Hook Assembly •... - Page 77 Service Oiling and Cleaning (continued) 1. Clear debris from the spring and discs of 1. In and around the hook assembly, clear the small thread tensioner. away any lint, cloth, and thread remnants using the lint brush. Hook Assembly Small Thread Tensioner 2.
- Page 78 Service Oiling and Cleaning (continued) 1. Open the head plastic. 1. Turn on the machine. Run the machine without a bobbin installed for about 10 seconds. This will distribute the oil in the hook assembly without getting oil on your bobbin thread.
-
Page 79: General Troubleshooting
(page 7). Machine is not turned on Flip up the power switch on the back of the machine (page 7). If your problem persists, contact a Grace Company support technician at 1-800-264-0644. Machine is skipping Damaged needle Install a new needle (page 15). - Page 80 Clean the machine (page 60). Burred bobbin Check bobbin for sharp edges and replace if needed. If your problem persists, contact a Grace Company support technician at 1-800-264-0644. Thread is bunching up Bobbin case improperly threaded Make sure the bobbin is properly...
-
Page 81: Bobbin Wind Troubleshooting
Service Bobbin Wind Troubleshooting A quality bobbin wind is essential for a properly functioning machine and for setting your baseline thread tension. The thread on the bobbin should be smooth and evenly wound. The threads should be tightly packed together. Bobbin Wound Too Loose The tension of the bobbin wind is determined by the bobbin thread tensioner. - Page 82 Service Bobbin Wind Troubleshooting (continued) 1. Unthread the bobbin thread tensioner. With a 7 mm wrench (not included), loosen the nut at the base of the tensioner. 1. Turn the top part of the tensioner assembly (shown in blue) a full rotation to adjust the height of the tension discs.
-
Page 83: Appendix
Appendix Appendix Choosing Your Needle ................... 68 Choosing Your Thread ..................70 Index ........................73... -
Page 84: Choosing Your Needle
• Never use a needle that is broken, bent, or burred. Needle Style The Little Rebel uses MR (multi-range) needles. MR needles are highly durable and specially engineered to reduce needle deflection, skipped stitches, and breakage of needle and thread. - Page 85 Appendix Choosing Your Needle (continued) Parts of a Needle 90° Shank Shaft Groove Scarf Point • Shank: The short, thick part of the needle that is inserted up into the needle bar. • Shaft: The long, narrow part of the needle. Needle size is based on the diameter of the needle shaft.
-
Page 86: Choosing Your Thread
Appendix Choosing Your Thread General Tips When choosing thread for your project, do the following for best results: • Choose type based on the fabric that you are using (see next page). • Choose weight based on how visible you want your stitches to be (see next page). •... - Page 87 "Type" refers to the fiber from which the thread is made. Cotton, polyester, and silk are common thread types that are ideal for use with the Little Rebel. Every thread type has unique properties, like how stretchy it is or how easily it breaks. This means that some types of thread are more or less ideal for different types of fabric.
- Page 88 Choosing Your Thread (continued) Finesse Thread Finesse thread is specially designed by Grace Company for quilting and is a great choice for the Little Rebel machine. It is available at graceframe.com or from your local Grace Company dealer. Type: 100% polyester, 3-ply Recommended needles: Weight: 50 wt.
-
Page 89: Index
Appendix Index accessories ............52 large thread tensioner ..........21 alcohol wipe ............59 See also thread: tensioners assembly ..........lever ..........See first-time setup See presser bar lever lift ............. See presser bar lever lint brush ............... 60 backstitch button ............ 31 See also buttons bobbin needle... - Page 90 Appendix Index (continued) regulated stitching....... See stitch regulation seam guide ............28 sensor ........... See fabric: sensor settings ............See buttons Sewing Mode ........vii, 8, 23, 24, 26 skipped stitches ............63 small thread tensioner ...... See thread: tensioners speed ............
- Page 91 Information on disposal for Waste from Electrical & Electronic Equipment (WEEE): This symbol on the products and accompanying documents means that used electrical and electronic products should not be mixed with general household waste. For proper disposal for treatment, recovery and recycling, please take these products to designated collection points where they will be accepted on a free-of-charge basis.
- Page 92 www.graceframe.com 1-801-485-6688...
Need help?
Do you have a question about the Little Rebel and is the answer not in the manual?
Questions and answers