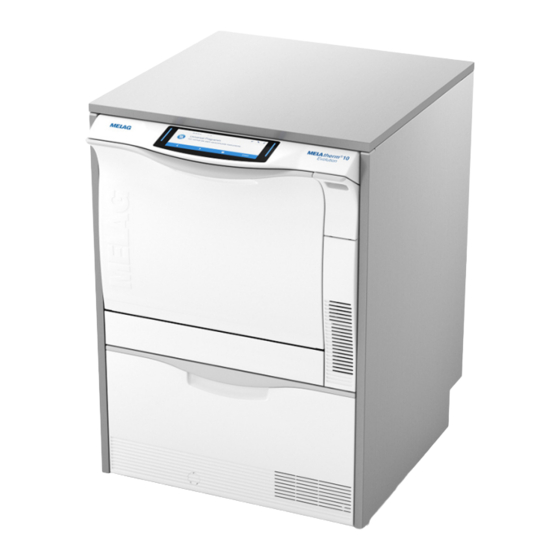
MELAG MELAtherm 10 Evolution Technical Manual
Washer-disinfector
Hide thumbs
Also See for MELAtherm 10 Evolution:
- User manual (96 pages) ,
- Technical manual (38 pages) ,
- User manual (94 pages)
Table of Contents
Advertisement
Quick Links
Technical Manual
MELAtherm
Washer-Disinfector
from software version 3.0.20
EN
Read this manual carefully and in the correct order before setting up and commissioning the device. The instructions
include important safety information. You also receive a user manual with the device. Please store this manual and the
user manual carefully and in close proximity to the device. They represent a component of the product.
®
10 Evolution
Advertisement
Table of Contents

Related Manuals for MELAG MELAtherm 10 Evolution


Summary of Contents for MELAG MELAtherm 10 Evolution
- Page 1 Technical Manual ® MELAtherm 10 Evolution Washer-Disinfector from software version 3.0.20 Read this manual carefully and in the correct order before setting up and commissioning the device. The instructions include important safety information. You also receive a user manual with the device. Please store this manual and the user manual carefully and in close proximity to the device.
-
Page 3: Table Of Contents
Contents Contents 1 General guidelines ................................ 5 Symbols used.................................. 5 Formatting rules ................................... 5 2 Installation requirements.............................. 6 Space requirements ................................ 6 Installation location................................ 7 On-site requirements................................ 9 System and network safety .............................. 11 3 Setup and installation ................................ 14 Removing from the packaging ............................ 14 Removing the stainless steel cover plate........................... 15 Aligning the device horizontally............................ 15 Aligning the device with floor unit............................ 16 4 Commissioning................................... 19... - Page 4 Contents How to set up the FTP server? ............................ 37 What do the terms IP address, subnetwork and DHCP mean? .................. 38 How to determine the software version of the device? ...................... 38...
-
Page 5: General Guidelines
They represent a component of the product. Should the manual no longer be legible, is damaged or has been lost, you can download a new copy from MELAG down- load centre at www.melag.com. -
Page 6: Installation Requirements
2 Installation requirements 2 Installation requirements Space requirements Front view and side view left PLEASE NOTE If the device is installed in an L-shaped corner, drawers to the left or right of the device may be blocked and cannot open due to the protruding display unit. Device dimensions Semi-integrated unit Free-standing... -
Page 7: Installation Location
If the device is to be set up with the additional floor unit, then the device must be secured on the wall using the wall fixture, see separate instructions (doc. AS_025-17). Property MELAtherm 10 Evolution DTA/MELAtherm 10 Evolution DTB Installation location Dry and dust-proof and free from vibrations and shocks. There are no installations in the area of the device rear. - Page 8 2 Installation requirements Property MELAtherm 10 Evolution DTA/MELAtherm 10 Evolution DTB Relative humidity max. 80 % at temperatures up to 31 °C, max. 50 % at 40 °C (decreasing in a linear fashion) Max. floor loading (normal Semi-integrated unit: Free standing:...
-
Page 9: On-Site Requirements
2 Installation requirements Installation as a top-frame device Requirements to construction-side wastewater connection for a top-frame device Connection height Remarks min. 0.74 m < 0.74 m Installation in a curve to at least 0.74 m height 1 DI water connection 4 Connection for water outlet at the syphon 2 Cold water connection 5 Type F (SCHUKO) socket 3 Dirt trap water inlet... - Page 10 Stains on the instruments or the device can develop from poor water quality. To avoid the development of stains on the instruments or in the washing chamber, MELAG recommends a final rinse with deionised water (DI water). Requirements for the water connection...
-
Page 11: System And Network Safety
MELAconnect (mobile app) querying device data Connection to the local network (LAN) MELAprint 42/44 Log printing (via CAT-5 patch cable) NOTICE When performing a device software update, use only the update data authorized by MELAG for the corresponding device type. - Page 12 2 Installation requirements Operating the device with memory media To prevent data loss, only use memory media to save the log data with the following characteristics: Functional capability (without malware etc.) Writeable Formatted with a correct file system Perform regular data backup. Restrict access to the device and systems with access authorization to the necessary circle of persons.
- Page 13 2 Installation requirements Network bandwidth / Quality of Service (QoS) The device does not place any requirements on the LAN bandwidth for data transfer, that exceed the standard time-out times of the respective logs. Process Volume max. Volume normal Transfer status, legend, program, malfunction log 10 kB 2-6 kB System log...
-
Page 14: Setup And Installation
Improper installation may lead to a short-circuit, fire, water damage or electrical shock. This could result in serious injury. Only have the device set up, installed and commissioned by people authorised by MELAG. The device is not suitable for operation in explosive areas. -
Page 15: Removing The Stainless Steel Cover Plate
3 Setup and installation As soon as the required position is reached, screw the rear middle device foot downwards using an Allen key (4 mm) and align the device horizontally. Removing the stainless steel cover plate Unscrew and remove the three TORX screws (TX 20) on the rear side of the device. -
Page 16: Aligning The Device With Floor Unit
3 Setup and installation Aligning the device with floor unit PLEASE NOTE In order to align the device with floor unit (top-frame device), it is recommended to align the floor unit first and then mount the device onto the floor unit, see Fitting the device on a floor unit [} page 17]. - Page 17 3 Setup and installation Fitting the device on a floor unit In order to fit the device on a floor unit, proceed as follows: Unscrew both rear casters including rails using a 5 mm ball-head Allen key. Reuse the screws to secure the bracket. Unscrew and remove both fore device feet and the rear device foot using an open-end wrench (size 24).
- Page 18 3 Setup and installation Screw the two brackets (scope of delivery of the floor unit) on the MELAtherm and the floor unit using the screws and flat washers (pos. a). The closed side of the bracket must point outwards. Secure the device with floor unit on the wall with the aid of the wall fixture, see “Instructions for installing the wall fixture”...
-
Page 19: Commissioning
4 Commissioning 4 Commissioning After installing the device, the following works have to be performed in accordance with the record of installation and set- up. Tools required: ▪ High-precision scales (accuracy d=0.1 g or better) ▪ Measuring cylinder with a scale of up to 250 ml (± 2 ml) Date and time Set date and time in the Settings menu. -
Page 20: Filling Process Agents
4 Commissioning Filling process agents WARNING Do not use a rinse aid to reprocess ophthalmological instruments. Remove the rinse aid container from the process agent drawer and hang the black suction lance in the suction lance bracket. Place a 5 litre container of cleaning agent and a 5 litre container of neutraliser in the device drawer, and close them with the corresponding cap (blue = cleaning agent, red = neutraliser) and suction lance. - Page 21 4 Commissioning Filling quantity / weight indicated on the label Place an empty measurement Calculating density: cylinder on the scales and set 5500 g Density (p) = to zero. 5000 ml p = 1.10 g/ml Fill at least 200 ml of cleaning agent into the measuring cylinder and read the actual amount.
- Page 22 4 Commissioning Either place the container with rinse aid on the scales and ascertain the total weight or reset the scales to zero by pressing the tare key if possible. Ê As soon as the partial cycle for disinfection is displayed and the metering temperature is reached, the rinse aid metering pump will start metering the rinse aid audibly.
-
Page 23: Exceptions When Setting Up At Altitudes
4 Commissioning V (actual) V (target) Example: Calculated metering quantity: V (actual) = 28 ml Metering quantity acc. to log printout: V (target) = 27.8 ml 28 ml x = 0.7 % 27.8 ml The check of the metering quantity reveals a deviation of 0.7 %. Read off the nominal value of the cleaning agent from the program log and compare this value with the calculated actual value before calculating the percentage of deviation. -
Page 24: Validation
▪ The metering process has been checked in terms of the metering quantity. ▪ The basis basket is in place. Validation Detailed information regarding the validation of the device can be found in the separate document “Recommendations for the validation of MELAtherm 10 Evolution” (doc. ME_007-22). -
Page 25: Process-Relevant Parameters (Vrp)
If changes are made to the factory-set parameters during commissioning, then enter these in the record of installation and setup. Improper changes to the parameters can lead to personal injury and/or property damage as well as damage to the device. MELAG does not accept any liability for such damage. Universal-Program Factory settings... -
Page 26: Quick-Program
5 Process-relevant parameters (VRP) Quick-Program Factory settings Quick-Program Pre-cleaning Cleaning Neutralisa- Intermediate Disinfection Drying tion rinsing Partial cycle repetition Holding time [sec.] Temperature [°C] Metering temperature [°C] R: 40 K: 70 Metering concentration R: 6 N: 1.5 K: 0.3 [ml/l] DI proportion [%] Quantity of water [l]... -
Page 27: Intensive-Program
5 Process-relevant parameters (VRP) Intensive-Program Factory settings Intensive-Program Pre-cleaning Cleaning Neutralisa- Intermediate Disinfection Drying tion rinsing Partial cycle repetition Holding time [sec.] Temperature [°C] Metering temperature [°C] R: 40 K: 70 Metering concentration R: 10 N: 1.5 K: 0.3 [ml/l] DI proportion [%] Quantity of water [l]... -
Page 28: Ophthalmo-Program
5 Process-relevant parameters (VRP) Ophthalmo-Program Factory settings Ophthalmo-Program Pre-cleaning Cleaning Neutralisa- Intermedi- Disinfection Drying tion ate rinsing Partial cycle repetition Holding time [sec.] 1800 Temperature [°C] Metering temperature [°C] R: 40 Metering concentration R: 6 N: 1.5 [ml/l] DI proportion [%] Quantity of water [l]... -
Page 29: Rinsing
5 Process-relevant parameters (VRP) Rinsing Factory settings “Rinsing” program Rinsing Partial cycle repetition Holding time [sec.] Temperature [°C] Metering temperature [°C] Metering concentration [ml/l] DI proportion [%] Quantity of water [l]... -
Page 30: Settings
6 Settings 6 Settings Menu structure The following menu structure shows the menu Diagnosis and service. This menu can only be accessed by enter- ing the service PIN. Among other things, the service technician can adjust factory parameters or reset the maintenance counter after maintenance. -
Page 31: Setting The Ip Address
6 Settings Setting the IP address NOTICE The setting up in the (practice) network will require in-depth understanding of the network technology. Handling errors of IP addresses can result in malfunctions and data loss in your user network. IP addresses may only be set by the (practice) network system administrator. The device is equipped as standard with IP addresses which all belong to a common network with the subnet mask stat- ed in the table “Pre-setting of the IP addresses in the device ex works”. -
Page 32: Selecting The Connection Via Ftp Or Tcp
6 Settings Press CONFIRM to accept the changes. Repeat step 3 to 6 in order to edit more digits. Selecting the connection via FTP or TCP Connection via FTP ü The Settings > Log settings > Network menu is open. Press FORWARDS/BACK until Type of connection is displayed. - Page 33 6 Settings Press FORWARDS/BACK to change the parameter. PLEASE NOTE Holding the FORWARDS or BACK button pressed accelerates the increase or decrease. Press CONFIRM to accept the changes. PLEASE NOTE If the device is integrated in the (practice) network via a TCP connection, you will require a suitable program, e.g.
-
Page 34: Frequently Asked Questions (Faq)
You can then open files with this ending via a double-click in Windows Editor. Alternatively, you can open all text and graphic logs with the documentation software MELAview/MELAtrace. MELAG has developed MELAview/MELAtrace for the display and sorting of logs and for recording graphic logs during a program... -
Page 35: What Does The Log Name Mean
7 Frequently Asked Questions (FAQ) What does the log name mean? Complete encoding of both the serial number and the total batch number is performed in the 8 digit log name. Manually re-named files are always easy to identify but not to be recommended. A log name is never assigned twice. The log name achieves good log sortability. -
Page 36: How To Format A Cf Card On The Computer Correctly
FAT16 or FAT32. CF cards from which a software update is to be performed may only be formatted in a FAT16 file system. The device can only file or read data on CF cards formatted in this way. CF cards supplied by MELAG fulfil these require- ments and have already been formatted. -
Page 37: How To Integrate The Device In A (Practice) Network
How to set up the FTP server? The following describes how to log on a device as user using the example of the MELAG FTP server: Install the MELAG FTP server on your computer. If you have MELAview/MELAtrace, start the installation directly from the installation assistant of MELAview/MELAtrace and follow the instructions for installation. - Page 38 7 Frequently Asked Questions (FAQ) Messages which could be displayed in the window of the FTP server Meaning The following line is displayed for a longer time period: ▪ The cable connection is defective. ▪ The computer IP address is not set 14:12:14 Server has been started at Port 21 correctly in the device (see Setting the...
- Page 40 MELAG Medizintechnik GmbH & Co. KG Geneststraße 6-10 10829 Berlin Germany Email: info@melag.com Web: www.melag.com Original instructions Responsible for content: MELAG Medizintechnik GmbH & Co. KG We reserve the right to technical alterations Your stockist...
Need help?
Do you have a question about the MELAtherm 10 Evolution and is the answer not in the manual?
Questions and answers