MELAG MELAtherm 10 Evolution User Manual
Washer-disinfector
Hide thumbs
Also See for MELAtherm 10 Evolution:
- User manual (96 pages) ,
- Technical manual (38 pages) ,
- Technical manual (40 pages)
Table of Contents
Advertisement
Quick Links
User Manual
MELAtherm
Washer-Disinfector
from software version 3.0.20
EN
Dear customer,
We thank you for your confidence demonstrated by the purchase of this MELAG product. As an owner-run and operated
family concern founded in 1951, we have a long history of successful specialization in hygiene products for practice-
based use. Our focus on innovation, quality and the highest standards of operational reliability has established MELAG
as the world's leading manufacturer in the instrument reprocessing and hygiene field.
You, our customer are justified in your demand for the best products, quality and reliability. Providing
hygiene"
and
"Quality – made in
agement system is subject to close monitoring: one instrument to this end is our annual multi-day audit conducted in ac-
cordance with EN ISO 13485. This guarantees that all MELAG products are manufactured and tested in accordance with
strict quality criteria.
The MELAG management and team.
®
10 Evolution
Germany", we guarantee that these demands will be met. Our certified quality man-
"competence in
Advertisement
Table of Contents

Subscribe to Our Youtube Channel
Related Manuals for MELAG MELAtherm 10 Evolution


Summary of Contents for MELAG MELAtherm 10 Evolution
- Page 1 3.0.20 Dear customer, We thank you for your confidence demonstrated by the purchase of this MELAG product. As an owner-run and operated family concern founded in 1951, we have a long history of successful specialization in hygiene products for practice- based use.
-
Page 3: Table Of Contents
Contents Contents 1 General guidelines ................................ 5 Symbols used.................................. 5 Formatting rules ................................... 5 Disposal .................................... 5 2 Safety..................................... 6 3 Performance specifications .............................. 8 Intended use .................................. 8 User benefits .................................. 8 Program sequence................................ 9 Process agents .................................. 10 4 Description of the device.............................. 11 Scope of delivery................................ 11 Views of the device ................................ 11 Symbols on the device ............................... 13 Operating panel and acoustic signal .......................... 15 Menu structure ................................... 18... - Page 4 Contents Removing the load after program end.......................... 40 7 Logging .................................... 41 Batch documentation ................................. 41 Output media.................................. 41 Outputting logs immediately and automatically........................ 42 Subsequent log output ............................... 43 Deleting the saved logs.............................. 44 Determining the format for the program logs ........................ 44 Finding the logs.................................. 47 8 Settings .................................... 48 Settings menu .................................. 48 Log settings.................................. 49 Setting the date and time .............................. 54...
-
Page 5: General Guidelines
Make sure that you always have access to digital or printed version of the user manual. Should the manual no longer be legible, is damaged or has been lost, you can download a new copy from MELAG down- load centre at www.melag.com. -
Page 6: Safety
Use only original MELAG accessories or those from other suppliers authorised for use by MELAG. When using non-MELAG accessories for the mounting of instruments (especially hollow-body instruments) comply with the information from the manufacturer of the accessories. - Page 7 Never operate the device unattended (e.g. overnight). Unsupervised operation of the device can result in damage to the device or your facility and is performed at your own risk. In such a case, MELAG does not accept any liability. Process agents...
-
Page 8: Performance Specifications
3 Performance specifications Intended use The MELAtherm 10 Evolution DTA/MELAtherm 10 Evolution DTB is intended for use in a medical context such as a clin- ic or medical and dental practices. EN ISO 15883-1 and -2 defines it as a washer-disinfector intended for reprocessing ... -
Page 9: Program Sequence
3 Performance specifications Drawer for process agents The drawer for the process agents is located in the lower area of the device in which the cleaning agent, neutraliser and rinse aid containers are stored. Automatic conductivity measurement If the device is supplied with DI water in the final rinse, the DI water fed in is subject to automatic internal conductivity ... -
Page 10: Process Agents
material compatibility. MELAG recommends using MEtherm process agents. The suitability of the MEtherm process agents for use in MELAtherm has been proven in comprehensive cleaning effectiveness and material-compatibility tests. Other process agents must not be used if their performance and safety for use with the MELAtherm have not been conformed by the manufacturer of the process agents. -
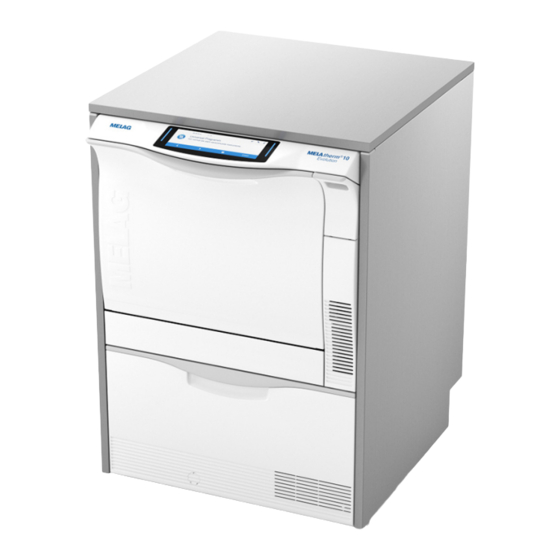
Page 11: Description Of The Device
4 Description of the device Scope of delivery Please check the scope of delivery before setting up and connecting the device. Standard scope of delivery ▪ MELAtherm 10 Evolution Washer-Disinfector ▪ User manual ▪ Technical manual ▪ Record of installation and setup ▪... - Page 12 4 Description of the device Cover card slot open Card slot Ejection button Ethernet data connection View from rear Connection for de-ionised water water) Connection for cold water Effluent connection Transport rollers Ethernet data connection for permanent network connection Mains cable...
-
Page 13: Symbols On The Device
4 Description of the device View from inside Connection tube for injector rails Cold water (CW) inflow and de-ionised water (DI) Salt container Lower rinse arm Coarse and fine sieve Process agent drawer, open Drying fan pre-filter Assignment of the process agents Container for rinse aid with suction lance Suction lance bracket... - Page 14 4 Description of the device Indicates the permitted temperature range (min./max.) of the water supply. Flow pressure on the water inflow connected from min. to max. Electrical connection of the device: AC current Internal device fuse, rated in amperes [A] The user manual includes important safety information.
-
Page 15: Operating Panel And Acoustic Signal
In the event of warning and malfunction messages, the serial number of the device and the ID of the event are displayed. This is the information that can be transmitted via QR code to MELAconnect or manually to the troubleshooting section of the MELAG website to access context-sensitive troubleshooting help. Context menu The context menu displays the submenus, modes and function buttons temporarily and in a context-dependent fashion. - Page 16 4 Description of the device LED display and acoustic signals The LED display to the left and right of the main area indicates operating states by colour. An acoustic signal is linked to the colour of the LED display and indicates an expected event. Colour of the LED Description Blue...
- Page 17 Malfunction Documentation Additional markings that indicate the availability of assistance (e.g. in the user manual, in MELAconnect or on the troubleshooting area in the MELAG website) regarding the issue with which the current message is concerned QR code Action bar...
-
Page 18: Menu Structure
4 Description of the device Menu structure Universal-Program Quick-Program Intensive-Program Ophthalmo-Program Rinsing Emptying Conductivity measurement DI Air removal Regeneration Time metering 60 s Log output Output internal log memory Select output medium:automatic CF card MELAprint Computer All logs Last log All malfunction logs Last malfunction log Log selection... -
Page 19: Water Softening Unit
4 Description of the device Water softening unit The tap water is processed in the internal water softening unit to produce an optimal cleaning outcome. Use coarse-grain regeneration salt (NaCl) to regenerate the water softening unit. Water hardness conversion table °dH mmol/l °f... -
Page 20: First Steps
Record of installation and setup The record of installation and setup is to be completed by the responsible stockist and a copy sent to MELAG as proof of the correct setup, installation and initial commissioning. This is a constituent part of any guarantee claim. -
Page 21: Switching The Device On And Off
5 First steps Switching the device on and off Switch the device on or off at the power switch. Video tutorials The Multimedia menu contains video tutorials which describe the use of this washer-disinfector in a number of operat- ing situations. View of the video control Button Description... -
Page 22: Melaconnect App
▪ Locating malfunctions and accessing solutions and assistance immediately ▪ Performing quick paperless documentation of routine checks of MELAG sealing devices ▪ Contacting the service technician (contact data must be entered manually) In order to connect the MELAconnect app with your MELAG device, see the Connectivity [} page 57] section. -
Page 23: Inserting The Basis Basket
NOTICE Malfunctions of the water softening unit from unsuitable regenerating salt. Fine grain regenerating salt can cause device malfunctions. MELAG does not recommend the use of pellets, as the salt dissolves too slowly. Use only special, coarse grain regenerating salt (additive-free NaCl). - Page 24 5 First steps Refilling with regenerating salt Video tutorial See also “Refilling Regenerating Salt”. Insufficient regenerating salt or its absence will result in the display of the corresponding display message. ▪ If the display shows the message There is almost no regenerating salt left. Re-fill the regenerating salt soon., fill the regenerating salt immediately, or upon the display of the next message at the latest.
-
Page 25: Regenerating The Water Softening Unit
5 First steps Remove the filling funnel and any excess salt residue from the washing chamber. NOTICE The salt has a corrosive effect on stainless steel. Salt residue must be removed from the washing chamber and the screw cap of the salt container be closed tightly to protect the instruments and the device. -
Page 26: Holding Process Agents Ready
5 First steps Holding process agents ready Video-Tutorial See also “Replacing Process Agents”. CAUTION Danger of chemical burns! Inappropriate handling of the process agents can lead to chemical burns and injury to health. Comply with the information from the manufacturer of the process agents. In the case of damage, every type of liquids (e.g. - Page 27 5 First steps Replacing the containers for cleaning agent and neutraliser Unscrew the suction lance from the container and place it in the suction lance bracket. Place the new container in the process agents drawer and screw on the suction lance. Ê...
-
Page 28: Removing Air From The Metering System
5 First steps Transfer the rinse aid from the original packaging into the MELAG container. Ê Fill the container with rinse aid ¾ full, otherwise the rinse aid will overflow during insertion of the suction lance. Screw the suction lance onto the container. -
Page 29: Cleaning And Disinfection
▪ transmission instruments e.g. handpieces and contra angles by using the adapter Further accessories may be required when reprocessing ophthalmological instruments (not available from MELAG). The operator is responsible for validating the procedure in combination with special load accessories. It is especially important that feed lines to hollow-body instruments are maintained without kinking and as short as possible. -
Page 30: Arranging The Load
6 Cleaning and disinfection Arranging the load NOTICE Some brands are only authorised for thermal disinfection after a specific year of manufacture. Only reprocess instruments designed by their manufacturer for automatic reprocessing in a washer- disinfector. Comply with the information from the relevant instrument manufacturer. In order to arrange the load, the basis basket including insert racks, instrument baskets, wash trays and/or sieve cas- ... -
Page 31: Reprocessing Dental Transmission Instruments
Rinse all hollow-body instruments after use with patients or before automatic reprocessing. Reprocess only those hollow-body instruments which guarantee sufficient and reproducible rinsing. Remove instruments with a recognisably reduced throughflow. Use only MELAG adapters to reprocess hollow-body instruments on the injector rail. The suitability of a hollow-body ... - Page 32 6 Cleaning and disinfection WARNING Do not use rinse aid for reprocessing ophthalmic instruments! If present, remove the rinse aid container from the process agents drawer and hang the black suction lance in the suction lance bracket so that the screw-on lid is positioned at the top. The process agent hoses only need to be placed head-first in the suction lance bracket if the metering hoses are to be bled, see Removing air from the metering system...
-
Page 33: Overview Of Programs
6 Cleaning and disinfection Routine check Perform a routine check of the pH value after reprocessing of the hollow-body instruments. Blow through the hollow-body instrument with medical compressed air onto indicator paper (e.g. from Macherey- Nagel: PEHANON pH 4.0-9.0). The measurement accuracy must amount to or exceed 0.5. Compare the value displayed on the indicator paper with the pH value of the final rinse water from the previous performance qualification. -
Page 34: Selecting, Starting And Monitoring The Program
6 Cleaning and disinfection Selecting, starting and monitoring the program Ensure compliance with the following prerequisites in order to secure the optimal rinsing performance before every pro- gram start: The process agents containers are sufficiently full. The injector rail nozzles / adapters are clean. The rinse arms can be turned freely. -
Page 35: Manual Program Abort
6 Cleaning and disinfection Manual program abort NOTICE Aborting a current program by deactivation at the power switch may cause damage at the device. Never abort a program by switching off at the power switch. Aborting the program during drying WARNING Nucleation because of poor drying. -
Page 36: Authentication And Batch Approval
6 Cleaning and disinfection Aborting the program before the start of drying WARNING Danger of contamination through program abort! Aborting a program before the drying phase begins means that the load is classed as not having been disinfected. This endangers the health of the patient and the practice team. CAUTION Danger of burns from hot instruments and surfaces. - Page 37 6 Cleaning and disinfection Enter your four-digit user PIN and press CONFIRM. Ê The door is unlocked. Ê The Approve batch view is displayed. Press DETAILS for information for the batch approval assessment criteria. Press FORWARDS and read all the assessment criteria carefully. Check the reprocessed batch using the assessment criteria outlined.
- Page 38 6 Cleaning and disinfection Press FORWARDS and read all the assessment criteria carefully. Check the reprocessed batch using the assessment criteria outlined. Press LEAVE to switch to Approve batch. Press YES if the assessment criteria are met. Press NO if the assessment criteria are not met. Ê...
- Page 39 6 Cleaning and disinfection Skip authentication If both batch approval and authentication have been activated, you will automatically be requested to assess the batch and provide it with approval after the reprocessing program has been completed successfully. You have the option to skip the authentication and continue in the process.
-
Page 40: Removing The Load After Program End
6 Cleaning and disinfection Removing the load after program end CAUTION Danger of burns from hot instruments and surfaces. The instruments and chamber can remain hot even after the device has been switched off. Allow the device to cool before removing the instruments. Wear suitable protective gloves. -
Page 41: Logging
[} page 49]). If the program is continued, the logs are deleted automatically; the last ten saved logs remain in the log memory. MELAG recommends outputting logs immediately. Output media You can output the logs of the finished programs via the following output media: ▪... -
Page 42: Outputting Logs Immediately And Automatically
7 Logging Insert the CF card in the slot with the contacts at the front. The MELAG lettering on the CF card points towards the LED. Slide the CF card in the card slot until it clicks. Do not use force. -
Page 43: Subsequent Log Output
7 Logging Graphic logs (optional) The following requirements must be fulfilled in order to record graphic logs: In the Settings > Log settings > Graphic logs at least one output medium is set to yes. At least one of the output media selected for graphic logs corresponds to an output medium for the text log. This means that at least the computer or the CF card must be activated as an output medium for both log types. -
Page 44: Deleting The Saved Logs
7 Logging Deleting the saved logs Save the logs on an output medium before deleting them. From the main menu, press FORWARDS/BACK until the Log output menu is displayed. Press CONFIRM to open the menu. Press CONFIRM again. If necessary, press FORWARDS/BACK until All logs is displayed. - Page 45 7 Logging Log types In addition to logs for successfully completed programs, there are other types of log. These can also be outputted via the selection list in the Log output menu. You can identify the log type by the ending of its file name. Ending Stands for Explanation...
- Page 46 >> Never change code in following row << Proof of authenticity: 0100002C1B4802BE0306064C0B3C0AD0130D9610 Must never be changed; permits inference that the data 07BD3EFECA15229618881B257A98850427217323 was created on a MELAG device and has not been 930815C1C892292E3965C071864442576F5F38AC changed. 648A82A3945A3D404141440157A94648AE494AEC >> Proof of authenticity batch log <<...
-
Page 47: Finding The Logs
7 Logging Finding the logs PLEASE NOTE Do not rename the directories, otherwise logs will be stored in both the renamed directory as well as the device directory which the device generates automatically. All memory media (CF card or computer) contain a directory with the encoded serial number of the device concerned following log output. -
Page 48: Settings
8 Settings 8 Settings Settings menu In the Settings menu, parameters such as date, time, display brightness, etc. can be set. The general procedure for making settings is described below. Opening the menu From the main menu, press FORWARDS/BACK, until the Settings menu is displayed. -
Page 49: Log Settings
8 Settings Log settings You can define settings for automatic logging in the Log settings submenu. Detailed information regarding logging is provided in chapter Logging [} page 41]. From the Settings menu, press FORWARDS/BACK until the Log settings submenu is displayed. Press CONFIRM to open the submenu. Selecting the output media In the Log settings submenu, you have the option to select the output media for automatic logging. - Page 50 8 Settings Press EDIT if the parameter is to be changed. Press FORWARDS/BACK to switch between yes and no. Press CONFIRM to accept the changes. Determining log format The following must be fulfilled or present: ü The Settings > Log settings menu is open. Press FORWARDS/BACK until Log format is displayed.
- Page 51 8 Settings Setting the network NOTICE The setting up in the (practice) network will require in-depth understanding of the network technology. Handling errors of IP addresses can result in malfunctions and data loss in your user network. IP addresses may only be set by the (practice) network system administrator. The network settings for logging can be changed in the Network submenu.
- Page 52 8 Settings PLEASE NOTE Holding the FORWARDS or BACK button pressed accelerates the increase or decrease. Press CONFIRM to accept the changes. Repeat step 3 to 6 in order to edit more digits. Type of connection Working in the Type of connection window, you can choose between an FTP and an FTP/IP connection. The following must be fulfilled or present: ü...
- Page 53 8 Settings Press EDIT. Press FORWARDS/BACK to change the parameter. PLEASE NOTE Holding the FORWARDS or BACK button pressed accelerates the increase or decrease. Press CONFIRM to accept the changes. PLEASE NOTE If the device is integrated in the (practice) network via a TCP connection, you will require a suitable program, e.g.
-
Page 54: Setting The Date And Time
8 Settings Press FORWARDS/BACK to switch between yes and no. Press CONFIRM to accept the changes. Setting the date and time Date and time of the device must be correctly set for proper batch documentation. Setting the date The following describes how to set the Day parameter. The Month and Year parameters are set according to the same procedure. -
Page 55: Setting The Display Brightness
8 Settings Press EDIT. Press FORWARDS/BACK to change the parameter. Press CONFIRM to accept the changes. Setting the display brightness The following must be fulfilled or present: ü The Settings > Display brightness menu is open. Press EDIT. Press FORWARDS/BACK to change the parameter. The colour bar gives an impression of the colour contrast. -
Page 56: Setting The Volume Of The Signal Tone
8 Settings Press CONFIRM to accept the changes. Setting the volume of the signal tone The following must be fulfilled or present: ü The Settings > Signal tone volume menu is open. Press EDIT. Press FORWARDS/BACK to change the parameter. Press CONFIRM to accept the changes. Setting the volume of the key tone The following must be fulfilled or present: ü... -
Page 57: Connectivity
Alternatively, you can enter the IP address of your device manually in the MELAconnect app. With manual entry of the IP address: Owners of multiple MELAG devices of the identical type can differentiate between their devices by viewing seri- al number on the display to check whether MELAconnect has been connected to the correct device. -
Page 58: Setting The Water Supply
8 Settings Setting the water supply If the device is connected to a DI water supply e.g. MELAdem 53/MELAdem 53 C or another water treatment unit, this must be set on the device. When the device is delivered, the water supply has been set to DI water yes. PLEASE NOTE This setting is performed by the service technician during device commissioning. -
Page 59: Administrative Settings
8 Settings Administrative settings Working in the Administration submenu, the administrator is able to assign user PINs to existing user IDs as well as activate or deactivate the authentication and batch approval. Logging in as an administrator The following must be fulfilled or present: ü... - Page 60 8 Settings User In the Settings > Administration > User menu, 20 user IDs are preset. The administrator can assign and edit a user PIN to each user ID. Every user PIN consists of four digits. Creating and assigning a new user PIN When the device is delivered, the user IDs 2 to 20 have not been assigned a PIN.
- Page 61 Changing an existing admin/user PIN When the device is delivered, the admin PIN is set to 1000 by default. MELAG recommends that you change the admin PIN upon commissioning. The admin PIN (user ID 1) can be changed just as a user ID (user ID 2-20).
- Page 62 8 Settings Press CONFIRM to accept the changes. Ê The displayed user ID is no longer assigned a user PIN. Authentication The administrator can activate or deactivate user authentication. When the device is delivered, authentication is deacti- vated by default (= inactive). Activating authentication The following must be fulfilled or present: ü...
- Page 63 8 Settings Batch approval The administrator can activate or deactivate batch approval. When the device is delivered, batch approval is deactivated by default (= inactive). Activating batch approval The following must be fulfilled or present: ü You are logged in as an administrator. ü...
-
Page 64: Function Tests
9 Function tests 9 Function tests Automatic and manual functional check Automatic The device components are monitored and checked automatically for their functionality and interplay. Should the param- eter thresholds be exceeded, the device will issue warning messages or malfunction messages. If necessary, it will abort a program with the relevant notification. -
Page 65: Maintenance
10 Maintenance 10 Maintenance Video tutorial See also “Regular Checks”. WARNING All maintenance work, especially that performed in the washing chamber may only be performed after a successfully completed reprocessing program. Wear suitable personal protective equipment (e.g. gloves). Maintenance intervals Interval Measure Device component... - Page 66 10 Maintenance Turn the grip of the coarse sieve anti-clockwise to its fullest extent and remove it upwards. Turn the knurled nut on the fine sieve anti-clockwise and remove the fine sieve upwards. Inspect the coarse and the fine sieves for soiling. Rinse the soiled sieves under running water.
-
Page 67: Cleaning On Demand
Checking the injector rail nozzles and adapters for free passage MELAG recommends checking the injector rail nozzles and adapters for free passage on a monthly basis. To test whether the injector rail nozzles and adapters are blocked, hold them upright under running water. If the water flows freely through the nozzles or adapters, they are not blocked. -
Page 68: Avoiding Staining
To avoid the development of stains and/or corrosion on the instru- ments or the washing chamber, MELAG recommends a final rinse with demineralised water (DI water). All water-bearing parts of the device consist of non-rusting material. This rules out the development of stains or rust caused by the device. -
Page 69: Maintenance
/ performance requalification. ▪ MELAG cannot provide a guarantee for non-MELAG accessories, even if they are in possession of validation. ▪ The document “Recommendations for the validation of MELAtherm 10 Evolution” (doc. ME_007-22) is available for... -
Page 70: Pause Times
▪ Decommission the device if you plan to have an immobilisation time of over two weeks. Decommissioning Preparation for transport Decommissioning in preparation for transport outside the practice should only be undertaken by MELAG-authorised per- sons. Following longer operating pauses When decommissioning the device for a long pause (e.g. -
Page 71: Transport Within The Practice
11 Pause times Transport within the practice CAUTION Danger of injury from incorrect carrying. Lifting and carrying too heavy a load can result in spinal injury. Failure to comply with these provisions can result in crushing. Comply with the safety regulations issued by your professional association. Note the following: Empty the device entirely. -
Page 72: Malfunctions
Not all messages on the display are malfunction messages. Messages are issued on the display with an event number. This number is used for identification for assistance on the MELAG website, the MELAconnect app and with the author- ised customer service or stockist technician. -
Page 73: Displaying Events In Melaconnect
Should you be unable to find the relevant event, or your efforts do not redress the problem, you can contact your nearest stockist or authorised MELAG customer service provider. Please have the serial number of your device, the event number and a detailed description of the message ready. - Page 74 12 Malfunctions Notifications Event Possible cause Remedy Banging or rattling The rinse arm bangs against instruments or Interrupt the program and re-arrange the noise in the washing containers. The load moves in the washing load. chamber during a chamber. Start the program again. program run White layer on the The internal water softening unit has not been...
- Page 75 The memory of the CF card is too large (max. 4 GB). Insert a CF card with a memory of up to 4 GB. During insertion, the MELAG lettering must point to the right. MELAG recommends the use of original accessories only.
- Page 76 The memory of the CF card is too large (max. 4 GB). Insert a CF card with a memory of up to 4 GB. During insertion, the MELAG lettering must point to the right. MELAG recommends the use of original accessories only.
- Page 77 12 Malfunctions Event Possible cause Remedy The system does not recognise an output medium. Check the settings in the Settings > Log settings menu. The system does not recognise a log printer, even though it is connected. Working in the Settings > Log settings menu, Working in the display, select the Log output at least one output is active and Immediate menu and save the log on the CF card or the...
- Page 78 [} page 54]. The CF card is not functioning correctly. Insert a CF card with a memory of up to 4 GB. During insertion, the MELAG lettering must point to There is no CF card in the slot. the right. MELAG recommends using original accessories only.
- Page 79 12 Malfunctions Event Possible cause Remedy Insufficient conductivity (> 15 µS/cm and Close the screw cap of the salt container correct- < 25 µS/cm) was measured in the washing chamber during disinfection in the Ophthalmo-Program. Setup the containers in the device with their This could be caused by carry-over of process openings facing downwards.
- Page 80 12 Malfunctions Event Possible cause Remedy The washing chamber pressure required for drying Switch the device off and then on again. has not been reached. Start the program again. The requisite rinse pressure has not been reached. Switch the device off and then on again. Start the program again.
- Page 81 12 Malfunctions Event Possible cause Remedy No cleaning agent is being pumped. Replace the cleaning agent container, working in accordance with the working safety regulations. The cleaning agent container has been exhausted, Alternatively, refill. air may have been transported. NOTICE! Use only previously used process agents! Start the “Air removal”...
- Page 82 12 Malfunctions Event Possible cause Remedy Water is in the pump sump after pumping out. Clean the coarse and fine sieves, see Regular checks and cleaning [} page 65]. The coarse or fine sieve is soiled. The non-return valve in the pump sump is missing or Insert the non-return valve in the pump sump fitted incorrectly.
- Page 83 12 Malfunctions Event Possible cause Remedy The water inflow is insufficient. Check the water inflow of the device. The water inflow tap has not been opened Open the water inflow tap completely. completely. The sieve in the cold water connection is blocked. Remove and clean the sieve in the cold water connection.
- Page 84 12 Malfunctions Event Possible cause Remedy Liquid in the device floor trough. CAUTION! Avoid contact with liquids in the floor trough; they can contain process agents. Switch off the device. Close the water inflow tap. Contact the authorised customer services/stock- ist technician. During a program run, the water level in the washing Press CONFIRM in the action bar on the display.
- Page 85 12 Malfunctions Event Possible cause Remedy Strong foam generation in the washing chamber. Load the instruments into the MELAtherm without pre-cleaning or rinse them thoroughly after placing in The instruments are pre-cleaned or placed in a a solution. foam-generating solution. Unsuitable process agents (rinse aid or cleaning NOTICE! Use only those process agents suitable agent) have been used.
- Page 86 12 Malfunctions Event Possible cause Remedy Water is in the pump sump after pumping out. Remove and clean the coarse and fine sieves, see Regular checks and cleaning [} page 65]. The coarse or fine sieves are soiled. The non-return valve in the pump sump is missing or Insert the non-return valve in the pump sump has been fitted incorrectly.
-
Page 87: Technical Data
13 Technical data 13 Technical data MELAtherm 10 Evolution DTA/DTB device dimensions Device types Semi-integrated unit Free standing Top-frame device Device dimensions 81.8 x 59.8 x 68.1 cm 83.6 x 59.8 x 68.1 cm 124 x 59.8 x 68.1 cm... - Page 88 13 Technical data Device types MELAtherm 10 Evolution DTA MELAtherm 10 Evolution DTB Wastewater Wastewater connection DN21 Max. wastewater temperature 93 °C (< 1 min, approx. 7 l) Amount of wastewater per hour approx. 38 l (in short intervals) Capacity of drain pump max.
-
Page 89: Accessories And Spare Parts
14 Accessories and spare parts 14 Accessories and spare parts You can obtain the specified articles together with an overview of further accessories from your stockist. Information regarding the instrument reprocessing accessories can be found in the current MELAG price list. Article Art. no. -
Page 90: Documentation And Approval
15 Documentation and approval 15 Documentation and approval Video tutorial See also “Batch Approval”. B*** Program / Process Process ap- Instrument Remarks Signature load success- proval? approval? ful? reprocessed on: partially reprocessed on: partially reprocessed on: partially reprocessed on: partially reprocessed on: partially reprocessed on:... -
Page 91: Glossary
The effectiveness of disinfection measures and agents trained and authorised by MELAG to perform maintenance against pathogens is divided by the Robert Koch Institute and installation work on MELAG devices. Only they may into microbiological effect ranges. The effectiveness rang- carry out this work. - Page 92 Glossary Process agent A process agent is a composition of chemical compounds for designed for reprocessing purposes e.g. of medical instruments. Process agents used in a washer-disinfector consist of a cleaning agent, neutraliser and rinse aid. Qualified electrician Person with suitable technical training, knowledge and experience so that he or she can recognise and avoid haz- ards that can be caused by electricity [see IEC 60050 or for Germany VDE 0105-100].
- Page 94 MELAG Medizintechnik GmbH & Co. KG Geneststraße 6-10 10829 Berlin Germany Email: info@melag.com Web: www.melag.com Original instructions Responsible for content: MELAG Medizintechnik GmbH & Co. KG We reserve the right to technical alterations Your stockist...
Need help?
Do you have a question about the MELAtherm 10 Evolution and is the answer not in the manual?
Questions and answers