Belmont Medical Technologies CritiCool User Manual
Hide thumbs
Also See for CritiCool:
- Service manual (133 pages) ,
- User manual (125 pages) ,
- Operational training (79 pages)
Table of Contents
Advertisement
Quick Links
Advertisement
Table of Contents
Troubleshooting

Related Manuals for Belmont Medical Technologies CritiCool


Summary of Contents for Belmont Medical Technologies CritiCool
- Page 1 ® CritiCool User Manual DDT-136-000 Rev. E English...
- Page 2 The Netherlands Switzerland Authorized Representative: Medenvoy Switzerland Gotthardstrasse 28 6302 ZUG Switzerland Copyright by Belmont Medical Technologies. All RIGHTS RESERVED Registered trademarks are the intellectual property of their respective holders. DDT-163-000 Rev. E Belmont Medical Technologies Page 2 of 121...
- Page 3 Belmont Medical Technologies representative. Training Belmont Medical Technologies or its authorized distributor will provide training for the system user according to the intended use of the system. It is the responsibility of the hospital management to ensure that only users trained to use the equipment safely operate the system.
- Page 4 Ignoring any of the warnings, precautions and safety measures indicated in this manual. c. Replacement, repair or alteration not performed by Belmont Medical Technologies or authorized personnel. d. The use of accessories and other parts or equipment made by other...
-
Page 5: Table Of Contents
CliniLogger™ Technical Specifications ....................31 CHAPTER 3: INSTALLATION ......................32 Pre-installation Requirements ......................32 Space and Environmental Requirements .................... 32 Electrical Requirements ........................32 Equipment List ............................ 32 Unpacking and Inspection ........................33 DDT-163-000 Rev. E Belmont Medical Technologies Page 5 of 121... - Page 6 Patient Thermoregulation – Step by Step Operation ................40 Operating the System ......................... 40 Inserting and Attaching Temperature probes ..................42 Connecting the Water Hoses (Tubes) to CritiCool ................43 Activating the System ......................... 44 Wrapping the Patient .......................... 45 The Control Panel ..........................
- Page 7 Converting to Excel ........................... 117 Ending a Viewing Session ........................ 118 APPENDIX A: ........................... 119 Belmont Medical Technologies CUSTOMER SERVICE REPRESENTATIVE ........119 APPENDIX B: RF SEPARATION ...................... 120 APPENDIX C: WASTE ELECTRICAL & ELECTRONIC EQUIPMENT (WEEE) ........ 121 DDT-163-000 Rev. E...
- Page 8 LIST OF FIGURES ® Figure 1: Label Placement for the CritiCool Device................14 Figure 2: Front View..........................19 Figure 3: Side View..........................20 Figure 4: Rear View..........................21 Figure 5: Measurements........................23 Figure 6: Disposable Temperature Probe Connections................ 26 Figure 7: Handle Assembly.
- Page 9 Figure 51: Example: Modes and Errors Area..................112 Figure 52: Example of Modes and Error Area..................116 Figure 53: Section of Excel Table...................... 117 Figure 54: Section of Graphic Chart....................118 DDT-136-000 Rev E Belmont Medical Technologies Page 9 of 121...
- Page 10 Table 9: Technical Messages and Alarms .................... 77 Table 10: Wrap Information ........................84 Table 11: CritiCool Infant Reusable Accessory Kit (PN# 200-00320) ........... 85 Table 12: CritiCool Adult Reusable Accessory Kit (PN# 200-00300) ............ 85 Table 13: CritiCool Infant Disposable Accessory Kit (PN# 200-00330)..........86 Table 14: CritiCool Adult Disposable Accessory Kit (PN# 200-00310) ..........
-
Page 11: Chapter 1: Safety Precautions
Pressure sores may appear or develop when soft tissue is compressed ® between a bony prominence and external surface. The use of the CritiCool system does not prevent this from happening. DDT-136-000 Rev E... -
Page 12: Precautions
Follow the warning notes listed in the various sections of this manual. Only trained personnel, familiar with all system operating procedures and certified only by Belmont Medical Technologies or authorized agents of ® Belmont Medical Technologies are allowed to use the CritiCool system. -
Page 13: Emc Safety
Avoid inserting any sharp object between the patient and the Wrap. 10. Read all manufacturers’ instructions associated with the temperature probes or temperature probe adapters supplied by Belmont Medical Technologies. 11. Accessories from one system should not be moved or switched out with those from another system to avoid cross-contamination. -
Page 14: Labels
Chapter 1: Safety Precautions Labels ® CritiCool System Labels ® Figure 1: Label Placement for the CritiCool Device. DDT-136-000 Rev E Belmont Medical Technologies Page 14 of 121... -
Page 15: Label Symbols
The serial number for this product Catalogue part number European Authorized Representative Switzerland Authorized Representative Caution – refer to user manual Type BF equipment Recycle for WEEE Date of manufacture XX/XX/XXXX DDT-136-000 Rev E Belmont Medical Technologies Page 15 of 121... - Page 16 Restricts the sale and use of this instrument to qualified medical personnel only. Unique Device Identifier Instructions for Use Does not contain natural rubber latex Medical Device Do Not Reuse DDT-136-000 Rev E Belmont Medical Technologies Page 16 of 121...
-
Page 17: Chapter 2: System Description
The desired temperature is preset by the physician with a possible range of target temperatures from Hypothermia to Normothermia. ® The system is composed of two elements, the CritiCool device, and the ® ®... -
Page 18: Criticool System
CureWrap. During the initial phase of regulation, the flow cycle is 12 minutes ON (water flows through the wrap) and 1 minute OFF ® (water recirculates within CritiCool ; no flow through the wrap) in both TTM and Normothermia modes. -
Page 19: External Features
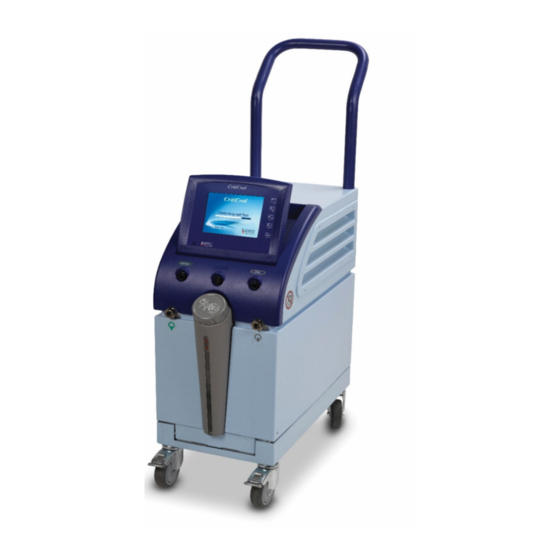
Chapter 2: System Description External Features Front View Figure 2: Front View. DDT-136-000 Rev E Belmont Medical Technologies Page 19 of 121... -
Page 20: Side View
Chapter 2: System Description Side View Figure 3: Side View. DDT-136-000 Rev E Belmont Medical Technologies Page 20 of 121... -
Page 21: Rear Panel
Chapter 2: System Description Rear Panel Figure 4: Rear View. DDT-136-000 Rev E Belmont Medical Technologies Page 21 of 121... -
Page 22: Curewrap
Wrap Material Patient side: Non-Woven Polypropylene • Exterior: Brushed Loop Fabric • Usage Duration The wrap is durable for up to 120 hours. Replace the wrap if it becomes • soiled. DDT-136-000 Rev E Belmont Medical Technologies Page 22 of 121... -
Page 23: Figure 5: Measurements
Chapter 2: System Description Figure 5: Measurements. DDT-136-000 Rev E Belmont Medical Technologies Page 23 of 121... -
Page 24: Selected Wrap Design
Single Size Adult Boxes Accessories ® The following accessories are available for use in conjunction with the CritiCool system. Temperature Probes Intended Use Core temperature probes are used to measure the patient's core temperature. Disposable temperature probes are recommended. Surface temperature probes are used to measure the patient's skin temperature, in a location not covered by the wrap. - Page 25 ® socket at the front of the CritiCool device. NOTE: The response time for temperature feedback to the CritiCool for all temperature probes once plugged in and attached to the patient is less than 60 seconds. Belmont Medical Technologies Page 25 of 121 ®...
-
Page 26: Figure 6: Disposable Temperature Probe Connections
The disposable surface temperature probe is attached to the reusable surface adapter ® (green). The adapter is plugged into the green surface socket at the front of the CritiCool device. The temperature probe is attached to the patient's skin and measures surface body temperature. -
Page 27: Detachable Electric Power Cable & Plug
The tubes are supplied as a paired unit with two or three male Quick ® Coupling Connectors for the CritiCool device and with two or three female Quick Coupling Connectors for the Wrap. -
Page 28: Temperature Splitter (Optional)
Chapter 3: Installation Temperature Splitter (Optional) ® The Temperature Splitter is compatible for the CritiCool system using the YSI 400 Series temperature probes. The Temperature Splitter measures the patient’s temperature using a single sensor in the patient and displays ®... -
Page 29: Criticool ® Technical Specifications
CritiCool® CritiCool® CritiCool® CritiCool®, , , , one of Belmont Medical Technologies’ temperature regulating systems, induces, one of Belmont Medical Technologies’ temperature regulating systems, induces, one of Belmont Medical Technologies’ temperature regulating systems, induces, one of Belmont Medical Technologies’ temperature regulating systems, induces, maintains and reverses hypothermia in an effective and precise manner. - Page 30 10-90% Wrap Transport Wrap Transport Wrap Transport Wrap Transport Temperature Temperature Temperature Temperature Conditions Conditions Conditions Conditions -20°C to 60°C Humidity Humidity Humidity Humidity Conditions Conditions Conditions Conditions 20-95% Belmont Medical Technologies Page 30 of 121 ® CritiCool Operator’s Manual...
-
Page 31: Clinilogger™ Technical Specifications
CliniLogger CliniLogger CliniLogger CliniLogger™ is an CliniLogger™ is an optional optional accessory accessory for for CritiCool® CritiCool® / / / / CritiCool® MINI CritiCool® MINI / / / / CliniLogger™ is an CliniLogger™ is an optional optional accessory accessory CritiCool®... -
Page 32: Chapter 3: Installation
® ventilation to the CritiCool system. ® The following dimensions should be considered when placing the CritiCool system: 260 mm W x 625 mm D x 940 mm H / (10.23"W x 24.6"D x 37"H) Electrical Requirements 230/115VAC 500W or 100 VAC WARNING!!! To avoid the risk of electric shock, this equipment must only be connected to a mains supply with protective earth (PE). -
Page 33: Unpacking And Inspection
The unit should be unpacked, installed and tested only by Belmont Medical Technologies authorized personnel. No attempt should be made by the purchaser to unpack or assemble the unit alone. -
Page 34: Assembling The Handle
3. Press in and screw the four thumb screws by hand (do not use force when tightening) to secure the handle and the top cover. Thumb Screws Figure 7: Handle Assembly. Belmont Medical Technologies Page 34 of 121 CritiCool ®... -
Page 35: Moving The Unit
When the unit is stationary, the brakes must be in the locked position. Release the brakes only when transporting the unit. Packing CritiCool for Shipment Please follow these instructions to properly prepare CritiCool for transport. Empty the water tank prior to packing CritiCool. Belmont Medical Technologies Page 35 of 121 ®... -
Page 36: Chapter 4: Operating Instructions
Chapter 4: Operating Instructions CHAPTER 4: OPERATING INSTRUCTIONS General This chapter contains: ® A description of the controls, indicators and connections for the CritiCool system • ® Detailed operating instructions for the CritiCool system for the different modes • of operation. -
Page 37: Criticool Functions
Normothermia: Fast warming • CritiCool starts up in one of two patient modes, Adult or Neonatal, depending on the chosen settings. The default settings are different for these two modes. Both can be set by the user per the protocol used at each hospital. The user should set the appropriate patient mode in Settings when setting up the machine. -
Page 38: Controls, Functions, Indicators And Connections
Screen Controls ® The CritiCool screen is a touch screen, with additional hard keys to the right of the panel: ® Table 4: CritiCool screen keys Icon Description Main Menu and Escape Show Graph / Change Graph Parameters Alarm Tone ON/OFF... -
Page 39: Qcc- Quick Coupling Connectors
Chapter 4: Operating Instructions QCC— Quick Coupling Connectors ® The Quick Coupling Connectors are located at the front of the CritiCool device (see circles below) and are connected to the Wrap by the connecting tubes. Quick Coupling Connectors To connect the connecting tubes: Lock the connecting tubes by pressing the metal ends of the tubes into each metal connector on the device (see below);... -
Page 40: Temperature Probe Sockets
Chapter 4: Operating Instructions Temperature Probe Sockets ® There are two temperature probe sockets located at the front of the CritiCool device above the Quick Coupling Connectors: Core – for the core temperature probe or adapter cable • Surface – for the surface temperature probe or adapter cable •... - Page 41 Select the appropriate wrap, remove it from the package and place it on the bed or underneath the patient. (See Table 2: CureWrap®). NOTE: When using CritiCool in TTM mode, it is highly recommended to let ® the CritiCool run before connecting temperature probes and hoses to allow the water to cool.
-
Page 42: Inserting And Attaching Temperature Probes
Chapter 4: Operating Instructions Inserting and Attaching Temperature probes ® WARNING!!! For proper use of the CritiCool system, the core temperature probe must be inserted, and the surface temperature probe must be attached to the patient per the probes’ instructions for use. -
Page 43: Connecting The Water Hoses (Tubes) To Criticool
3. Verify that the tubes are locked by lightly tugging them towards you. 4. Connect water tubes to wrap and to CritiCool®, listening for a click upon each connection. Open the clamps on the wrap, if necessary. -
Page 44: Activating The System
Wrap will begin to fill. Figure 10: Main Screen Once CritiCool® is turned on, all operating functions are controlled by the LCD Touch Screen. Alternatively, the control panel's hard keys and visual displays guide you through each operational phase as well. -
Page 45: Wrapping The Patient
® CritiCool • OK indicator to indicate that water is flowing into the wrap and the system is • functioning correctly ❹ Action Icons and Touch keys ❺ • Belmont Medical Technologies Page 45 of 121 CritiCool ® Operator’s Manual... -
Page 46: Patient Mode
NOTE: The Alarm icon appears only if there is an Alarm condition. This icon is informative only and not an action button (It is not a touch button). ® Graphical Display of CritiCool Parameters – Set Point / Target Temperature Control –... - Page 47 Adult. The new Patient Mode will now be highlighted with a white box. Press OK to finalize the change. NOTE: The Neonatal and Adult modes have different settings during operation. The Main Screen will now show the new Patient Mode icon upon full restart. Belmont Medical Technologies Page 47 of 121 CritiCool ®...
- Page 48 Adult Mode, press Settings. You will be asked to enter the passcode, which can be found in the manual under Settings on page 55. Enter the code and then press OK. Settings Screen 1 will appear. Belmont Medical Technologies Page 48 of 121 CritiCool ®...
- Page 49 NOTE: This differs from Neonatal Mode. If Core < 31.0°C: Thermoregulation is paused, and water stops flowing to the wrap. Belmont Medical Technologies Page 49 of 121 CritiCool ®...
-
Page 50: The Main Menu
When you touch the Menu icon , a list of options appears. Figure 12: Main Menu. The options include the following: Standby • Mode Select • Temp Graph • Settings • Services • Belmont Medical Technologies Page 50 of 121 CritiCool ® Operator’s Manual... -
Page 51: Standby Mode
It is important for the patient to be monitored by the clinical team during all phases of treatment, including when CritiCool is in Standby Mode. To go to Standby:... -
Page 52: Mode Select
Touch the required mode icon. The selected mode will be highlighted in blue. Touch OK to activate the mode. NOTE: The selected mode is shown at the top of the control panel (see “the Control Panel”). Belmont Medical Technologies Page 52 of 121 CritiCool ® Operator’s Manual... - Page 53 NOTE: When switching to Normothermia Management, the system keeps the last set point of the preceding mode. More detail on all modes of operation is provided on page 60. Belmont Medical Technologies Page 53 of 121 CritiCool ® Operator’s Manual...
-
Page 54: Temperature Graph
Move forward or backward the time of the graph displayed by using the arrow keys. The screen can show 1 hour, 6 hours, 12 hours or 24 hours. Use the double arrows to select the time range. Belmont Medical Technologies Page 54 of 121 CritiCool ®... -
Page 55: Settings
Patient Mode: Adult or Neonatal ❶ • Language ❷ • Default Set Point Temperature for Adult Mode ❸ • Temperature Scales (Celsius/ Fahrenheit) ❹ • Rewarming Step for Controlled Rewarming Mode ❺ • Belmont Medical Technologies ® Page 55 of 121 CritiCool Operator’s Manual... -
Page 56: Figure 17: Settings Screen 2
High Patient Temperature ❶ • Low Patient Temperature ❷ • High Water Temperature ❸ • Settings Screen 3 Figure 18: Settings Screen 3 Setting Screen 3 includes the touch screen ON/OFF option. Belmont Medical Technologies ® Page 56 of 121 CritiCool Operator’s Manual... -
Page 57: Figure 19: Settings Screen 4
Touch OK to confirm settings changes and to return to the control panel. NOTE: Touching the ESC soft key returns to the main screen without saving any changes. Belmont Medical Technologies Page 57 of 121 ® CritiCool... -
Page 58: Services
Power on the system. Choose Empty on the main screen, or navigate to Empty by touching the Menu icon , then selecting Services, then Empty. Press OK. The following screen appears. Belmont Medical Technologies Page 58 of 121 ® CritiCool... -
Page 59: Figure 20: Start Emptying Panel
OFF position. The main power switch is found on the rear of the device. ® CritiCool is now ready for storage until the next procedure. For further instruction on after use care, consult “Before Storage” on page 90. Belmont Medical Technologies Page 59 of 121 CritiCool ® Operator’s Manual... -
Page 60: Modes Of Operation
Modes of Operation Targeted Temperature Management (TTM) Mode ® Upon startup, the CritiCool system prompts the user to confirm the mode, and an audio alarm sounds. TTM is highlighted by default. When a mode is selected, a default Set Point (SP) temperature appears on the Main Screen (see Figure 11 on page 45). -
Page 61: Figure 22: Core Readout Too Low Message
Chapter 4: Operating Instructions ® After adjusting the set point, the CritiCool system automatically operates at the optimal level to obtain the desired set point temperature. The set point should therefore be set upon mode selection and not changed until the patient needs to be rewarmed or there is another need to change the desired patient temperature. -
Page 62: Figure 23: Thermoregulation Is Continuing Message
Figure 23: Thermoregulation is Continuing Message Controlled Rewarming Mode This mode is used for Controlled Rewarming following TTM. In Controlled Rewarming Mode, CritiCool® increases the set point automatically in small steps until it reaches a normothermic target temperature. Controlled Rewarming Process The Controlled Rewarming process starts with the patient at a mild hypothermia temperature. -
Page 63: Figure 24: Select Mode Controlled Rewarming
Touch OK to return to the Main Screen. To Start Controlled Rewarming: Touch MENU icon Touch Mode Select to open the MODE SELECT panel. Touch Controlled Rewarming. Figure 24: Select Mode Controlled Rewarming. Touch OK. Belmont Medical Technologies Page 63 of 121 CritiCool ® Operator’s Manual... -
Page 64: Figure 25: Switching To Rewarming Message
The system proceeds to increase the virtual set point until the target temperature is reached. NOTE: In the main screen, the "Next Step" shows the VSP / 0.5 hour. ® When core temperature reaches the target temperature, CritiCool continues to maintain the body temperature according to the target temperature. Belmont Medical Technologies... -
Page 65: Figure 27: Temperature Regulation Paused Message
Check that the core probe is inserted correctly in the patient and then touch OK to continue Rewarming. NOTE: While this screen is displayed, the machine is not thermoregulating the patient and there is no water flowing to the Wrap! Belmont Medical Technologies Page 65 of 121 CritiCool ®... -
Page 66: Figure 28: Target Temperature Setting Panel
NOTE: The icons provide a change of 0.1ºC. Each scale mark in the toolbar provides a change of 1ºC. Figure 28: Target Temperature Setting Panel Touch OK to confirm. Belmont Medical Technologies ® Page 66 of 121 CritiCool Operator’s Manual... -
Page 67: Normothermia Management
The set point step and the duration of each step depend on hospital protocol. ® When choosing small steps, CritiCool will keep water temperature close to body temperature. It is recommended to choose steps of 0.2°C – 0.3°C per hour during the rewarming phase. -
Page 68: Figure 29: Normothermia Mode
NOTE: The icons provide a change of 0.1ºC. Each scale mark in the toolbar provides a change of 1ºC. ® The CritiCool system automatically operates at the optimal level to obtain the desired set point temperature so that, when in Normothermia Mode, the difference between the set point temperature and the core temperature does not affect the heating rate. -
Page 69: Figure 30: Out Of Normothermia Message
If the desired set point temperature is set outside of the normothermia range (32ºC to 38ºC / 89.6ºF to 100.4ºF), the message OUT OF NORMOTHERMIA appears. Figure 30: Out of Normothermia Message Belmont Medical Technologies Page 69 of 121 CritiCool ®... -
Page 70: Replacing The Wrap
Velcro strips (follow the Instructions for Use leaflet supplied with each wrap). 11. The system is ready. NOTE: If there is not enough water in the tank after filling the wrap, the system alert message ADD WATER appears. Belmont Medical Technologies Page 70 of 121 CritiCool ®... -
Page 71: Operation Panel Messages And Alerts
NOTE: Only authorized users can change the range of the alarms marked by (*) in the Settings screen. The user needs to insert a password to enter the Settings panel and change the alarm limit. Figure 31: Adjustable Alarm Limits Belmont Medical Technologies Page 71 of 121 CritiCool ®... -
Page 72: Safety Messages And Alarms
WATER TEMPERATURE TOO LOW • WATER TEMPERATURE TOO HIGH • If such a condition occurs, the user should shut down the system and find the cause of the problem. Belmont Medical Technologies Page 72 of 121 CritiCool ® Operator’s Manual... -
Page 73: Clinical Messages And Alarms
Neonatal Mode, or 2) if in Adult Mode and core temperature is below 31°C. Switching to Confirm the patient's Auto Rewarm temperature before Mode switching to Rewarming mode. Once confirmed, touch OK to continue. Belmont Medical Technologies Page 73 of 121 CritiCool ® Operator’s Manual... -
Page 74: Table 6: Clinical Messages
NOTE: It is possible to change the range of some of these alarms in the Settings screen. The user can choose at which temperature the "High Patient Temp" and "Low Patient Temp" alarms will be activated. Belmont Medical Technologies Page 74 of 121 CritiCool ®... -
Page 75: Technical Messages
Chapter 4: Operating Instructions Technical Messages The following technical messages might appear: Table 7: Technical Messages and Alarms Message Screen Message Tank is empty Add Water Belmont Medical Technologies ® Page 75 of 121 CritiCool Operator’s Manual... -
Page 76: Table 8: Technical Messages And Alarms
Chapter 4: Operating Instructions Table 8: Technical Messages and Alarms Message Screen Message Connect Water Tubes Connect Core Temperature Sensor (Probe) Check Water Tubes Belmont Medical Technologies Page 76 of 121 CritiCool ® Operator’s Manual... -
Page 77: Table 9: Technical Messages And Alarms
Screen Message Check Core Temperature Sensor (Probe) Follow the instruction of the technical messages, (for example add water if necessary, or connect sensors if they are not connected etc.). Belmont Medical Technologies ® Page 77 of 121 CritiCool Operator’s Manual... -
Page 78: Informative Messages
Normothermia Mode and Range a Set Point temperature <32°C or >38.0°C is chosen. For this message, thermoregulation continues. Touching OK confirms the new set point temperature and removes the message. Belmont Medical Technologies ® Page 78 of 121 CritiCool Operator’s Manual... -
Page 79: Ttm Mode Messages
This message could indicate that the core temperature probe might be out of place. The following message appears: “Temperature Regulation Paused. Core Readout Too Low. Confirm Sensor Position. Press OK to continue.” Belmont Medical Technologies ® Page 79 of 121 CritiCool... -
Page 80: Figure 33: Temperature Regulation Paused Message
OK to re-activate temperature control. When OK is touched, the screen returns to the main screen and the following message appears for 5 seconds. Belmont Medical Technologies ® Page 80 of 121 CritiCool... -
Page 81: Figure 34: Thermoregulation Is Continuing Message
Check that the core sensor is in place and the low temperature represents the true patient status and touch OK to re-activate temperature control. NOTE: If you disregard the message and do not touch OK for over 30 minutes, the alarm cannot be silenced. Belmont Medical Technologies ® Page 81 of 121 CritiCool... -
Page 82: Controlled Rewarming Mode Messages
Temperature) >2°C This means that the core temperature probe is probably out of the body. An audible alarm sounds, and the following message appears: Figure 35: Core Readout too Low Message. Belmont Medical Technologies ® Page 82 of 121 CritiCool... -
Page 83: Figure 36: Thermoregulation Is Continuing Message
30 minutes, the alarm cannot be silenced. When OK is touched, the screen returns to the Main Screen and the following message appears for 5 seconds. Figure 36: Thermoregulation is Continuing Message. Belmont Medical Technologies Page 83 of 121 CritiCool ®... -
Page 84: Chapter 5: Ordering Information
Medical Technologies representative or your local authorized distributor. When ordering parts, specify the part number as listed in this chapter as well as the ® serial number of your CritiCool system. Available Wraps odels for various wraps are available. Refer to Table 10. -
Page 85: Available Accessories
Chapter 5: Ordering Information Available Accessories One accessory kit is provided with each system. The CritiCool Accessory Kit is available in four configurations: two with reusable temperature probes (PN# 200-00300 and PN# 200-00320) as shown in Table 11 and Table 12 and two with adapter cables for use with disposable temperature probes (PN# 200- 00310 and PN# 200-00330) as shown in Table 13 and Table 14. -
Page 86: Table 13: Criticool Infant Disposable Accessory Kit (Pn# 200-00330)
Chapter 5: Ordering Information Table 13: CritiCool Infant Disposable Accessory Kit (PN# 200-00330) Sub Part No. Description Number Supplied 014-00028 Adapter Cable for Disposable Core Temperature Probe, Gray 014-00129 Adapter Cable for Disposable Surface Temperature Probe RJ, Green 200-00109 Connecting Water Tubes 2 by 2 Way... -
Page 87: Chapter 6: Maintenance
Chapter 6: Maintenance CHAPTER 6: MAINTENANCE Introduction ® This chapter outlines the maintenance instructions for the CritiCool system. Trained hospital staff may perform routine maintenance unless otherwise specified. ® WARNING!!! The repair and servicing of the CritiCool system should be performed only by Belmont Medical Technologies or authorized agents of Belmont Medical Technologies. -
Page 88: Routine Maintenance
Chapter 6: Maintenance Routine Maintenance The CritiCool® system should be inspected and maintained as noted in Table 16 to make sure that it remains in optimum condition. Table 16: Inspection and Maintenance Schedule Frequency Inspection/Service Performed By • Clean connecting tubes and Quick Coupling... -
Page 89: Routine Maintenance Overview
Make sure that the system is turned off and unplugged from power. Using a lint free cloth with sterile water, clean the exterior of the machine and the LCD screen from any soiling. DDT-136-000 Rev E Belmont Medical Technologies Page 89 of 121... -
Page 90: Before Storage
The cleaning, disinfection and sterilization of the reusable temperature probes are according to the manufacturer’s instruction. Disposable probes are not to be reused. Improper use can lead to cross contamination and deterioration of safety. DDT-136-000 Rev E Belmont Medical Technologies Page 90 of 121... -
Page 91: Thermal Disinfection (Self-Cleaning)
Thermal Disinfection (Self-Cleaning) This feature performs a thermal disinfection of the water tank and internal tubing. The thermal disinfection of CritiCool® is an integrated feature, which heats the circulating water of the system, thus allowing the heat to disinfect the internal water pathways of the system, including the water tank. -
Page 92: Figure 37: Selecting System Check
System Check takes about 10 minutes. When the process is completed, a message appears on the screen "SYSTEM CHECK COMPLETED". Switch to the Operation screen. ® Turn CritiCool off. DDT-136-000 Rev E Belmont Medical Technologies Page 92 of 121... -
Page 93: Filter Replacement
The filter is for filtering hard soils or large particles. It is not intended for filtering the water from bacterial contamination. The filter must be replaced every twelve months at a minimum. NOTE: The filter should be replaced only by Belmont Medical Technologies authorized personnel. See the Service Manual for replacement instructions. -
Page 94: Chapter 7: Troubleshooting
Chapter 7: Troubleshooting CHAPTER 7: TROUBLESHOOTING General ® The CritiCool system is equipped with self-testing routines that continuously monitor system operation. If a system fault or malfunction is detected, a fault message appears. Should a malfunction occur, consult the Troubleshooting Guide. -
Page 95: Table 17: Criticool System Malfunction (No Message) Troubleshooting Guide
Chapter 7: Troubleshooting ® WARNING!!! The repair and servicing of the CritiCool system should be performed only by Belmont Medical Technologies or authorized agents of Belmont Medical Technologies. ® Table 17: CritiCool System Malfunction (no message) Troubleshooting Guide Observation Possible Problem Action to be Taken ®... -
Page 96: Table 18: Water Tank Overfilling
Connect the special male connector to the water-out connecting tube (the gray end if using the 2x3 Way Connecting Water Hoses). ® Turn the CritiCool device ON. Select Empty mode in Services. Prepare to allow the excess water to drain into a receptacle, pail or sink. -
Page 97: Table 19: Criticool® System Messages Troubleshooting Guide
Chapter 7: Troubleshooting Table 19: CritiCool® System Messages Troubleshooting Guide Action to Message Cause of Problem Comments be taken Indicates that an alarm is activated Tank is Empty No water in the Open water tank. tank cap. Refill water tank to maximum level. -
Page 98: Table 20: Criticool® System Messages Troubleshooting Guide
Chapter 7: Troubleshooting Table 20: CritiCool® System Messages Troubleshooting Guide Action to Message Cause of Problem Comments be taken Connect Core Temperature No core temperature Connect core * Pressing alarm mute Probe probe is inserted in temperature silences the buzzer for its socket. -
Page 99: Table 21: Criticool® System Messages Troubleshooting Guide
Chapter 7: Troubleshooting Table 21: CritiCool® System Messages Troubleshooting Guide Action to be Message Cause of Comments taken Problem Core temperature Core Readout Too Low Confirm the An alarm issues and is at least 2°C location of the thermoregulation stops. -
Page 100: Table 22: Criticool® System Messages Troubleshooting Guide
Chapter 7: Troubleshooting Table 22: CritiCool® System Messages Troubleshooting Guide Cause of Problem Action to be Message Comments taken Water Temperature Water Thermoregulation The alarm can be Too High temperature in stops until the muted for an the system is water cools or the unlimited time. -
Page 101: Table 23: Criticool® System Messages Troubleshooting Guide
Chapter 7: Troubleshooting Table 23: CritiCool® System Messages Troubleshooting Guide Action to Message Cause of Problem Comments be taken Patient’s temperature is Core temperature Check that the Thermoregulation below XX.X°C is below the alarm core continues. limit preconfigured temperature in the Settings... - Page 102 User has selected Touch OK to Thermoregulation continues. a Set Point confirm the Temperature new Set Point beyond the temperature normothermia and eliminate range of >32°C and the message. <38.0°C. DDT-136-000 Rev E Belmont Medical Technologies Page 102 of 121...
-
Page 103: Chapter 8: Clinilogger™ Installation And Operating Instructions
Installation and Operating Instructions CHAPTER 8: CLINILOGGER™ INSTALLATION AND OPERATING INSTRUCTIONS Overview and Installation Introduction ® The purpose of the optional CliniLogger™ device is to save the CritiCool ® ® CritiCool MINI / Allon systems' vital data for further reference. For more information on connecting the CliniLogger to CritiCool for data collection, see CliniLogger™... -
Page 104: Figure 39: Clinilogger™ Initialization
When initialization finishes the following screen appears. Figure 40: CliniLogger™ Installation. You can change the installation location by clicking Browse and selecting a new location. Click Next. The License Agreement window appears. DDT-136-000 Rev E Belmont Medical Technologies Page 104 of 121... -
Page 105: Figure 41: Start Installation
Next. The Start Installation window appears. Figure 41: Start Installation. Click Next; you can follow the installation progress in the progress bars until it finishes. Figure 42: Installation Progress. DDT-136-000 Rev E Belmont Medical Technologies Page 105 of 121... -
Page 106: Figure 43: Installation Complete
Click Finish to complete and exit the software installation. Copy "User Ver 1.6" folder from CD to your desktop. 10. You can now open "User Ver XX." folder and click the CliniLogger.exe file to start the application. DDT-136-000 Rev E Belmont Medical Technologies Page 106 of 121... -
Page 107: Using The Clinilogger Viewer Application
COM 1 –10 port or you can use with USB to RS232 adaptor. Click Connect to Logger, the software traces the COM port where ™ the CliniLogger is connected – wait for the message. DDT-136-000 Rev E Belmont Medical Technologies Page 107 of 121... -
Page 108: Viewing Downloaded Data
To view downloaded data: ™ ™ Double-click the CliniLogger Viewer icon. The CliniLogger window appears. Figure 45: CliniLogger™ Window. Click Load stored data and choose the file you would like to view. DDT-136-000 Rev E Belmont Medical Technologies Page 108 of 121... -
Page 109: Figure 46: Choose Clinilogger™ File Window
When the data has been loaded the “Complete” message appears Figure 47: Complete Message. Click View data - the graph opens. To convert to Excel, click Convert to Excel – the data is presented in Excel format. DDT-136-000 Rev E Belmont Medical Technologies Page 109 of 121... -
Page 110: Clinilogger Viewing Panel
Software version of the thermoregulation device • Close Window button • Function Selection area: control keys • Graphic Display area with a graphic presentation of the thermoregulation • system variables. DDT-136-000 Rev E Belmont Medical Technologies Page 110 of 121... -
Page 111: Figure 49: Graphic Display Area
Temperatures graphs: Set-point, Core and Surface as a function of time • Modes and Error area: Thermoregulation modes, Rewarming step and • errors as a function of time Device Functional Status area: Heat/Cool and Pump On/Off • DDT-136-000 Rev E Belmont Medical Technologies Page 111 of 121... -
Page 112: Figure 50: Example: Functional Status Area
Temperature Settings Wrap Settings Errors/TempStep Settings Figure 51: Example: Modes and Errors Area. Temperature graph control buttons enable modifying the display of each of the temperature graphs. DDT-136-000 Rev E Belmont Medical Technologies Page 112 of 121... - Page 113 Moving the mouse horizontally will move the graphs horizontally - in time, and moving the mouse vertically, will move the graphs vertically - in temperature. Zoom Clicking the Zoom button shows 6 modes of zoom use: DDT-136-000 Rev E Belmont Medical Technologies Page 113 of 121...
-
Page 114: Table 24: Zoom Tool Buttons
To return to full time scale after zoom actions: Click on The graph returns to the full-time range, without affecting the Temperature scale. NOTE: To return to the original display click the unzoom button DDT-136-000 Rev E Belmont Medical Technologies Page 114 of 121... - Page 115 Use the mouse to move the double line to a new cursor location. NOTE: The values of the temperature at the cursor location appear in the window adjacent to the curve color window DDT-136-000 Rev E Belmont Medical Technologies Page 115 of 121...
-
Page 116: Figure 52: Example Of Modes And Error Area
PowerUp Rewarm Neonate PowerUp Standby PowerUp Sel.Mode Adult PowerUp Sel.Mode Neonate Cooling Adult Cooling Neonate Warming Adult Warming Neonate Rewarming Adult Rewarming Neonate Standby Select Mode Adult Select Mode Neonate DDT-136-000 Rev E Belmont Medical Technologies Page 116 of 121... -
Page 117: Converting To Excel
The graphs indicate the state of the wrap: Heat / Cool modes and the On/Off of water circulation in the wrap. ® Heat/Cool- When CritiCool is cooling the water in the tank, the line is blue. When the device is warming the water in the tank, the line is red. -
Page 118: Ending A Viewing Session
Y axis showing the temperatures, and the X axis the Excel table lines. Figure 54: Section of Graphic Chart. Ending a Viewing Session To end a session: Click Quit on the Main Menu to exit the Viewing Session DDT-136-000 Rev E Belmont Medical Technologies Page 118 of 121... -
Page 119: Belmont Medical Technologies Customer Service Representative
PPENDIX Belmont Medical Technologies C USTOMER ERVICE EPRESENTATIVE WARNING!!! The following details are necessary to contact your Belmont Medical Technologies representative. Keep this form with the User Manual for scheduling annual periodic maintenance and/or servicing needs. Representative Name: Company Name:... -
Page 120: Appendix B: Rf Separation
Recommended separation distances between portable and mobile RF communications equipment and the CritiCool® plus CliniLogger™ are given in Separation Distances in meters. Table 26: Separation Distances in meters... -
Page 121: Appendix C: Waste Electrical & Electronic Equipment (Weee)
DDT-136-000 Rev E Belmont Medical Technologies Page 121 of 121...
Need help?
Do you have a question about the CritiCool and is the answer not in the manual?
Questions and answers