Humminbird HELIX Series Installation Manual
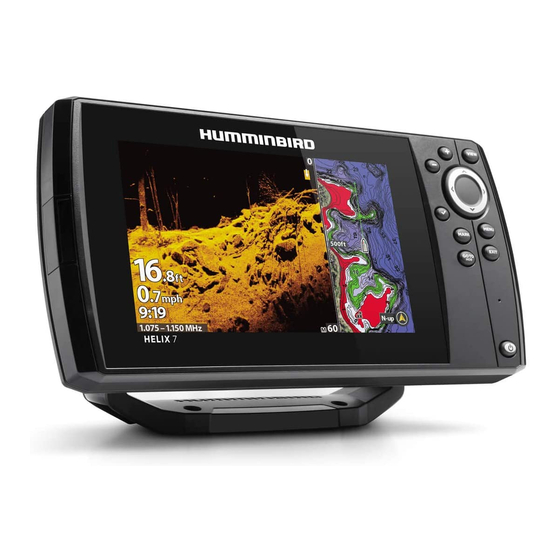
Control head
Hide thumbs
Also See for HELIX Series:
- Installation manual ,
- Operation manual (330 pages) ,
- Installation diagrams (10 pages)
Advertisement
Available languages
Available languages
HELIX® SERIES CONTROL HEAD Installation Guide
Use the instructions in this installation guide to gimbal mount the control head.
Read the instructions in this guide completely to understand the installation requirements before
beginning the installation.
Supplies: In addition to the hardware supplied with your control head, you will need a 3 Amp fuse,
powered hand drill and various drill bits, Phillips head screwdriver, pencil, safety glasses and dust
mask, marine-grade silicone sealant, dielectric grease (optional), extension cables (optional),
Ethernet cables (optional), and accessory cables (optional). Also, see Connect the Control Head
to Power to determine the type of connection and equipment you will need for the installation.
Accessories and Ethernet: Accessories and Ethernet equipment are available for purchase at
humminbird.com. The installation guides are available with the product, or they can be downloaded
from our Web site.
HELIX GPS: The transducer installation instructions in this guide do not apply to the chartplotter
model.
Visit our Web site at humminbird.com for additional information and resources. Also, visit
youtube.com/humminbirdtv for informational videos.
Installation Overview
1
| Plan the Mounting Location
1. Install the gimbal knobs into each side of the control head. Tighten the knobs just enough so
you can slide the control head into the gimbal bracket arms.
2. Place the assembled control head in various locations to determine the best mounting location
with the following requirements:
∆ a stable, protected surface to protect the control head from excessive wave shock, vibration,
and water
∆ sufficient space for the control head tilt range
∆ visibility during operation, as well as easy installation and removal
∆ access above and below the mounting surface to pass the cables through to the control
head
∆ space for the 1" (25 mm) cable hole, under the bracket or 2" to 4" (50 to 100 mm) behind
the chosen mounting location
3. Test route all cables (transducer, power, accessory, Ethernet) to the control head mounting
location.
4. After you have selected the mounting location, loosen the gimbal knobs and remove the control
head from the gimbal bracket.
2
| Install the Gimbal Bracket
1. Place the gimbal bracket in the chosen position on the mounting surface. Mark the four
mounting screw locations using a pencil or center punch.
2. Set the gimbal bracket aside and drill the four mounting screw holes using a 9/64" (3.5 mm)
drill bit.
3. To run the cables through a hole under the bracket, mark and drill a 1" (25 mm) hole, centered
between the four mounting holes. Press the grommet into place on the hole. Proceed to
Connect the Control Head to Power. You will complete the bracket installation (steps 4 and 5)
after you route the cables to the control head.
Installation Preparation
532312-5_A
Install the Gimbal Knobs
bracket arm
gimbal knob
Planning for the Cable Hole
behind the bracket (shown)
or under the bracket
Planning for the Tilt Range
1
Advertisement
Table of Contents

Related Manuals for Humminbird HELIX Series


Summary of Contents for Humminbird HELIX Series
- Page 1 Power to determine the type of connection and equipment you will need for the installation. Accessories and Ethernet: Accessories and Ethernet equipment are available for purchase at humminbird.com. The installation guides are available with the product, or they can be downloaded from our Web site.
- Page 2 WARNING! Make sure that the power cable is disconnected from the control head at the beginning of this procedure. WARNING! Humminbird® is not responsible for over-voltage or over-current failures. The control head must have adequate protection through the proper selection and installation of a 3 Amp fuse.
- Page 3 Attach the black wire to ground (–), and the red wire to positive (+) 12 VDC power. NOTE: For multi-control head installations and troubleshooting information, download the Power Troubleshooting Guide from our Web site at humminbird.com. Also, see the Operations Summary Guide to set the Low Battery Alarm and use Standby Mode to conserve power.
- Page 4 When you power on the control head, it will start Normal mode automatically if a functioning transducer is detected. NOTE: For operations information, see the Operations Summary Guide included with your control head and the control head operations manual (available for download at humminbird.com).
-
Page 5: Important Notices
HELIX® SERIES CONTROL HEAD Installation Guide 532312-5_A Important Notices WARNING! Disassembly and repair of this electronic unit should only be performed by authorized service personnel. Any modification of the serial number or attempt to repair the original equipment or accessories by unauthorized individuals will void the warranty. WARNING! This device should not be used as a navigational aid to prevent collision, grounding, boat damage, or personal injury. -
Page 6: Préparation De L'installation
HELIX GPS : Les directives de ce guide relatives à l'installation d'un transducteur ne s'appliquent Placez les molettes du cardan pas au modèle du traceur graphique. bra du support Visitez notre site Web à humminbird.com pour plus d'informations et de ressources. Visitez du cardan également youtube.com/humminbirdtv pour des vidéos d'information. Présentation de l'installation | Préparation de l'emplacement de montage... - Page 7 TÊTE DE COMMANDE SÉRIE HELIX Guide d’installation 532312-5_A 3. Pour faire passer les câbles à travers un trou sous le support, marquer et percer un 25 mm (1 po) trou, centré entre les quatre trous de montage. Appuyez sur la passe-câble en place sur le trou.
- Page 8 AVERTISSEMENT ! Assurez-vous que le câble d’alimentation n’est pas branché à la tête de commande au début de cette procédure. AVERTISSEMENT ! Humminbird ne garantit pas le produit contre les surtensions et les surintensités. La tête de commande doit disposer d’une protection suffisante; installer de façon adéquate un fusible de 3 A.
- Page 9 Normal automatiquement si elle détecte un transducteur fonctionnel. REMARQUE : pour des informations relatives au fonctionnement, consultez le guide d'utilisation résumé qui accompagne votre tête de commande et le guide d'utilisation de la tête de commande (disponible au téléchargement sur humminbird.com).
-
Page 10: Avis Importants
TÊTE DE COMMANDE SÉRIE HELIX Guide d’installation 532312-5_A Avis importants AVERTISSEMENT ! La réparation et/ou le démontage de cet appareil électronique doit être effectué uniquement par un personnel d'entretien autorisé. Toute modification du numéro de série et/ou réparation par un personnel non autorisé entraînera l'annulation de la garantie. AVERTISSEMENT ! Cet appareil ne devrait en aucun cas être utilisé...
Need help?
Do you have a question about the HELIX Series and is the answer not in the manual?
Questions and answers