
Related Manuals for Z GRILLS MINI


Summary of Contents for Z GRILLS MINI
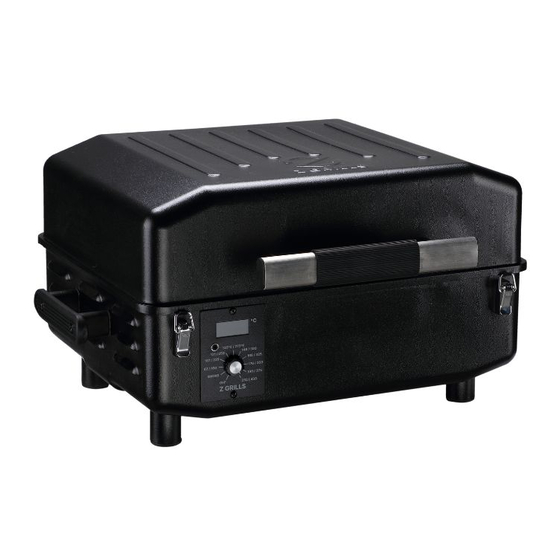
- Page 1 Z GRILLS MINI Wood Pellet Smoker Grill Owner Manual www.zgrills.com.au This owner manual edition is for Z Grills MINI (200A V1)
- Page 2 IMPORTANT SAFETY INFORMATION DANGER! • FLAMMABLE LIQUIDS: Never use or store flammable liquids near the grill, or use flammable liquids to light the grill. • OUTDOOR USE ONLY: Do not operate the grill indoors or in enclosed spaces as carbon-monoxide poisoning may occur. The grill may be used in an open air deck or balcony as long as SAFE DISTANCE guidelines are met and smoke is able to freely vent from the ceiling/roof area.
-
Page 3: Table Of Contents
10. Wood Pellet Use & Storage 11. Using a BBQ Hotplate 12. Controller Operation 13. Troubleshooting 14. Wiring Diagram 15. Spare Parts List 16. Error Codes 17. Grill Repair Instructions 18. Limited Product Warranty © Z Grills Australia Pty Ltd - 2022 Document Date: 12-06-2022... -
Page 4: Quick Reference Guide
NEW GRILL BURN-IN • It is important to complete a 45 minute HIGH temperature BURN IN before cooking any food on a new Z Grills smoker. See section 6 for details. NORMAL STARTUP PROCEDURE • Open the grill lid and set the controller to SMOKE. -
Page 5: Technical Specifications
2. Technical Specifications Grill Model ZPG-200A (V1) also called the MINI Grill Rack 400 x 320 mm (0.13m Power Supply 240VAC 50Hz (Min 1.2 Amp 300W) Max Power Usage 250W Normal Power Usage 25 ~ 50W after 5 minute startup period Hopper Capacity 3.6 kg... -
Page 6: Food Minimum Cooked Temperatures
3. Food Minimum Temperature Chart • When cooking meat and fish use food probes to monitor the internal temperature. Internal temperatures can also indicate how well cooked it is. • Minimum food temperatures must be reached to kill bacteria ensuring the meat is safe to eat. - Page 7 STEP 1 - LEGS Rubber Plug STEP 2 - LID HANDLE...
- Page 8 STEP 3 - SIDE HANDLES If packing in a car or caravan you may wish to leave off (or temporarily remove) the side handles for a smaller overall size. Take care lifting the grill as it is heavy. Never move whilst still hot. STEP 4 - GREASE TRAY Cover with foil Cover the grease tray with...
- Page 9 STEP 5 - GRILL RACK Sit the grill rack in over the grease tray. The grill rack are ceramic coated. Only clean with a wet cloth, BBQ wipes or Koala Claw (BBQ cleaning tool). Do not use stainless steel brushes or strong chemicals as they will damage the ceramic coating.
-
Page 10: Initial Startup Instructions
5. Initial Startup Instructions 1. Remove the grill rack and grease tray from the grill. 2. Open the hopper lid to check that there are no foreign objects in the hopper or auger. 3. With the controller dial in the OFF position, plug in the power cord into 240V AC grounded power supply. -
Page 11: New Grill Burn-In
6. New Grill Burn-In This process runs the grill at the highest temperature setting (burning wood pellets for heat) to burn off any surface oils on the grease tray (wipe off excess oil first with paper towel). This must be completed before cooking any food. The smoke will have an oily odour, so avoid breathing in the smoke or completing the burn-in near an open window of your house. -
Page 12: Temperature Issues
Shutdown Procedure 1. If operating at 162ºC or higher, first turn to SMOKE setting for 10min to allow the fire to die down. For lower operating temperatures proceed directly to step 2. 2. Turn the controller dial to OFF ✓ The auger will stop rotating and no more pellets will be delivered into the fire-pot. ✓... -
Page 13: Cleaning The Grill
9. Cleaning the Grill Clean the grill after each use, as accumulation of grease, ash and soot can increase the risk of a grease fire and result in inefficient operation. Grease Tray & Bucket • Remove foil from the grease tray and wipe off any surface grease. •... -
Page 14: Wood Pellet Use & Storage
10. Wood Pellet Use & Storage Storage • There are small holes in the wood pellets plastic bags to release air, so never sit bags on wet surfaces, or directly on outdoor concrete or wood as moisture may be absorbed. •... -
Page 15: Using A Bbq Hotplate
11. Using a BBQ Hotplate The Z Grills MINI BBQ hotplate is an optional accessory specifically designed to fit in Z Grills MINI smokers for hotplate BBQ style cooking. The cast iron hotplate is pre-seasoned but will benefit from additional oil seasoning. -
Page 16: Controller Operation
12. Controller Operation The digital PID controller monitors the temperature sensor inside the grill and turns on/off the auger motor to deliver wood pellets into the fire-pot. The grill internal temperature (GRILL) and food probe (P TEMP) are constantly displayed in degrees Celsius. -
Page 17: Troubleshooting
BLOWN FUSE numbers. • Failure of either of these components is often associated with a strong “burning plastic” smell. • Contact Z Grills customer service to get a replacement part. No fan or auger operating noises. LOOSE PLUG • Check to ensure that all wiring plugs are tightly connected. - Page 18 • Check the sensor connection into the back of the controller (with TEMPERATURE the grill power unplugged) SENSOR • If still getting HEr contact Z Grills customer support for a replacement temperature sensor and/or controller (which can sometimes be the cause). FAULTY CONTROLLER •...
- Page 19 Problem Reason Investigation/Solution • After turning to SMOKE for startup, don’t shut the lid until lots of Temperature rises smoke is released and the fire has been roaring for a few mins. too high (above • Shutting the lid too early results in the large initial quantity of pellets releasing lots of heat which easily overshoots lower temperature LID CLOSED TOO SOON...
-
Page 20: Wiring Diagram
Ignition Rod (200W) Fire-pot Fan (25W) 240V AC 50Hz rated input Z GRILLS EARTH 15. Spare Parts List If a component is damaged, lost or just worn out through normal use, spares are available. Please refer to the chart below for most common spare components. -
Page 21: Error Codes
16. Error Codes Error codes will be displayed on the controller LCD screen. All grill operation will cease when there is an Error, so the problem must be solved before the grill can operate normally again. Check section 13 Troubleshooting for more detailed information, or scan the QR code beside the error to visit our help page online for a more detailed explanation. -
Page 22: Grill Repair Instructions
Do not complete any repair work yourself unless suitably experienced and confident to do so. • Refer to the table below for estimated time, difficulty, parts and tools required. • How to repair videos are available on the Z Grills Australia website. Component Time Difficulty Spare Parts Tools Required ✓... -
Page 23: Limited Product Warranty
Manufacturer’s Limited Warranty Policy Z Grills Australia Pty Ltd (Z Grills) provides a 3 years parts warranty from the date of purchase by the original owner. This warranty applies to defects in all materials and workmanship. - Page 24 Scan QR code zgrills.com.au/product-registration Or go to: Registration is only required if you did NOT purchase from the Z Grills Australia website. By registering, we will have your information on file should you ever need any support. Get Help Scan QR code zgrills.com.au/help/...
Need help?
Do you have a question about the MINI and is the answer not in the manual?
Questions and answers