Table of Contents
Advertisement
Quick Links
Installation Instructions
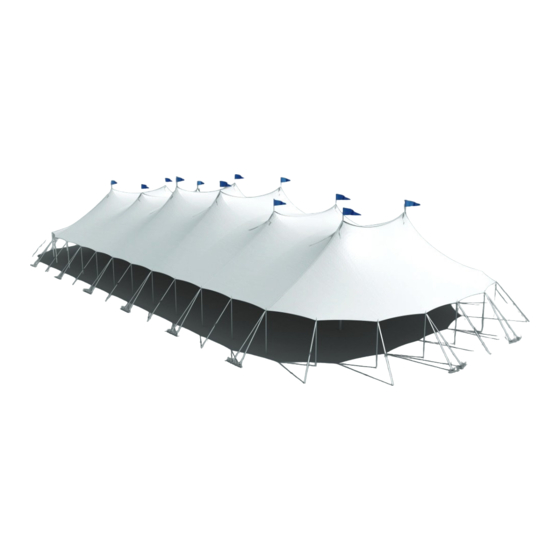
59' Aurora Tent
Non-Certifi ed Installation
Please read all assembly / installation instructions before the installation or removal of this product.
7701 Highway 41 N
Evansville, IN 47725
Phone: 812-867-2421
Fax: 812-867-1429
1-800-544-4445
email: tents@anchorinc.com
www.anchorinc.com
EC5811
AU59NC-621
Advertisement
Table of Contents

Related Manuals for Anchor 59 Aurora


Summary of Contents for Anchor 59 Aurora
- Page 1 Installation Instructions 59’ Aurora Tent Non-Certifi ed Installation Please read all assembly / installation instructions before the installation or removal of this product. 7701 Highway 41 N Evansville, IN 47725 Phone: 812-867-2421 Fax: 812-867-1429 1-800-544-4445 email: tents@anchorinc.com www.anchorinc.com EC5811 AU59NC-621...
-
Page 2: Table Of Contents
Index Introduction ......................3 Safety Notes........................ 3 Parts Illustrations......................4 Part Numbers Chart.......................5 Stake and Pole Layout....................5 Tent Layout........................6 Stake Bars........................6 Lacing........................... 6 Lace Flap........................7 Attach Guys........................7 Raise Poles......................... 8 Winch Tensioning......................8 Final Adjustment......................9 Take Down........................9 Walls.......................... -
Page 3: Introduction
The requirements as specified must be followed. The installer/ owner must read the assembly instructions completely prior to any installation. Particular attention must be given to anchor- ing! See Caution Statement on back page of this manual Work from step to step. -
Page 4: Parts Illustrations
IMPORTANT: The installation of this Tent should be performed/supervised by knowledgeable tent installers with a clear understanding of safety issues as well as the methods of anchoring. The installer/owner must read the assembly instructions completely prior to any installation. Particular attention must be given to anchoring! See Caution Statement on back page of this manual. -
Page 5: Part Numbers Chart
Part Numbers Chart PART NUMBERS AND DESCRIPTIONS PART NUMBERS AND DESCRIPTIONS Number Description Number Description 65872 Center Pole - 4” Alum. Schedule 40 Pipe - 21’ 8048614 59’ W Installation Layout Cable only 65873 Center Pole - 4” Alum. Schedule 40 Pipe - 22’ 8048607 59’... -
Page 6: Tent Layout
Tent Layout: Ground Cloth over the area to be covered by the tent. Unfold the tent top fabric over the ground cloth, with right side up. Unfold and stretch fabric out so that side pole plates match placement marked on ground. Place Stakes: step one for where single guys and stake bars are used. -
Page 7: Lace Flap
Fastening Lace Flap: back up to center pole hole and begin fastening fl aps together. Walk on tent with stocking feet for protection of fabric. Insert fl ap on loop side between fl aps of hole side. Attach Guys: Attach snaps of guys thru both plates at lace. -
Page 8: Raise Poles
Raise Center Poles: Raise center poles in the order and manner stated in the paragraph below. From underneath the tent, insert the pin of the center pole through the grommet at the peak and tie jump rope. Push the pole with the fabric up until the center pole is approximately half way raised. -
Page 9: Final Adjustment
Final Adjustment: Due to changes in climactic conditions, periodic inspection and adjustment should be made. Protective covers are recommended for all stakes and stake bars. Important: Check guys periodically for tight- ness and maintenance of good condition. Proper installation suitable to site conditions is the responsibility of the installer. -
Page 10: Flag Pole Installation
Aurora Flag Pole Installation Instructions Knob with set screw to hold flag pvc assembly onto pole. Flag pvc Assembly Collar with knob set screw. Collar traps flag pole on tent. Top holes of tent fabric at lace. (cut away for clarity) Properly Installed Flag Pole Flag pole. -
Page 11: More Staking Layouts
MORE STAKING LAYOUTS Note: Stake guys out at 1’-0” less than side pole height. -
Page 12: Queen/King Mids - Left Right Designation
QUEEN/KING MIDS - LEFT RIGHT DESIGNATION LEFT RIGHT PLAN VIEW LEFT RIGHT SIDE VIEW... -
Page 13: Caution Statement
WARNING...
Need help?
Do you have a question about the 59 Aurora and is the answer not in the manual?
Questions and answers