Table of Contents
Advertisement
Advertisement
Table of Contents

Related Manuals for Planet FNSW-1601


Summary of Contents for Planet FNSW-1601
- Page 2 16/24-Port 10/100Mbps Fast Ethernet Switch FNSW-1601/FNSW-2401 User’s Manual...
-
Page 3: Fcc Warning
Trademarks Copyright © PLANET Technology Corp. 2008. Contents subject to revision without prior notice. PLANET is a registered trademark of PLANET Technology Corp. All other trademarks belong to their respective owners. Disclaimer PLANET Technology does not warrant that the hardware will work... -
Page 4: Ce Mark Warning
Do not dispose of WEEE as unsorted municipal waste and have to collect such WEEE separately. Revision PLANET Fast Ethernet Switch User's Manual For Models: FNSW-1601 / FNSW-2401 Revision: 2.0 (JANUARY 2008) Part No: (2010-000020-003) -
Page 5: Table Of Contents
1.4 Product Specifications ... 7 2. INSTALLATION ... 8 2.1 Product Description ... 8 2.1.1 Product Overview ... 8 2.1.2 Switch Front Panel ... 9 2.1.3 LED Indicators ... 9 2.1.4 Switch Rear Panel ...10 2.2 Installing the Switch ...10 2.2.1 Desktop Installation ...11... -
Page 6: Introduction
The chapter explains the Fast Ethernet Switch transmit operation. Chapter 4 Troubleshooting The chapter explains the troubleshooting of the Fast Ethernet Switch. Appendix A This chapter contains cable information of the Fast Ethernet Switch. In the following section, the term “Fast Ethernet Switch” means the FNSW-1601/FNSW-2401. -
Page 7: Product Features
● Flow control to eliminate packets loss ● Internal, full-range power supply suitable for worldwide use ● Auto MDI/MDIX on each port for easy switch/hub cascading ● FCC, CE class A compliant filtering/forwarding... -
Page 8: Product Specifications
Shared Data Buffer Flow Control Packet Control Switch Fabric Switch Throughput Standard Conformance Network Standards Temperature Humidity operating Regulation Compliance FNSW-1601 16 10/100Base-TX 24 10/100Base-TX RJ-45 MDI/MDI-X RJ-45 MDI/MDI-X ports ports 1.4 KG 1.45 KG 100-240 VAC, 50/60 Hz Store-and-Forward... -
Page 9: Installation
Ethernet device without requiring special straight or crossover cables. The Flow Control function allows your Fast Ethernet Switch supported routers and Servers to directly connect to this Switch for fast, reliable data transfer. 2.1.1 Product Overview The PLANET Fast Ethernet Switch with 16/24 RJ-45 10/100Mbps ports for high-speed network connectivity. -
Page 10: Switch Front Panel
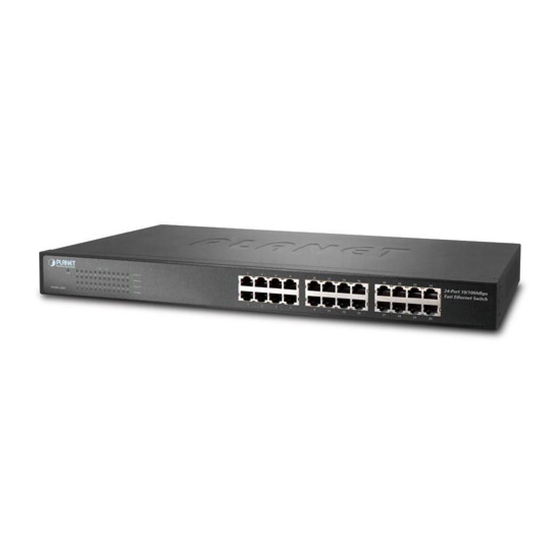
Switch could recognize up to 4K/8K different MAC address and enables filtering and forwarding at full wire speed. 2.1.2 Switch Front Panel Figure 2-1 & 2-2 shows a front panel of Fast Ethernet Switch. Figure 2-1 FNSW-1601 front panel Figure 2-2 FNSW-2401 front panel 2.1.3 LED Indicators... -
Page 11: Switch Rear Panel
Switch or the power adapter. 2.2 Installing the Switch This part describes how to install your Fast Ethernet Switch and make connections to it. Please read the following topics and perform the procedures in the order being presented. -
Page 12: Desktop Installation
Step 1: Attach the rubber feet to the recessed areas on the bottom of the Fast Ethernet Switch. Step 2: Place the Fast Ethernet Switch on desktop near an AC power source. Step 3: Keep enough ventilation space between the Fast Ethernet Switch and the surrounding objects. -
Page 13: Rack Mounting
To install the Fast Ethernet Switch in a 19-inch standard rack, follow the instructions described below. Step 1: Place your Fast Ethernet Switch on a hard flat surface, with the front panel positioned towards your front side. Step 2: Attach a rack-mount bracket to each side of the Switch with supplied screws attached to the package. - Page 14 Step 4: Follow the same steps to attach the second bracket to the opposite side. Step 5: After the brackets are attached to the Fast Ethernet Switch, use suitable screws to securely attach the brackets to the rack, as shown in Figure 2-5.
-
Page 15: Switch Operation
Fast Ethernet Switch. 3.2 Learning When one packet comes in from any port, the Fast Ethernet Switch will record the source address, port no. And the other related information in address table. This information will be used to decide either forwarding or filtering for future packets. -
Page 16: Store-And-Forward
Ethernet network environment to significantly boost bandwidth using conventional cabling and adapters. Due to the learning function of the Fast Ethernet Switch, the source address and corresponding port number of each incoming and outgoing packet are stored in a routing table. This information is subsequently used to filter packets whose destination address is on the same segment as the source address. -
Page 17: Troubleshooting
Solution: Check the speed duplex mode of the partner device. The Fast Ethernet Switch is run at Auto-negotiation mode and if the partner is set to half duplex, then the performance will be poor. Per port LED is lit, but the traffic is irregular Solution: Check that the attached device is not set to dedicate full duplex. -
Page 18: Appendix A Networking Connection
Each port of the Switch supports auto-MDI/MDI-X detection. That means you can directly connect the Switch to any Ethernet devices without making a crossover cable. The following table and diagram show the standard... -
Page 19: Cable Pin Assignments
A.2 RJ-45 cable Pin Assignments The standard RJ-45 receptacle/connector There are 8 wires on a standard UTP/STP cable and each wire is color- coded. The following shows the pin allocation and color of straight cable and crossover cable connection: Figure A-1: Straight-Through and Crossover Cable Please make sure your connected cables are with same pin assignment and color as above picture before deploying the cables into your network. - Page 20 This page is intentionally left blank...
- Page 21 This page is intentionally left blank...
Need help?
Do you have a question about the FNSW-1601 and is the answer not in the manual?
Questions and answers