Advertisement
Quick Links
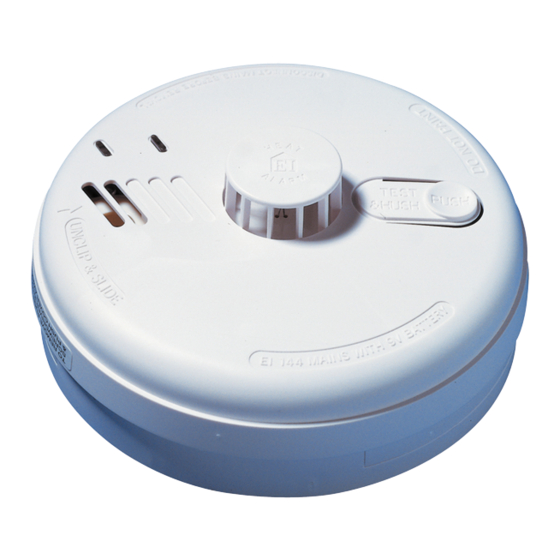
Ei140e Series
230V~ SMOKE & HEAT ALARMS
with Alkaline Battery Backup
Instruction Manual
Read and retain carefully for as long as the product
is being used. It contains vital information on the
operation and installation of your Alarm. The manual
should be regarded as part of the product.
If you are just installing the unit, the manual MUST
be given to the householder. The manual is to be
given to any subsequent user.
P/N B20412 Rev0
© Ei Electronics 2021
1
Advertisement

Related Manuals for Ei Electronics Ei140e Series


Summary of Contents for Ei Electronics Ei140e Series
- Page 1 If you are just installing the unit, the manual MUST be given to the householder. The manual is to be given to any subsequent user. P/N B20412 Rev0 © Ei Electronics 2021...
-
Page 2: Installer Section
Alarm Removal 1. Introduction LOCATE REMOVAL SLOT & INSERT SCREWDRIVER The Ei140e series is supplied with an Easi-Fit base that allows very quick and simple installation of the Smoke Alarm, combined with simple detector head removal and replacement. The Easi-Fit base automatically connects both mains power and battery as the detector head slides on to the Easi-Fit base. - Page 3 1.1 Overview Top View Red LED Alarm Indicator Test / Hush Button Alarm Sounder Green LED Power Indicator Ei146e Optical Alarm Ei144e Heat Alarm Smoke Entry Heat Sensor Vents (Thermistor) Alarm Alarm Removal Removal Latch Latch...
-
Page 4: Technical Specifications
1.2 Technical Specifications Power Supply 230V AC, 50Hz Power Consumption 0.25W (standby) Max Current Draw 60mA Battery Backup 9V Replaceable Alkaline battery Alarm Sounder Piezoelectric Horn Alarm Sound Level 85dB(A) at 3 meters (min) Checks sensors, electronics, interconnection (when applicable) and sounder. - Page 5 2. Installation 2.1 Important Safety Instructions WARNING: Mains operated Alarms must be installed and interconnected by a qualified electrician in accordance with the local appropriate Regulations for Electrical Installations. Failure to install this Alarm correctly may expose the user to shock or fire hazards and damage the product.
- Page 6 The greater the risks, the more comprehensive and reliable systems needs to be. LD (Life protection in Dwellings) Systems define the level of fire protection required for households, depending on the fire risk and regulations. Aico/Ei Electronics recommends that an LD1 system be installed for optimum protection.
- Page 7 UK Requirements (BS 5839-6:2019) OPTIMUM PROTECTION for dwellings where occupants may be at high risk (e.g. elderly) for dw Optimum Protection LD1: As LD2, but in addition Smoke or Heat Alarms should be located in all rooms and other areas of the dwelling. (apart from toilets or bathroom) Interconnect all Alarms BASIC PROTECTION...
- Page 8 2.3 Which Alarm in what Room? Selecting Alarm Type Location Ei146e Ei144e Optical Heat Smoke Alarm Alarm (i) ✔ ✗ Hall, Corridors, Escape routes ✗ ✔ (iii) Kitchens / Garages ✔ ✔ (ii) Living Rooms ✔ ✗ Bedrooms ✗ ✗ Shower / Bathrooms (i) A Heat Alarm should only be used in a room adjoining...
- Page 9 Improved Audibility The effectiveness of a Category LD2 system can be significantly enhanced if an additional Alarm (interconnected) is installed in the master bedroom. This will help ensure that a responsible person will quickly be alerted to a fire and can arrange for an orderly evacuation of children and other vulnerable occupants.
- Page 10 Wall mounting (Ei146e only) If ceiling mounting is impractical, only the Ei146e Optical 300mm (min) Smoke Alarm may be mounted on a wall, provided that: a) the top of the detection element is between 150mm and 300mm below the ceiling (see Figure 2); b) the bottom of the detection element is above the level 300mm of any door openings;...
- Page 11 2.5 Locations To Avoid DON’T place Smoke or Heat Alarms in any of the following areas: • Bathrooms, shower rooms or other rooms where the Alarm may be triggered by steam, condensation. • Places where the normal temperature can exceed 40°C or be below -10°C (e.g.
- Page 12 2.6 Mounting and Wiring Disconnect the AC mains supply from the circuit that is going to be used. WARNING: to prevent injury, this apparatus must be securely attached to the ceiling or wall in accordance with the installation instructions. 1. Select a location complying with the advice in the previous sections.
- Page 13 Note: The Alarm does not need to be earthed. However the terminal marked is provided for the convenience of the installer so that any copper Earth wire or cable coloured green and yellow, can be safely terminated. To interconnect Alarms connect all the IC terminals together as shown in Figure 7 (see section 2.7 - Interconnecting Alarms).
- Page 14 Smoke Alarms. Note: A maximum of 12 Alarms and accessory devices can be interconnected in an Aico/Ei Electronics Alarm system. If you wish to connect more than 12 Alarms, contact the Aico Technical Department on 01691 664100.
- Page 15 Alarms to communicate RF messages to other Ei Electronics products such as the Ei450 RadioLINK Alarm Controller where you can remotely locate, test and hush your Ei140e Series Alarms using this wireless controller. For detailed user instructions on using the Ei168RC with the Ei140e series, please consult the Ei168RC instruction manual.
- Page 16 2.8 Removing the Alarm WARNING: Disconnect mains before removal Locate removal slot Locate the arrow on the front face of the Alarm. The slot is located directly above Insert screwdriver Insert a flat-bladed screwdriver horizontally about 10mm into the centre of the removal slot Slide Alarm off mounting plate With the screwdriver still inserted, push the lower half of the Alarm away from the screwdriver, in the...
-
Page 17: User Section
User Section 3. Maintaining your Alarm 3.1 Testing your Alarm Frequent testing of all your Alarms is a requirement to ensure they are functioning correctly. Guidelines and best practices for testing are as follows: 1. After the system is installed. 2. - Page 18 (iv) Check for any sign of contamination such as cobwebs or dust and clean the Alarm as described in the “cleaning” section if necessary. (v) Press the test button for up to 10 seconds to ensure the sensor chamber, electronics and sounder are working.
- Page 19 3.2 Changing the battery back up NOTE: Constant exposure to high or low temperatures or high humidity may reduce the life of the battery. 1. Switch off mains power to Alarm (green light on cover should go out). 2. Remove unit as shown in “ALARM REMOVAL” section on page 16.
- Page 20 Vacuum around the side vents to clean Wipe Clean the Alarm with a clean damp cloth and dry thoroughly Use the narrow nozzle attachment of your vacuum cleaner to remove dust, insects and cobwebs from the sides and cover slots where the airflow enters. Clean the outside cover by occasionally wiping with a clean damp cloth then dry thoroughly with a lint free cloth.
- Page 21 4. What to do in case of alarm WARNING: If your Alarm sounds and you are unsure of the cause, it should be assumed that the alarm is due to an actual fire and the dwelling should be evacuated immediately. 1.
- Page 22 5. Indicators 5.1 Indicator summary tables Normal mode Mode Action Green LED Red LED Sound (power) (alarm) Slide onto Power up mounting plate every Standby 40 sec every Testing Press and hold 0.5 sec (Monthly) test/hush button In alarm mode every Detecting re 0.5 sec...
- Page 23 5.2 Troubleshooting 1. YOUR ALARM DOES NOT SOUND WHEN YOU PRESS THE TEST/HUSH BUTTON (1) Check the Alarm is secured on the mounting plate. (2) Wait 15 seconds after connecting the power before button testing. (3) Hold button down firmly for at least 10 seconds. (4) If the Alarm does not sound, then your Alarm must be returned for repair or replacement –...
- Page 24 4. PRESSING THE TEST/HUSH BUTTON DOES NOT SILENCE THE ALARM Always make sure that you are pressing the Test/ Hush button on the Alarm that sounds with the red LED flashing. 5. YOUR ALARM CHIRPS/BEEPS/FLASHES The Alarm automatically monitors the battery, sensor and electronics periodically to ensure that all are satisfactory.
- Page 25 6. Important Safeguards When a fire system is installed, basic safety precautions should always be followed, including those listed below: • Please read all instructions. • IMPORTANT: Experience has shown that children may not be woken by fire alarm tones. It is important that children are never left alone in a house.
- Page 26 7. Limitations of Fire Alarms Smoke / Heat Alarms have significantly helped to reduce the number of fire fatalities in countries where they are widely installed. However independent authorities have stated that these systems may be ineffective in some fire situations. There are a number of reasons for this: - The Alarms will not work if the mains power supply is off or disconnected and the backup battery is...
- Page 27 8.2 Guarantee Ei Electronics guarantees this Alarm for five years from the date of purchase against any defects that are due to faulty materials or workmanship. If this Alarm should become defective within the guarantee period, we shall at our discretion repair or replace the faulty unit.
- Page 28 For more details on collection and proper disposal, please contact your local government office or the retailer where you purchased this product. 2797 Ei Electronics, Shannon, Co. Clare, Ireland DoP No.21-0002 EN14604:2005 + AC:2008 Smoke Alarm Devices: Ei146e...
- Page 29 0086 Ei Electronics, Shannon, Co. Clare, Ireland DoP No.21-0002 EN14604:2005 + AC:2008 Smoke Alarm Devices: Ei146e Fire Safety Nominal activation conditions/ sensitivity, Pass response delay (response time) and performance under fire condition Operational reliability Pass Tolerance to voltage supply Pass...
- Page 30 Contact Us Aico Ltd Mile End Business Park, Maesbury Rd, Oswestry, Shropshire SY10 8NR, U.K. Tel: 01691 664100 www.aico.co.uk Ei Electronics Shannon, V14 H020, Co Clare, Ireland. Tel: 061 471277 www.eielectronics.com...
Need help?
Do you have a question about the Ei140e Series and is the answer not in the manual?
Questions and answers