Table of Contents

Related Manuals for Ei Electronics aico Ei146e


Summary of Contents for Ei Electronics aico Ei146e
- Page 1 For full User Instructions for Republic of Ireland Customers scan the QR code below +353 (0)61 471277 sales@eielectronics.ie Ei Electronics. Shannon, V14 H020, Co.Clare, Ireland www.eielectronics.ie © Ei Electronics 2021 P/N B20501 Rev1...
- Page 2 Introduction This Alarm is intended to be used as a device that provides a loud warning when it detects smoke/heat to alert people of an immediate danger enabling them to evacuate their dwelling promptly. It must be installed in accordance with the latest standards and is for indoor use only.
-
Page 3: Product Overview
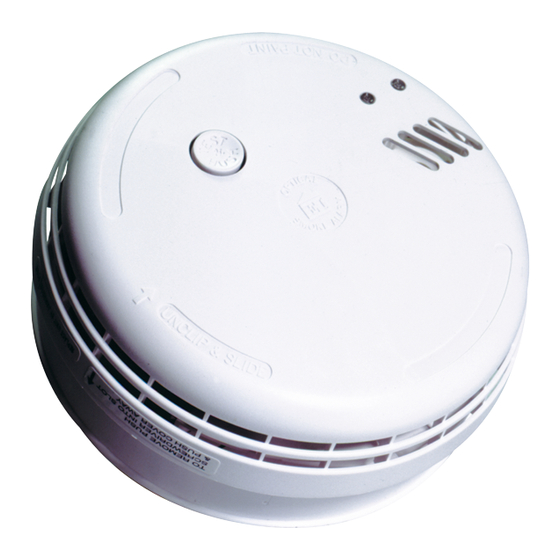
Product Overview Models Alarm Type Ei146e Optical Smoke Alarm Ei144e Heat Alarm Top View Red LED Alarm Indicator Test / Hush Button Alarm Sounder Green LED Power Indicator Ei146e Optical Alarm Ei144e Heat Alarm Smoke Entry Heat Sensor Vents (Thermistor) Alarm Alarm Removal... -
Page 4: Technical Specification
Technical Specification 230V AC, 50Hz Power Supply 0.25W (standby) Power Consumption Max Current Draw 60mA 9V Replaceable Alkaline battery Battery Backup Piezoelectric Horn Alarm Sounder Alarm Sound Level 85dB(A) at 3 meters (min) Checks sensors, electronics, interconnection and sounder. Test/Hush Button If the unit is in alarm when pressed, it silences the alarm for 10min Green LED –... -
Page 5: Mounting And Wiring
ATTENTION: Alternative Energy Sources - (Wind, Solar, UPS etc.) This product is designed to be connected to a Pure or True Sine Wave 230V AC supply. If connecting to a power source that utilises an inverter, e.g. PV solar panel, the Total Harmonic Distortion (THD) must be less than 5%. - Page 6 Place the mounting plate exactly where you want to mount the Alarm. With a pencil mark the location of the two screw holes. Taking care to avoid any electrical wiring in the ceiling/wall, drill holes using a 5.0mm drill bit through the centre of the marked locations. Push the plastic screw anchors provided into the drilled holes.
- Page 7 If the mains wires are being brought along the surface: (a) position the mounting plate so the cable trunking is as shown in Figure 2. (b) the mounting plate has a removable section, take it out to interface directly with 25mm trunking as shown in Figure 3.
-
Page 8: Interconnecting Alarms
Heat Alarms must always be interconnected to Smoke Alarms to ensure early warning. WARNING: Do not hardwire interconnect mains powered Alarms with low voltage or battery powered Ei Electronics Alarms/devices or any other type of Alarm produced by another manufacturer. Doing so may damage the Alarms and could result in a shock or fire hazard. - Page 9 Removing Alarms WARNING: Disconnect mains before removal Locate removal slot Locate the arrow on the front face of the Alarm. The slot is located directly above Insert screwdriver Insert a flat-bladed screwdriver horizontally about 10mm into the centre of the removal slot Slide Alarm off mounting plate With the screwdriver still inserted, push the lower half of the Alarm away from the screwdriver, it the...
- Page 10 The Declaration of Performance may be consulted at www.eielectronics.com/compliance Contact Us Aico Ltd. Mile End Business Park, Maesbury Rd, Oswestry, Shropshire SY10 8NR, U.K. Tel: 01691 664100 www.aico.co.uk Ei Electronics. Shannon, V14 H020, Co Clare, Ireland. Tel:+353 (0)61 471277 www.eielectronics.ie...
Need help?
Do you have a question about the aico Ei146e and is the answer not in the manual?
Questions and answers